Do you have a question about the Ipevo VZ-R and is the answer not in the manual?
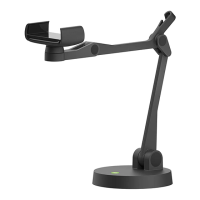
Describes the camera head, multi-jointed stand, and weighted base.
Details on controls like Light, Filter, Zoom, Power, Microphone, LED Indicator, and Focus.
Step-by-step guide to connect the camera to a TV, projector, or monitor via HDMI.
Instructions for connecting the camera to a computer using USB mode.
The IPEVO VZ-R HDMI/USB Dual Mode 8MP Document Camera is a versatile tool designed for capturing and displaying various materials. It can be used to capture documents, textbooks, artwork, devices, and 3D objects, streaming real-time images directly to a TV, monitor, or projector via HDMI without the need for a computer. Additionally, it offers a USB connection for use with a computer, expanding its functionality for various applications.
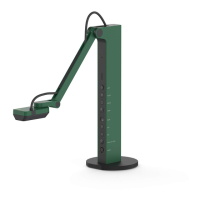
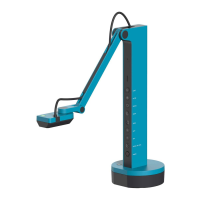
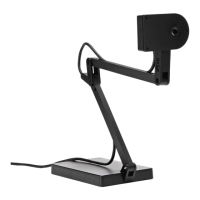
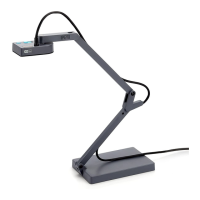
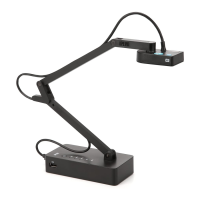
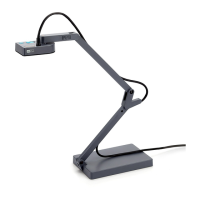
The VZ-R consists of two main parts: an 8MP camera with a multi-jointed stand and a weighted base. Before initial use, the weighted base needs to be attached to the stand using the provided screwdriver and screws. Care should be taken not to drop the base during this process.
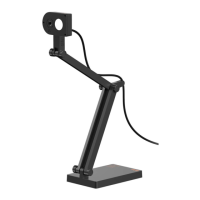
The camera head, equipped with an 8-megapixel sensor, can be swiveled to customize its orientation, allowing for flexible capturing angles. The multi-jointed stand provides the freedom to quickly and easily position the camera at different heights, angles, and orientations, accommodating various capturing materials and scenarios.
The weighted base ensures stability for the document camera, preventing accidental movement during use.
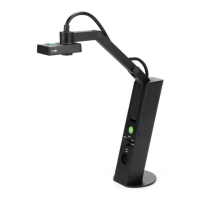
The device features several integrated controls for ease of use. A built-in LED light can be turned on or off to illuminate the subject, improving image clarity in various lighting conditions. Users can apply video filters to the live image, enhancing visual presentation. The image can also be rotated directly on the device, offering flexibility in how content is displayed. Zoom In and Zoom Out functions allow users to adjust the magnification of the live image, focusing on specific details or capturing a broader view. A Power Switch is available to turn the VZ-R on or off.
The VZ-R also includes a microphone, which is functional exclusively in USB mode. This feature is particularly useful for applications such as video conferencing, recording lessons, and other scenarios where audio capture is required alongside visual content.
An LED Indicator provides visual feedback on the device's status. It displays two colors: Green and White. A green light indicates that the VZ-R has been powered on and is ready for use. A white light signifies that the device is actively in use and providing an image, confirming its operational status.
Exposure controls are integrated to optimize image brightness. Users can increase exposure if the subject appears too dark, brightening the image. Conversely, exposure can be decreased if the subject is too bright, preventing overexposure and maintaining detail.
The Focus Button offers control over image sharpness. By default, the focus mode is set to AutoFocus-Continuous (AF-C), which continuously adjusts the focus to keep the image sharp. Pressing the button once will trigger a manual focus adjustment. Pressing and holding the button for two seconds will change the focus mode to AutoFocus-Single (AF-S), which focuses once and then locks the focus. Pressing the button again will switch the focus mode back to AF-C.
For connectivity, the VZ-R includes an HDMI Port, where an HDMI cable (not included) can be connected to stream images to a TV, projector, or monitor. It also features a USB Type-C Port. The included USB Type-C to USB Type-A cable can be plugged into this port to provide power for the VZ-R when in HDMI mode, or to connect it to a computer when in USB mode. A Frequency Switch allows users to change the display frequency between 50 Hz and 60 Hz, ensuring compatibility with different display devices and regions.
Connecting the VZ-R to HDMI displays involves a few simple steps. First, an HDMI cable should be connected from the VZ-R's HDMI port to the HDMI port of a TV, projector, or monitor. Next, the included USB Type-C to USB Type-A cable should be connected to the VZ-R's USB port and then to the USB port of the TV, projector, or computer to supply power. Alternatively, the VZ-R can be powered by connecting the USB cable to a 5V/1A adapter (not included) and plugging it into a power outlet. Finally, turning on the VZ-R using the Power Switch will display a live image on the connected TV, projector, or monitor, indicating that the device is ready for use.
When using the VZ-R in USB mode, it connects to a computer via the included cable. This allows users to project live images to a large screen through a projector connected to their computer. The VZ-R is compatible with various software applications in USB mode. For optimal utilization, it is recommended to use it with IPEVO Visualizer software, which can be downloaded from the IPEVO support website.
Regarding maintenance and precautions, it is important to avoid using or storing the product in certain environments. These include areas near heat sources, locations with steam or greasy smoke, places with high humidity, and sandy or dusty environments. Adhering to these guidelines will help ensure the longevity and proper functioning of the VZ-R document camera.
| Focus | Auto Focus |
|---|---|
| Connection | USB 2.0 |
| Frame Rate | 30 fps |
| Compatibility | Windows, Mac, Chromebook |
| Weight | 2.2 lbs (1 kg) |