InfiRay Outdoor • Geni GL35R Series • Quick Start Guide www.infirayouordoor.com
All rights reserved and shall not be copied and distributed in any form without written permission
➢ Select one zeroing type in the main menu (refer to the Main Menu –
Zeroing Type).
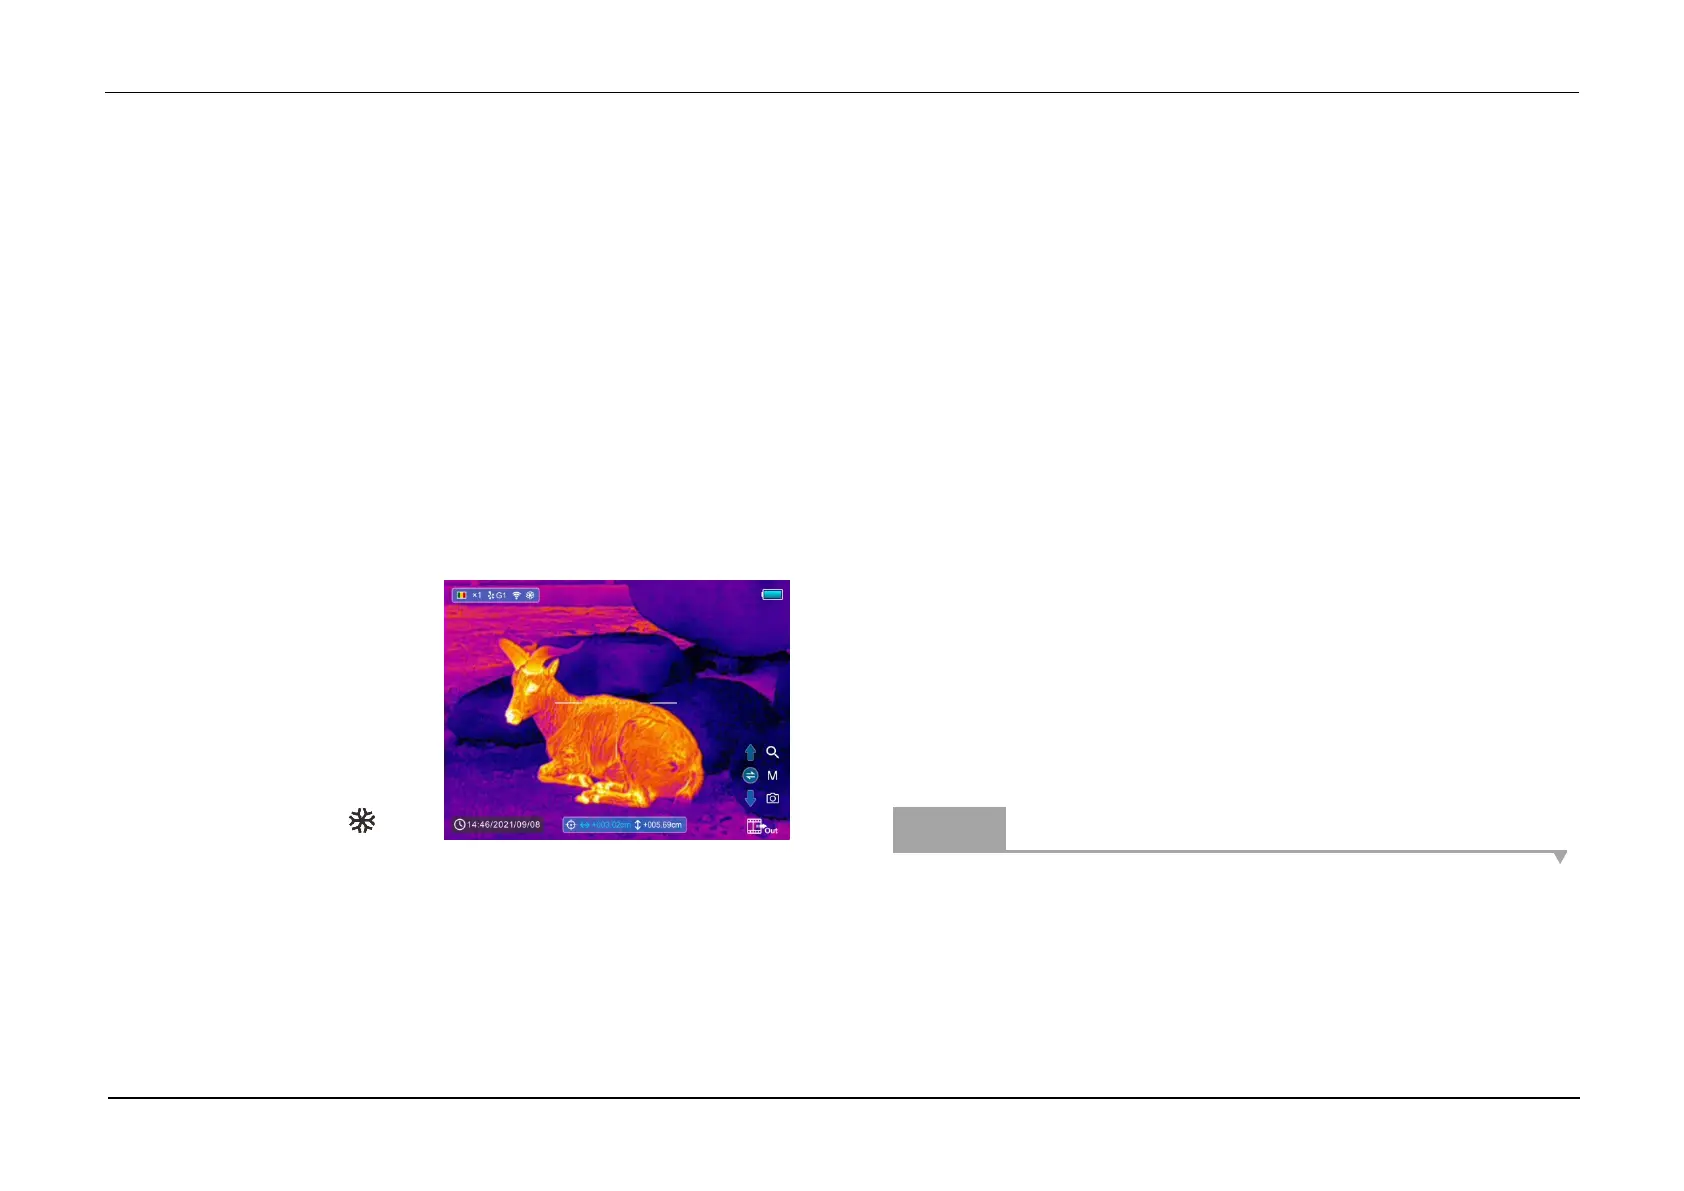
➢ Select the Zeroing item in the sunmenu of the MORE item, and press
the M (4) button to enter the Zeroing interface. In the Zeroing interface,
the reticle is shown as a small cross for position adjustment.
➢ Then aiming the center of the reticle at the bull’s-eye 100 meters away
and shooting.
➢ After firing, observe the actual point of impact.
➢ If the bullet hole can be seen on the display of the thermal scope:
⚫ While keeping the position
of the device fixed, press
and hold the M (4) and C (3)
button at the same time to
freeze the image, and a
snowflake icon will
appear on the upper-left corner of the screen.
⚫ Move the reticle to the position of the actual impact point by the Z
(5) / C (3) button.
⚫ Short press the M (4) button to switch the movement direction
between UP-DOWN and RIGHT-LEFT.
⚫ After moving the reticle to the bullet hole, press and hold down the
M (4) button to save the position and exit.
➢ If the bullet hole cannot be seen on the display of the thermal
scope:
⚫ Keep the position of the device fixed, and measure the horizontal
and vertical distance between the bull’s eye and the bullet hole.
⚫ According to the measured distance, move the reticle position by
long or short pressing the Z (5) / C (3) button until the distance
marked on the scale plate consistent with the measured distance.
⚫ Short press the M (4) button to switch the movement direction
between UP-DOWN and RIGHT-LEFT.
⚫ Press and hold down the M (4) button to save and exit when the
process is done.
Notes
- To ensure the accuracy of the position, aiming the bull’s-eye again and
repeat the operations until the bull’s-eye is hit.
- In the zeroing interface, the reticle moves one pixel with a short press of
the Z (5) / C (3) button to the corresponding direction while ten pixels
 Loading...