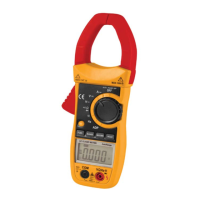
4. MAX/MIN button
Press the button to enter the MAX/MIN Recording Hold mode. The maximum, minimum values are then
reset to the present input. The readings are stored in memory. “ MAX ” or “ MIN ” annunciator turns on
to indicate what value is being displayed. Hold this button for more than 3 seconds to return to the nor-
mal operating mode.
5. LCD display
6. “ VΩHz” jack
This is positive input terminal for volt, resistance, diode, capacitance frequency, ADP and Continuity
test. Connection is made to it using the red test lead.
7. “COM” jack
This is negative (ground) input terminal for all measurements except current.
Connection is made to it using the black test lead.
8. RANGE button
Press this button to select auto and manual range. When a function with auto and manual mode is se-
lected, the meter enters autorange at first. To change to manual range, push this button once.
When the meter operates in manual ranging mode, push this button to change range to the higher one
and hold this button for more than 3 seconds to return to auto range mode.
9. FUNC. Button
In range, press this button to select Ω or or function.
Different symbol of function will appear on the LCD.
10.
button
Press the button is used to turn the backlight on. Press the button again is used to turn the backlight off.
To turn the backlight on again, just press it once more.
11. Rigger
Press the lever to open the transformer.
When the lever is released, the jaws will close again.
OPERATING INSTRUCTIONS
DC VOLTAGE MEASUREMENT
1. Insert the black and red test leads into the COM and VΩHz input terminals respectively.
2. Set rotary switch at desired V position. Connect the test lead tips in parallel with the circuit to
be measured. Be careful not to touch any electrical conductors.
3. The polarity of the red lead connection will be indicated along with the voltage value.
4. Read the measure result from the display.
AC VOLTAGE MEASUREMENT
1. Insert the black and red test leads into the COM and VΩHz input terminals respectively.
2. Set rotary switch at desired V~ position.
Connect the test lead tips in parallel with the circuit to be measured. Be careful not to touch any elec-
trical conductors.
3. Read the measure result from the display.
RESISTANCE MEASUREMENT
1. Insert the black and red test leads into the COM and VΩHz input terminals respectively.
2. Set rotary switch at desired
position.
Connect the test lead tips in parallel with the resistance in the circuit being measured.
4