6
TOOL USE USE DE LA HERRAMIENTA UTILISATION D L’OUTIL
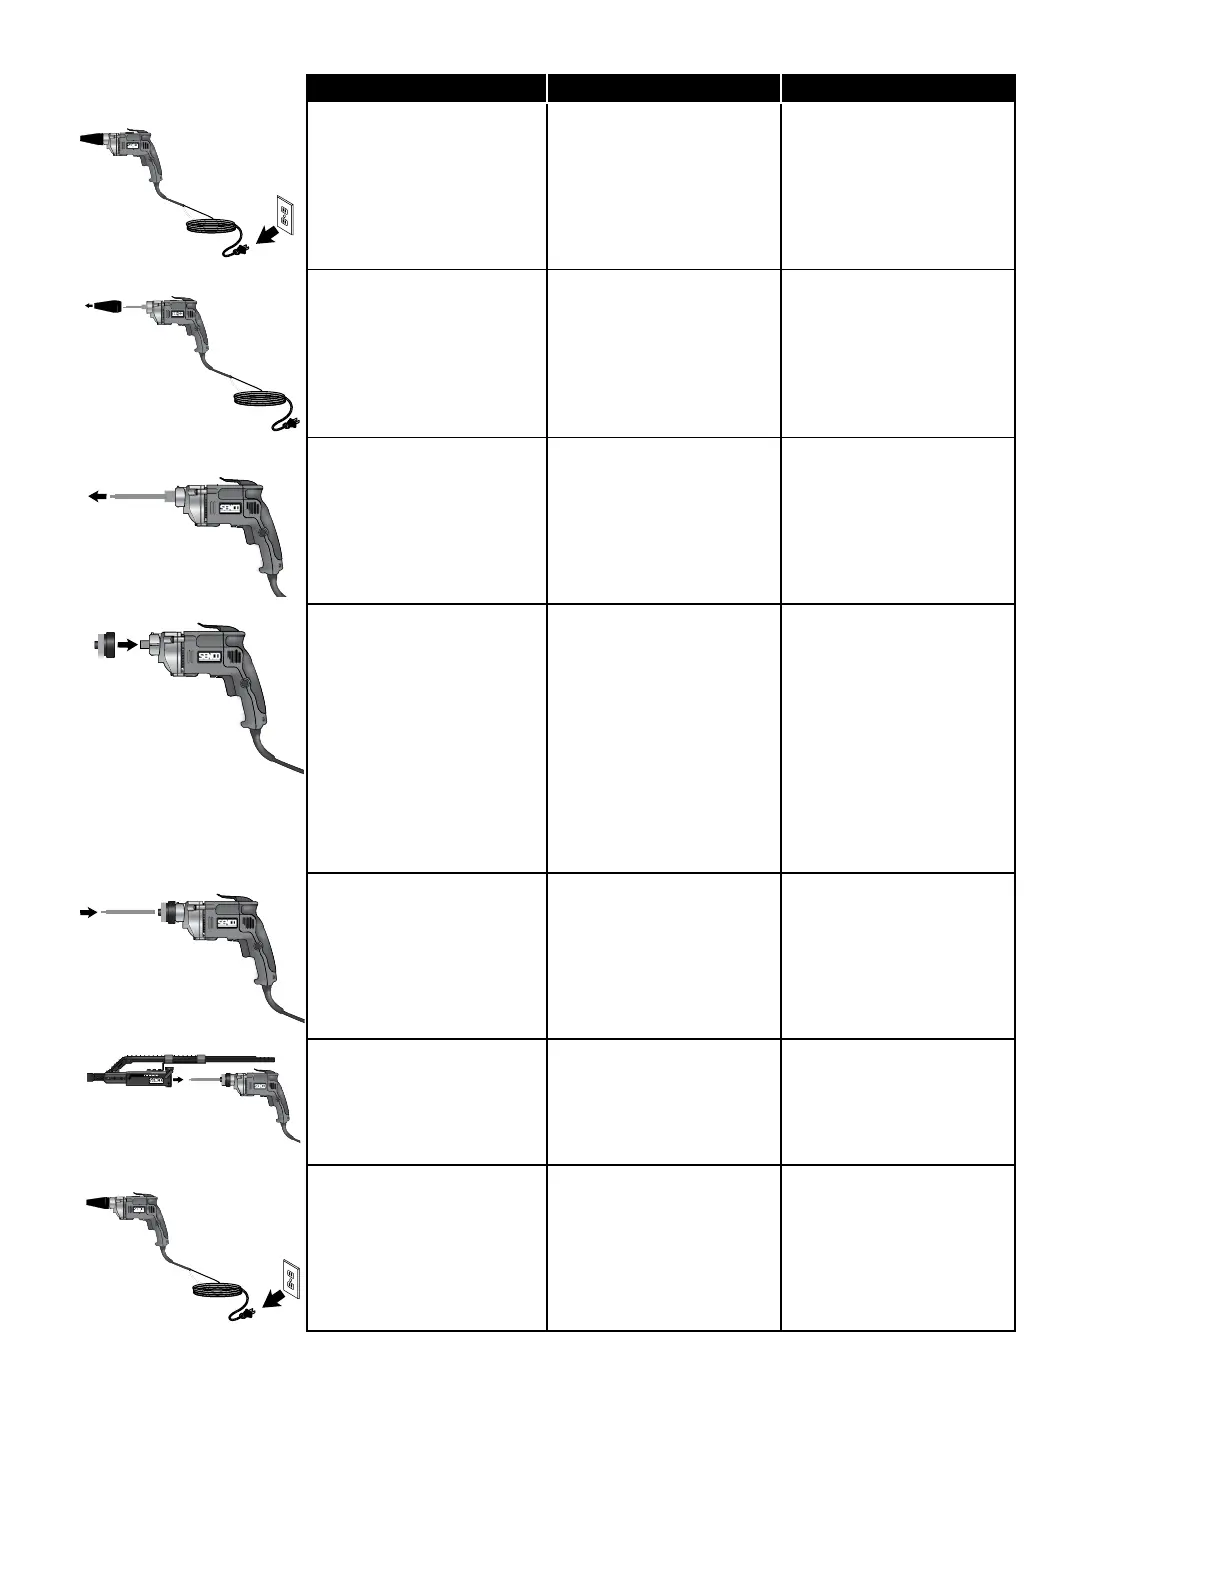
INSTALLING THE ATTACHMENT:
• Unplug tool from electrical
supply before installing
attachment.
CÓMO INSTALAR EL
ACCESORIO:
• Desconecte la herramienta
del tomacorriente antes de
instalar el accesorio.
INSTALLATION DE
L’ACCESSOIRE:
• Débranchez l’outil de la prise
de courant avant d’installer
l’accessoire.
• Remove the manufacturer’s
nose cone from the tool.
• Quite la punta cónica de
fábrica de la herramienta.
• Retirez de l’outil la pointe de
buse du fabricant.
• Remove manufacturer’s bit
and holder.
• Quite la broca y el soporte
de fábrica.
• Retirez l’embout et le porte-
embout du fabricant.
• Choose the adapter which
matches the screwdriver
model and brand you are
using.
• Attach the adapter onto the
screwdriver ensuring it is fully
seated and secure.
• NOTE: If you want to use
an extension pole with the
attachment, install that, now.
See instructions for using
the extension pole on p. 8.
Otherwise, continue to next
step, below.
• Elija un adaptador
compatible con el modelo y
la marca de su destornillador.
• Conecte el adaptador al
destornillador asegurándose
de que quede bien asentado
y asegurado.
NOTA: Si desea utilizar una varilla
de extensión con el accesorio,
instálela ahora. Consulte las
instrucciones sobre cómo utilizar la
varilla de extensión en la página 8.
O continúe con el siguiente paso.
• Choisissez l’adaptateur
approprié au modèle et à la
marque de visseuse utilisée.
• Fixez l’adaptateur à la
visseuse en veillant à ce qu’il
soit bien en place.
• NOTA: Si vous voulez
utiliser une tige de rallonge
avec l’accessoire, installez-
la maintenant. Voir les
instructions d’utilisation de
la tige de rallonge à la p. 8.
Autrement, passez à l’étape
suivante ci-dessous.
• Install the appropriate Senco
bit, making sure it is fully
seated (this may require some
force.)
• Instale la broca adecuada
de Senco, asegurándose de
que quede bien asentada
(esto puede requerir algo de
fuerza).
• Installez l’embout Senco
approprié en veillant à ce
qu’il soit bien en place (vous
aurez peut-être à exercer
une certaine force).
• Slide the attachment onto the
adapter. Make sure there’s no
gap between the attachment
and the adapter.Tighten wing
screw.
• Deslice el accesorio en el
adaptador. Asegúrese de
que no dejar espacios entre
el accesorio y el adaptador.
Apriete el tornillo de
mariposa.
• Faites glisser l’accessoire
sur l’adaptateur. Assurez-
vous qu’il n’y a aucun
espace entre l’accessoire et
l’adaptateur. Serrez la vis à
oreilles.
ADJUSTING FASTENER LENGTH
• Unplug tool from electrical
supply before adjusting nose-
piece for fastener length.
AJUSTE DEL LARGO DEL
TORNILLO
• Desenchufe la herramienta
de la fuente de alimentaciûn
elèctrica antes de ajustar la
pieza de boca al largo del
tornillo.
RÉGLAGE DE LA LONGUEUR DE
FIXATION
• Avant díajuster líextrèmitè
rotative en fonction de la
longueur de la xation,
níoubliez pas de dèbrancher
líoutil.
 Loading...