EN-14
8. CALIBRATION PROCEDURE
Most national standards recommend that you calibrate your sound level meter before
each set of measurements and check the calibration after each set.
The procedure to check/adjust the displayed sound level in response to acoustic
calibrator types SLC 1356 or B&K 4231 (or equivalent) is as follows:
1. Turn off the sound calibrator.
2. Press the button to turn on the instrument.
3. Use the “
▲
▲▲
▲
and
▼
▼▼
▼
” buttons to select the 60 to 120dB
reference sound level range.
4. Use the
A
button to select “A” frequency weighting.
5. Use the FAST button to select “FAST” time weighting.
6. Insert the microphone very carefully and slowly all the way
into the sound calibrator coupling orifice.
7. Switch on the 1000Hz sound calibrator in its nominal 94 dB
level setting.
8. Adjust the CAL potentiometer of the instrument, until the
display reading for diffuse field is the same as the certified
pressure level of the calibrator, or is 0.1 dB higher than this
pressure level for free-field. This applies to calibrators type
SLC 1356 or B&K4231.
9. Set the power switch of the sound calibrator to OFF.
10. Remove the microphone very carefully and slowly from the
coupler.
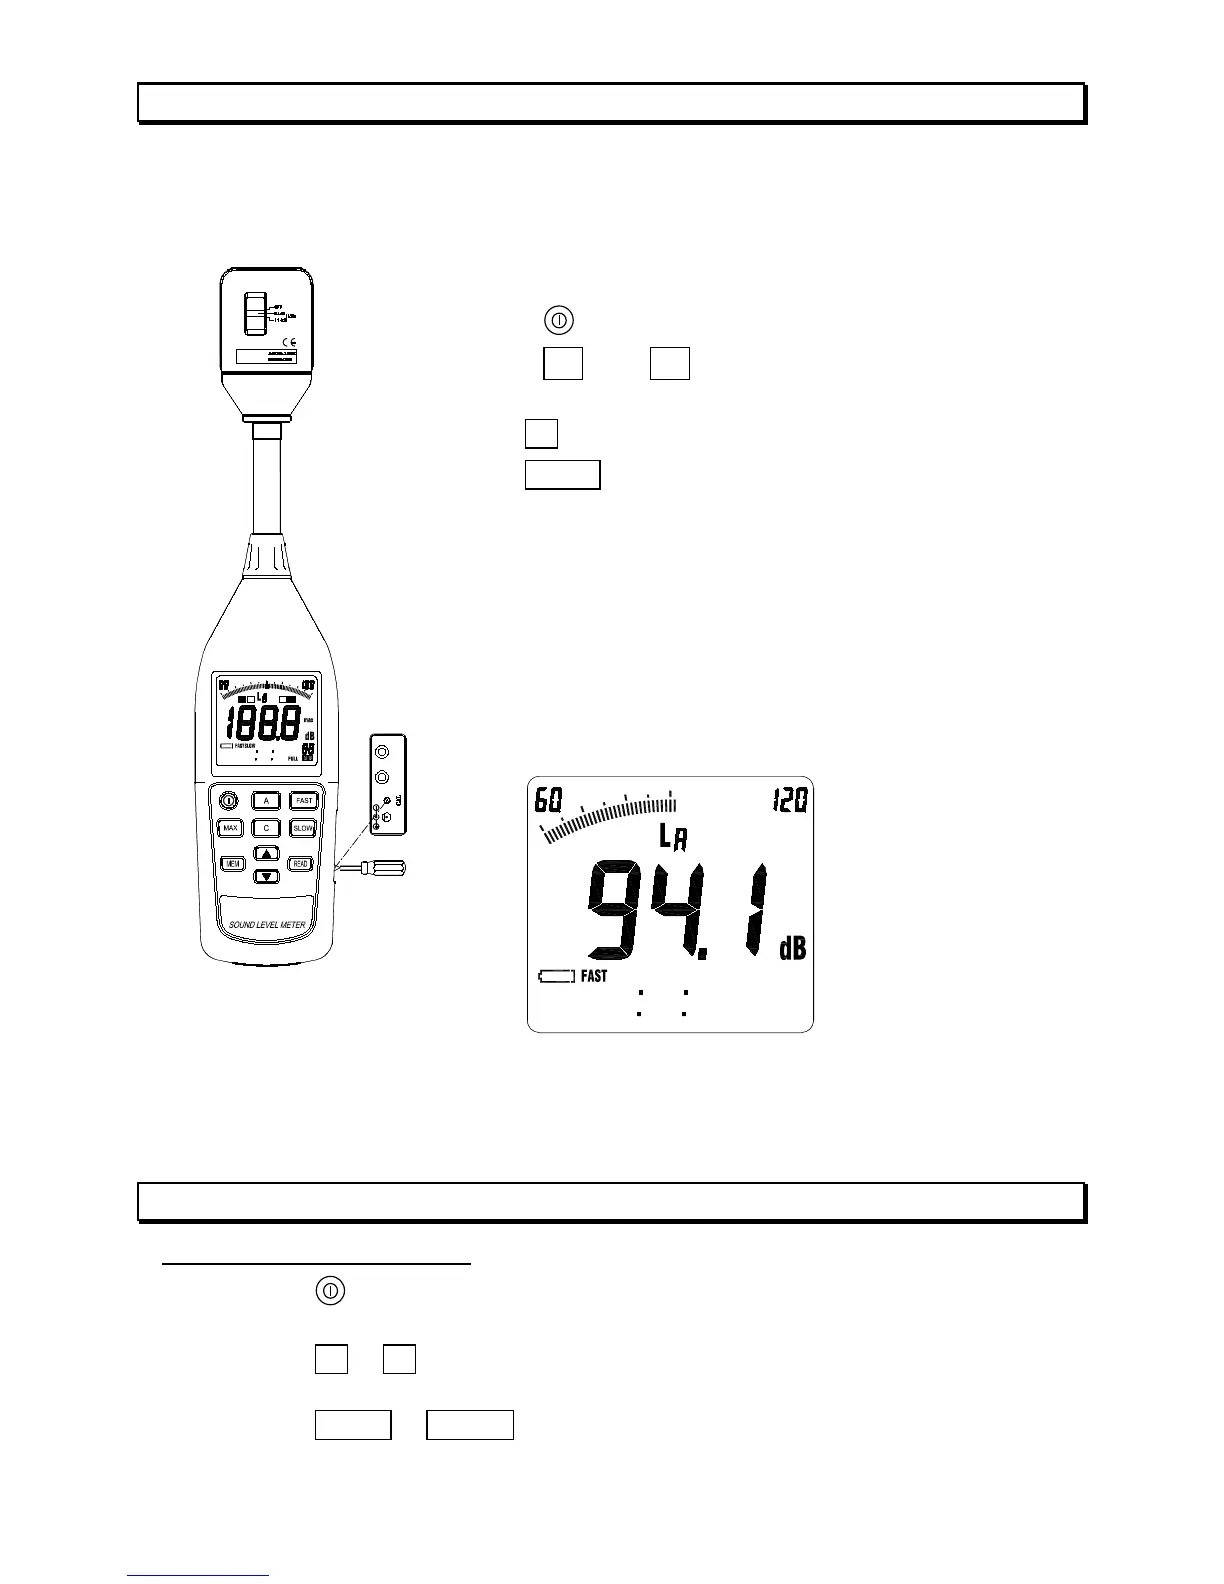
9. MEASUREMENT PROCEDURE
Sound level measurement
1. Press the button to turn on the instrument. The initial state depends on the
condition the instrument was in before it was last turned off.
2. Press the A
or C button to select the desired frequency weighting. For normal
sound level measurements, select the “LA” setting.
3. Press the FAST or SLOW button to select the desired time weighting (dynamic
characteristics). Normally, the “FAST” setting should be used.
Un Ov