6
CUSTOMER SUPPORT TEAM: +44 (0) 333 220 6058
BEFORE YOUR FIRST USE
1. Remove the product from the box.
2. Remove any packaging from the product.
3. Please retain all packaging until you have
checked and counted all the parts and the
contents against the parts list.
4. Your appliance is now ready for normal
use.
Dispose of the packaging in a responsible
manner.
ASSEMBLING THE ACCESSORIES
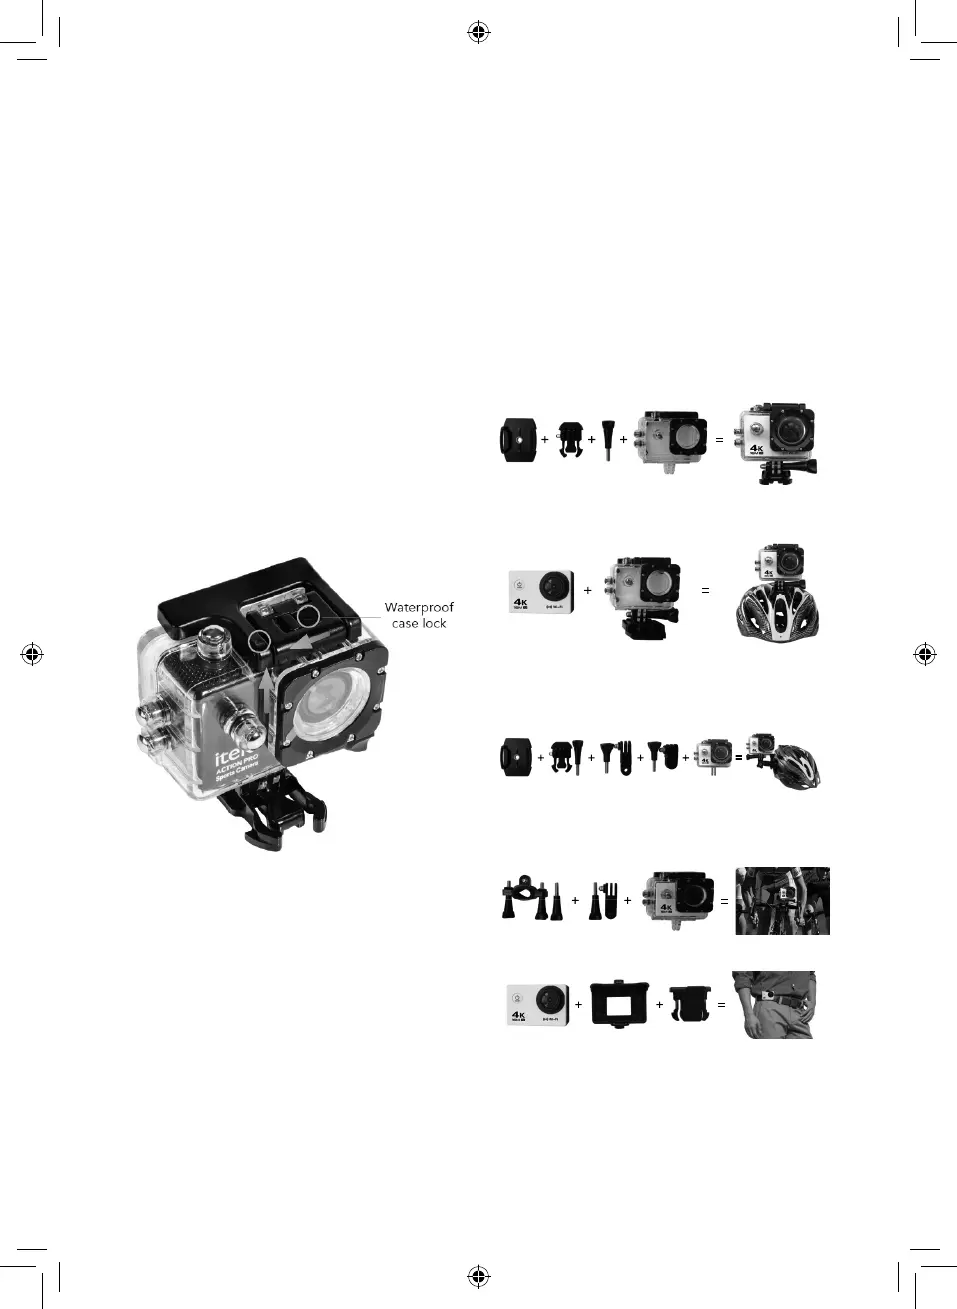
Opening the Waterproof Casing:
The camera casing is required to be a very tight
t to maintain image stability and resistance to
water. As such, it is best to get used to how
the release mechanism functions for ease of
battery change and cleaning if required.
1. Locate the tab situated at the top of the
camera casing. This is the waterproof
case lock.
2. Find a method that suits you best to push
the release tab forwards, as indicated by
the directional arrow. While doing this you
must push the arm to the left, indicated by
the triangle, in an upward motion. This will
release the camera housing mechanism.
3. Gently ease the catch up from the lip
of the casing to open the case fully and
remove the camera unit.
4. To close and lock the casing, press the
cover tightly against the rubber seal and
place the catch mechanism onto the lip.
With the catch in place press down on the
on the rear of the mechanism until it snaps
into place, locking the camera case.
Accessory Combinations:
The following combinations are possible with
the included accessories:
Helmet mount + mount 1 + long pole +
waterproof case.
Camera + waterproof case + helmet mount.
Helmet mount + mount 1 / long pole + support
3 / short pole + support 2 / short pole +
waterproof case.
Bicycle bracket / long pole + long pole /
support 3 + waterproof case.
Camera + back clip + clip.