3.2. Existing heater replacement
The mounting bracket design enables the most common existing
heaters to be replaced without needing to drill new holes or replace
the plumbing.
If this is not possible, install the heater according to the instructions
under New installation on page 12.
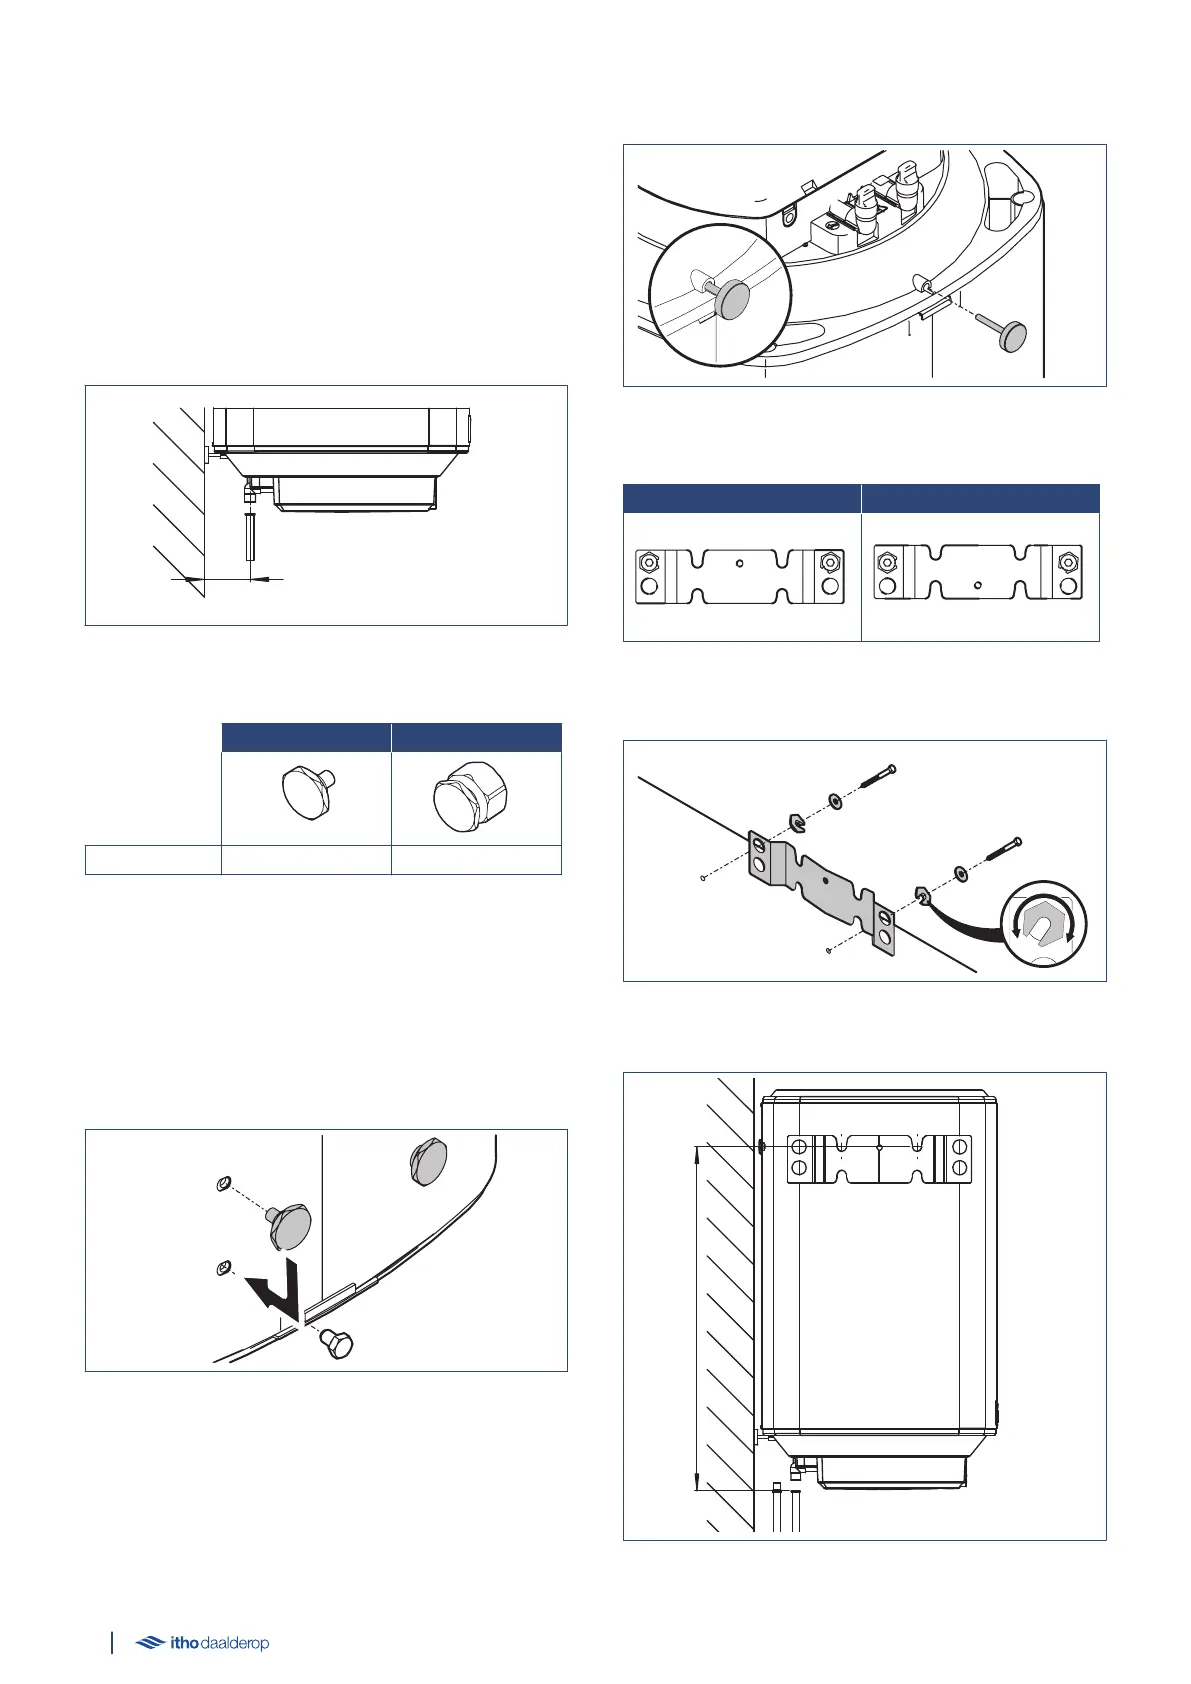
a) Remove the old heater and mounting bracket.
b) Measure the distance J (distance between the wall and the
centre of the pipes).
c) If this distance is 100 mm, replace the installed lugs with the
longer version.
Standard
Long
J (mm) 85 100
d) For 50 L heater model only:
It is possible that the distance between the ceiling and the lug's
centre (dimension G in Dimensional sketch on page 7) is less
than 200 mm. In this case, move the lugs to the holes in the
heater containing the M8 bolts.
Moving the lugs lowers the heater position and will require the
pipes to be cut.
e)
f) Twist the levelling foot all the way to the back of the heater.
g) Install the mounting bracket in the STANDARD position, with
the centring hole at the top and the existing mounting hardware.
Standard
Reverse
- Always use the mounting bracket's topmost mounting
holes.
- Rotate the centring rings to adjust the bracket horizontally.
h) Measure the distance K (distance between the pipes and the
centre of the notch in the mounting bracket).
10
 Loading...