DISASSEMBLY
16
DESARMADO
16
Reverse the disassembly instructions to reassemble the tool.
Invierta las instrucciones de desmontaje para volver a montar el instrumento.
D. RETIRO DE LA ESPIGA DE DISPARO
1. Retire los dos resortes del conjunto forro exterior (vea la Fugura 8).
2. Empuje hacia adentro el fiador y hale hacia fuera la guía de la espiga de
disparo (vea la Figura 8). Alinee el fiador con el extremo de la ranura. Retire
el resorte y el fiador. Retire el conjunto espiga de disparo. Retire la espiga de
empuje (vea la Figura 9).
E. RETIRO DEL CONJUNTO GATILLO
1. Retire lde la caja la espiga del gatillo con un martillo y un punzón
(vea la Figura 10)
2. Retire el conjunto gatillo de la parte posterior de la caja.
F. RETIRO DEL CONJUNTO FORRO EXTERIOR DE LA CAJA
1. Agarre el conjunto forro exterior y retírelo de la caja.
2. Retire el resorte y el rodamiento de bola ubicado artrás en el forro.
Figura 6 - Retirando de la caja el conjunto forro exterior
Figura 10 - Retiro de la espiga y del conjunto gatillo
Figura 8 - Retiro de los resortes y
empuje del fiador para retirar la guía
de la espiga de disparo
Figura 9 - Retiro del fiador, resorte,
conjunto espiga de disparo y espiga
de empuje
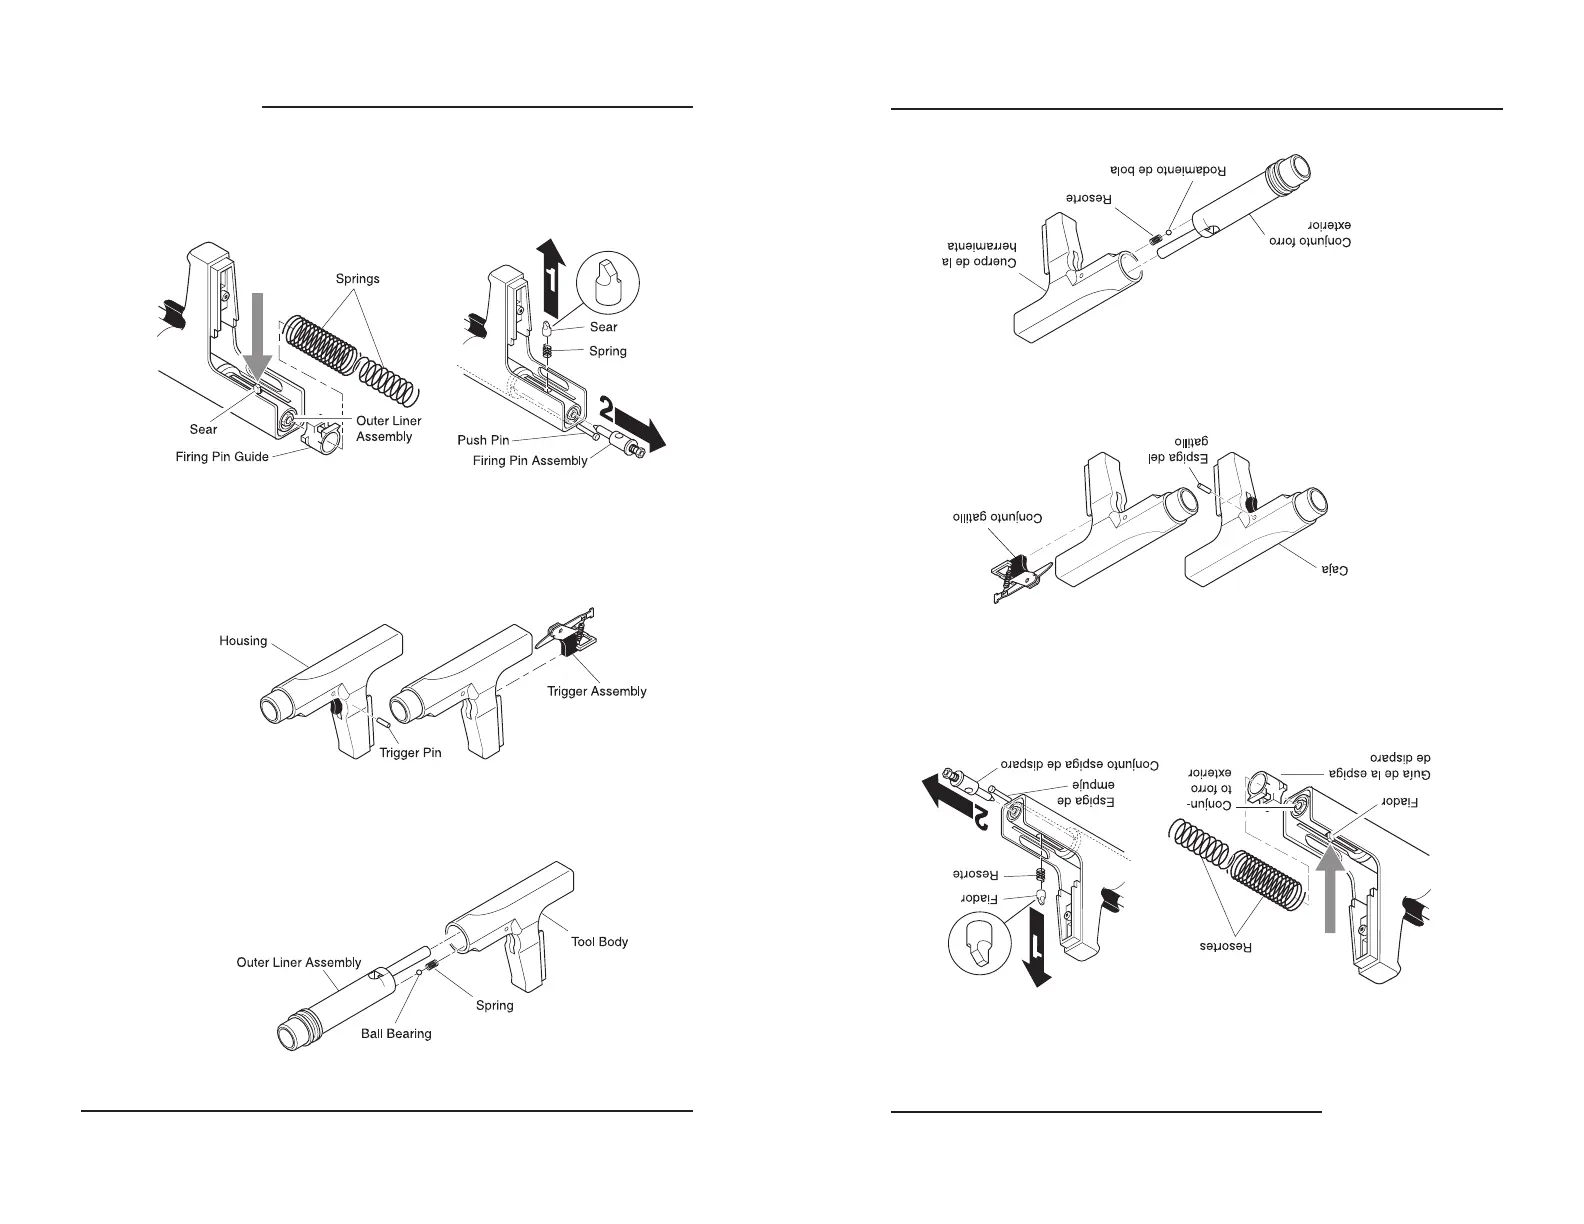
D. REMOVING FIRING PIN
1. Remove two springs from outer liner assembly (see Figure 8).
2. Push in sear and pull out firing pin guide (see Figure 8). Line up sear with
end of slot. Remove spring and sear. Remove firing pin assembly. Remove
push pin (see Figure 9).
E. REMOVING TRIGGER ASSEMBLY
1. Remove trigger pin from housing with hammer and punch (see Figure 10).
2. Remove trigger assembly from rear of housing.
F. REMOVING OUTER LINER ASSEMBLY FROM HOUSING
1. Grasp outer liner assembly and remove from housing.
2. Remove spring and ball bearing located at rear of liner.
Figure 8 - Removing Springs and
Pushing in Sear to Remove Firing
Pin Guide
Figure 10 - Removing Trigger Pin and Trigger Assembly
Figure 11 - RemovingOuter Liner Assembly from Housing
Figure 9 - Removing Sear, Spring,
Firing Pin Assembly, and Push Pin