5.
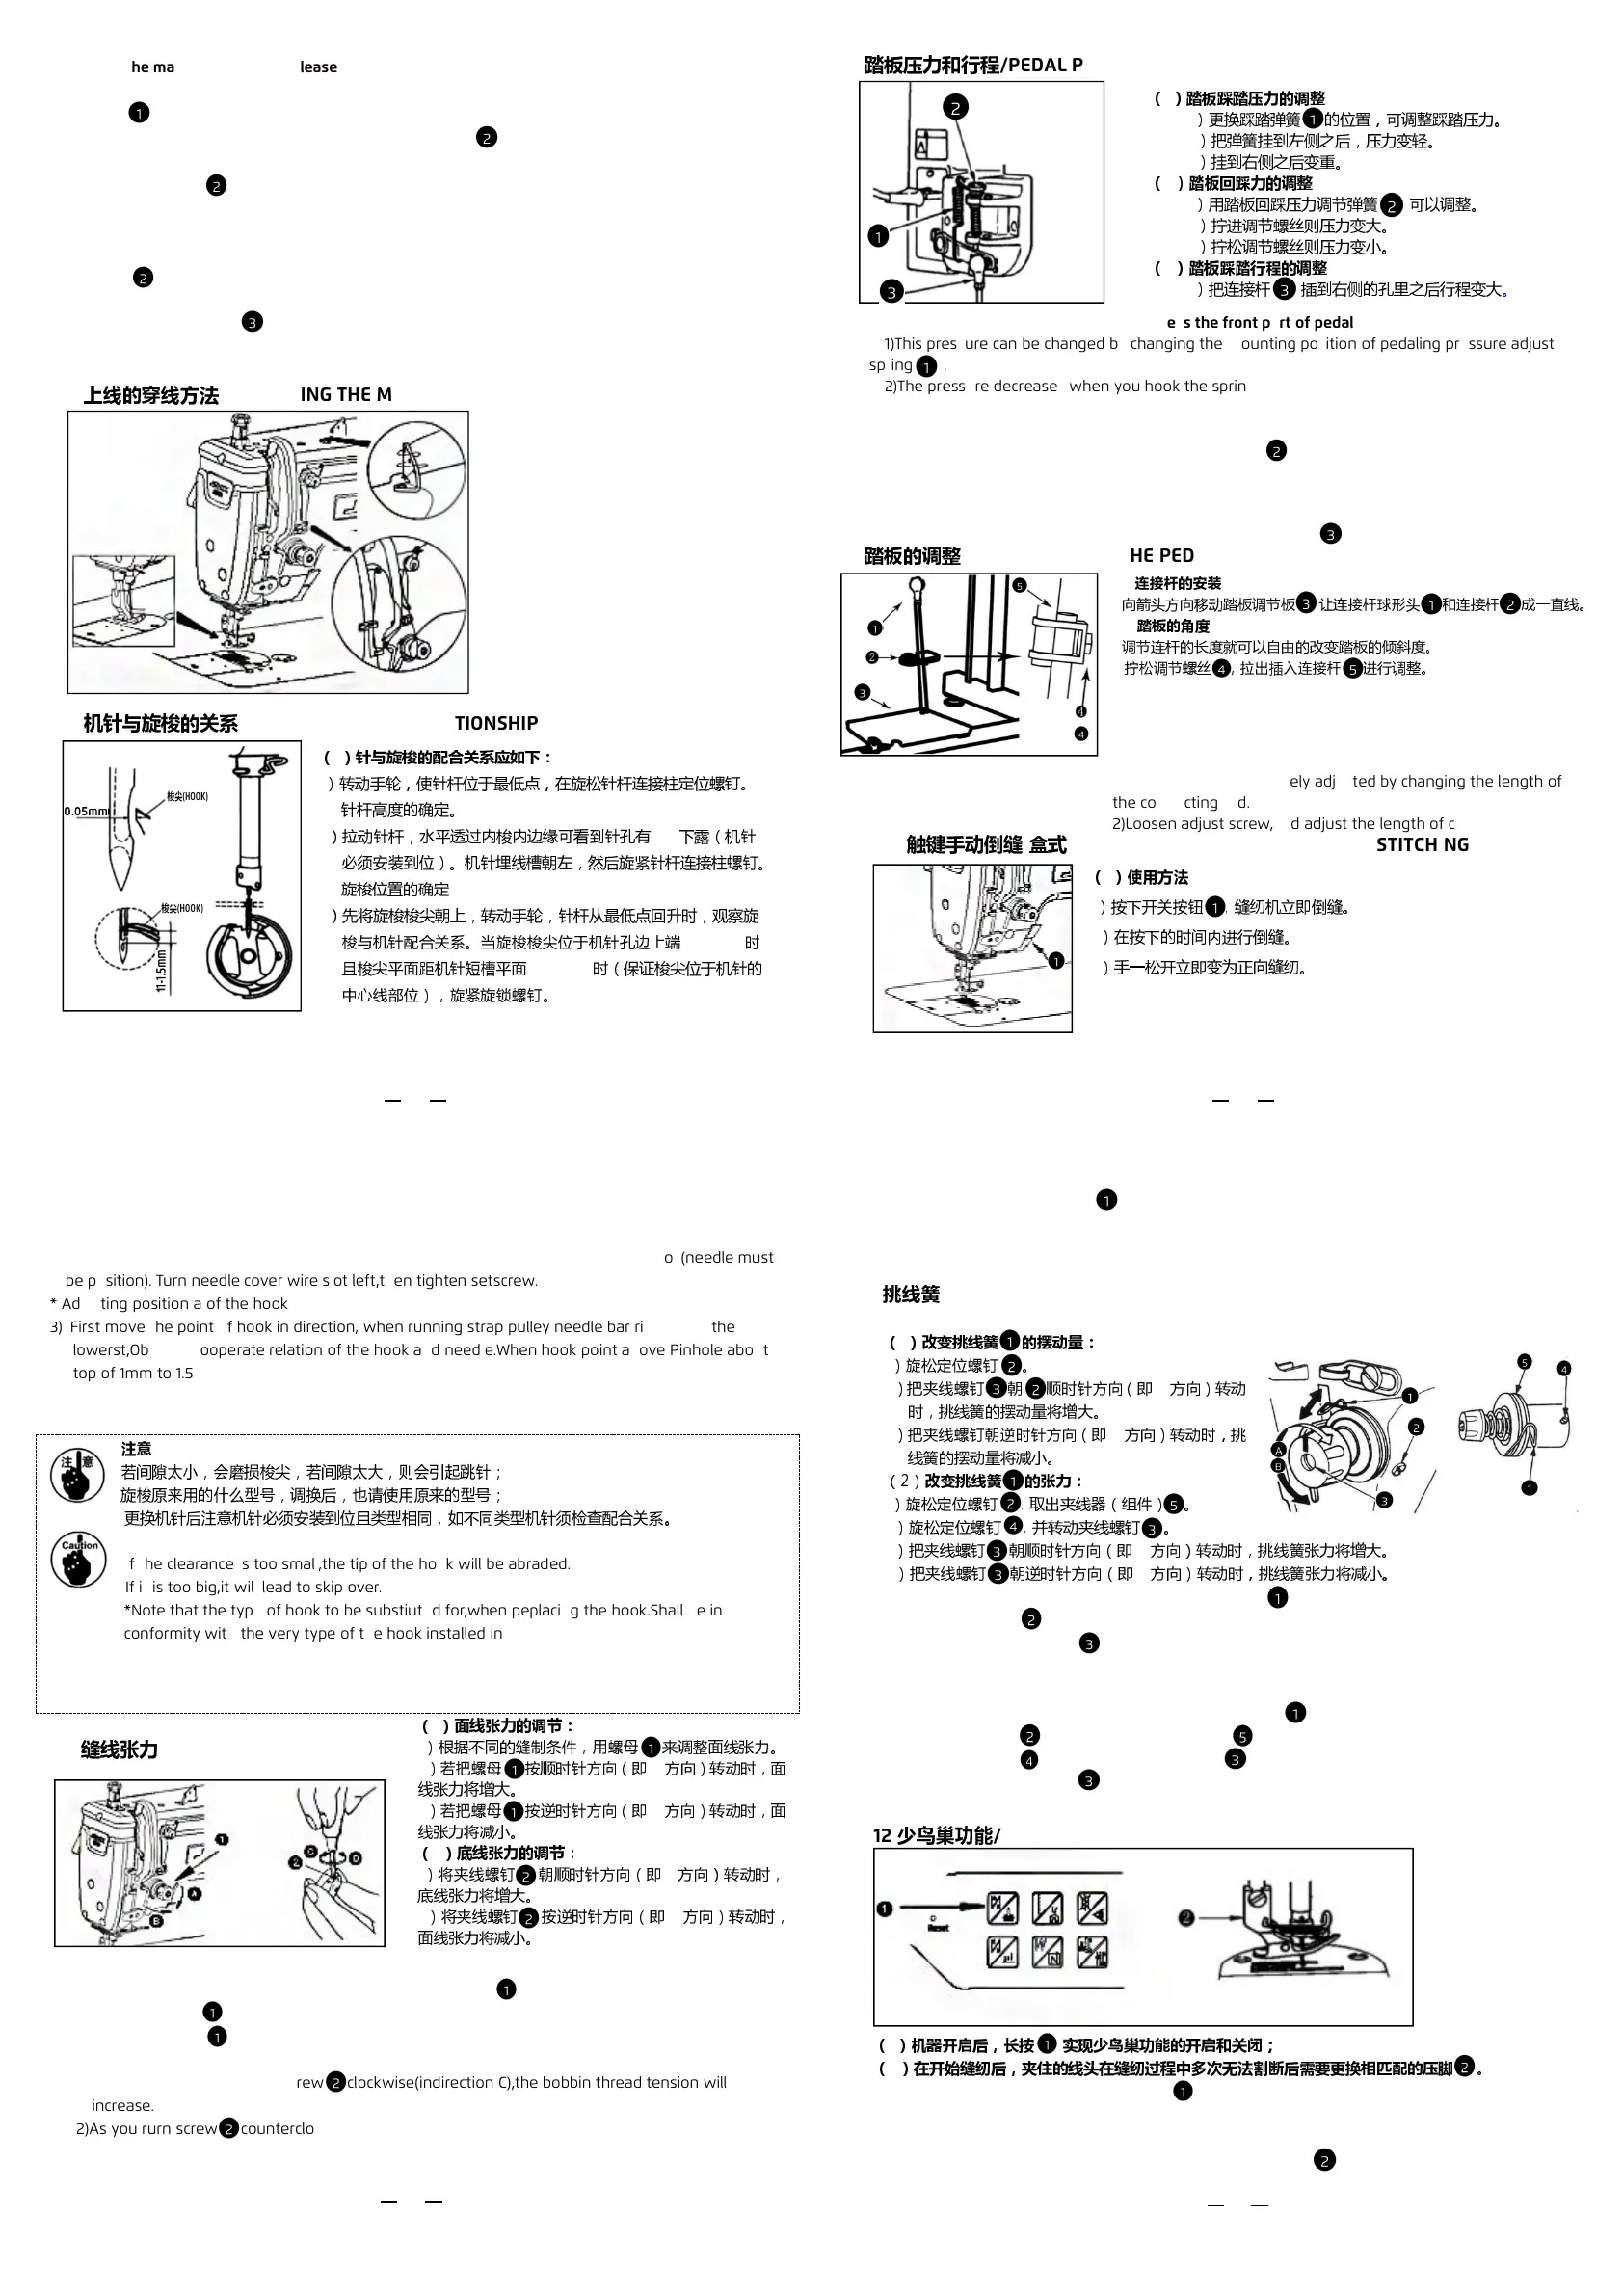
上线的穿线方法
/THREADING THE MACHINE HEAD
6.
机针与旋梭的关系
/NEEDLE-TO-HOOK RELATIONSHIP
11.
挑线簧
/THREAD TAKE UP SPRING
7.
缝线张力
/THREAD TENSION
Before the machine operation,please inject 330mL New Defrix No.10 oil
1) Please keep the sewing machine open, take off the rubber plug on the upper arm , and use a
funnel to add oil.
2) Please observe the oil amount on the operation panel .
when the machine oil cannot ensure the normal operation of the machine, the icon on the
operation panel would twinkle to warn us to add oil. In this situation,the machine would
operate for a period of time. After that, the machine would be locked and can not operate. Only
when the oil is higher than the minimum quantity line, the warning icon will be off. And we can
continue to oiling machine to the maximum oil line. And then the other icon on the operation
panel would light up and send out warning tone to warn us that he oil is full and stop oiling.
3)Running the machine after adding oil, if it's normal of lubrication, we can see the oil flow
through the window .
(
1
)踏板踩踏压力的调整
1
)更换踩踏弹簧 的位置,可调整踩踏压力。
2
)把弹簧挂到左侧之后,压力变轻。
3
)挂到右侧之后变重。
(
2
)踏板回踩力的调整
1
)用踏板回踩压力调节弹簧 可以调整。
2
)拧进调节螺丝则压力变大。
3
)拧松调节螺丝则压力变小。
(
3
)踏板踩踏行程的调整
1
)把连接杆 插到右侧的孔里之后行程变大。
(1)Adjusting the pressure required to depress the front part of pedal
1)This pressure can be changed by changing the mounting position of pedaling pressure adjust
spring .
2)The pressure decreases when you hook the spring on the left side.
3)The pressure increases when you hook the spring on the right side.
(2)Adjusting the pressure required to depress the back part of the pedal
1)This pressure can be adjusted using regulator screw .
2)The pressure increases as you turn the regulator screw in .
3) The pressure decreases as you turn the screw out.
(3)Adjusting the pedal stroke
(1)
连接杆的安装
1)
向箭头方向移动踏板调节板 ,让连接杆球形头 和连接杆 成一直线。
(2)
踏板的角度
1)
调节连杆的长度就可以自由的改变踏板的倾斜度。
2)
拧松调节螺丝 ,拉出插入连接杆 进行调整。
(1) Installing the connecting rod
1)Move pedal to the right or left as illustrated by the arrow so
that spher ical head and connecting rod are straightende.
(2) Adjusting the pedal angle
1)The pedal tilt can be freely adjusted by changing the length of
the connecting rod.
(
1
)针与旋梭的配合关系应如下:
1
)转动手轮,使针杆位于最低点,在旋松针杆连接柱定位螺钉。
*
针杆高度的确定。
2
)拉动针杆,水平透过内梭内边缘可看到针孔有
1/2
下露(机针
必须安装到位)。机针埋线槽朝左,然后旋紧针杆连接柱螺钉。
*
旋梭位置的确定
3
)先将旋梭梭尖朝上,转动手轮,针杆从最低点回升时,观察旋
梭与机针配合关系。当旋梭梭尖位于机针孔边上端
1-1.5mm
时
且梭尖平面距机针短槽平面
0.05mm
时(保证梭尖位于机针的
中心线部位),旋紧旋锁螺钉。
(
1
)使用方法
1
)按下开关按钮 ,缝纫机立即倒缝。
2
)在按下的时间内进行倒缝。
3
)手一松开立即变为正向缝纫。
(1) Adjust the timing between the needle and the hook as follow:
1) Turn the handwheel to bring the needle bar down to the lowest point of its stroke,and loossen
sntscrew.
* Adjusting the needle bar height
2) Pull the needle bar,you can see the pinhle basset 1/2 level through edge of inside hook(needle must
be position). Turn needle cover wire slot left,then tighten setscrew.
* Adjusting position a of the hook
3) First move the point of hook in direction, when running strap pulley needle bar risen from the
lowerst,Observe cooperate relation of the hook and needle.When hook point above Pinhole about
top of 1mm to 1.5mm and when plane of the hook point form plane of needle short bar 0.05mm(keep
(1)How to operate
1)The moment switch buttom is pressed,the mahine performs reverse feed stitching.
2)The machine performs reverse feed stitching as long as the switch lever is held depressed.
3)The machine resumes normal feed stitching the moment the switch leveris released.
(
)改变挑线簧 的摆动量:
)旋松定位螺钉 。
)把夹线螺钉 朝 顺时针方向(即
方向)转动
时,挑线簧的摆动量将增大。
)把夹线螺钉朝逆时针方向(即
方向)转动时,
线簧的摆动量将减小。
(2)
改变挑线簧 的张力:
)旋松定位螺钉 ,取出夹线器(组件) 。
)旋松定位螺钉 ,并转动夹线螺钉 。
3
)把夹线螺钉 朝顺时针方向(即
A
方向)转动时,挑线簧张力将增大。
4
)把夹线螺钉 朝逆时针方向(即
B
方向)转动时,挑线簧张力将减小
。
(1)Changing the stroke of thread take-up spring
1) Loosen setscrew .
2)As you turn tension post clockwise (in direction A),the stroke of thread take-up spring will
be increased.
3)As you turn the knob counterclockwise (in direction B),the stroke will be decreased.
(2)Changing the pressure of thresd take-up spring
1)Loosen setscrew ,and take out tension asm .
2)Loosen setscrew ,and remove tension post .
3)As you turn tension post clockwise(in direction A),the pressure will be increased.
注意
若间隙太小,会磨损梭尖,若间隙太大,则会引起跳针;
旋梭原来用的什么型号,调换后,也请使用原来的型号;
更换机针后注意机针必须安装到位且类型相同,如不同类型机针须检查配合关系。
the clearance is too small,the tip of the hook will be abraded.
it is too big,it will lead to skip over.
*Note that the type of hook to be substiuted for,when peplacing the hook.Shall be in
conformity with the very type of the hook installed in the sewing machine of original
assemblge.
After replacing the needle.the needle must be same type and install right pisition.If the
needle is different type need check match with relation.
(
1
)面线张力的调节:
1
)根据不同的缝制条件,用螺母 来调整面线张力。
2
)若把螺母 按顺时针方向(即
A
方向)转动时,面
线张力将增大。
3
)若把螺母 按逆时针方向(即
B
方向)转动时,面
线张力将减小。
(
2
)底线张力的调节:
1
)将夹线螺钉 朝顺时针方向(即
C
方向)转动时,
底线张力将增大。
2
)将夹线螺钉 按逆时针方向(即
D
方向)转动时,
面线张力将减小。
(1)Adjusting the needle thread tension
1)Adjust the needle thread tension using tension ad just nut according to the sewing specifications.
2)As you turn nut clockwise(in direction A),the needle thread tension will increase.
3) As you turn nut counterclockwise(in direction B),the tension will decrease.
(2)Adjusting the bobbin thread tension
1) As you turn tension adjust screw clockwise(indirection C),the bobbin thread tension will
increase.
(
1
)机器开启后,长按 实现少鸟巢功能的开启和关闭;
(
2
)在开始缝纫后,夹住的线头在缝纫过程中多次无法割断后需要更换相匹配的压脚 。
(1) After open the machine , long press to achieve the function for the bird's nest of opening
and closing.
(2 )After the start sewing, the thrum of the clamp cannot be cut off many times in the process of
sewing ,then you need to change the matched presser foot .
—
4
—
—
5
—
—
7
—
—
6
—
 Loading...