2-3
Chapter 2 — Installation
Installing the OBD Distance Sensor
These instructions are for installing a RAC Plus I with an OBD Distance
Sensor. If you are installing a different type of sensor, skip this section.
The AutoLink allows connection between the On-Board Diagnostics (OBD)
connector in your vehicle and the RAC Plus Distance Measuring Instrument.
Note: Your RAC and vehicle should be turned off while plugging in the
AutoLink cables.
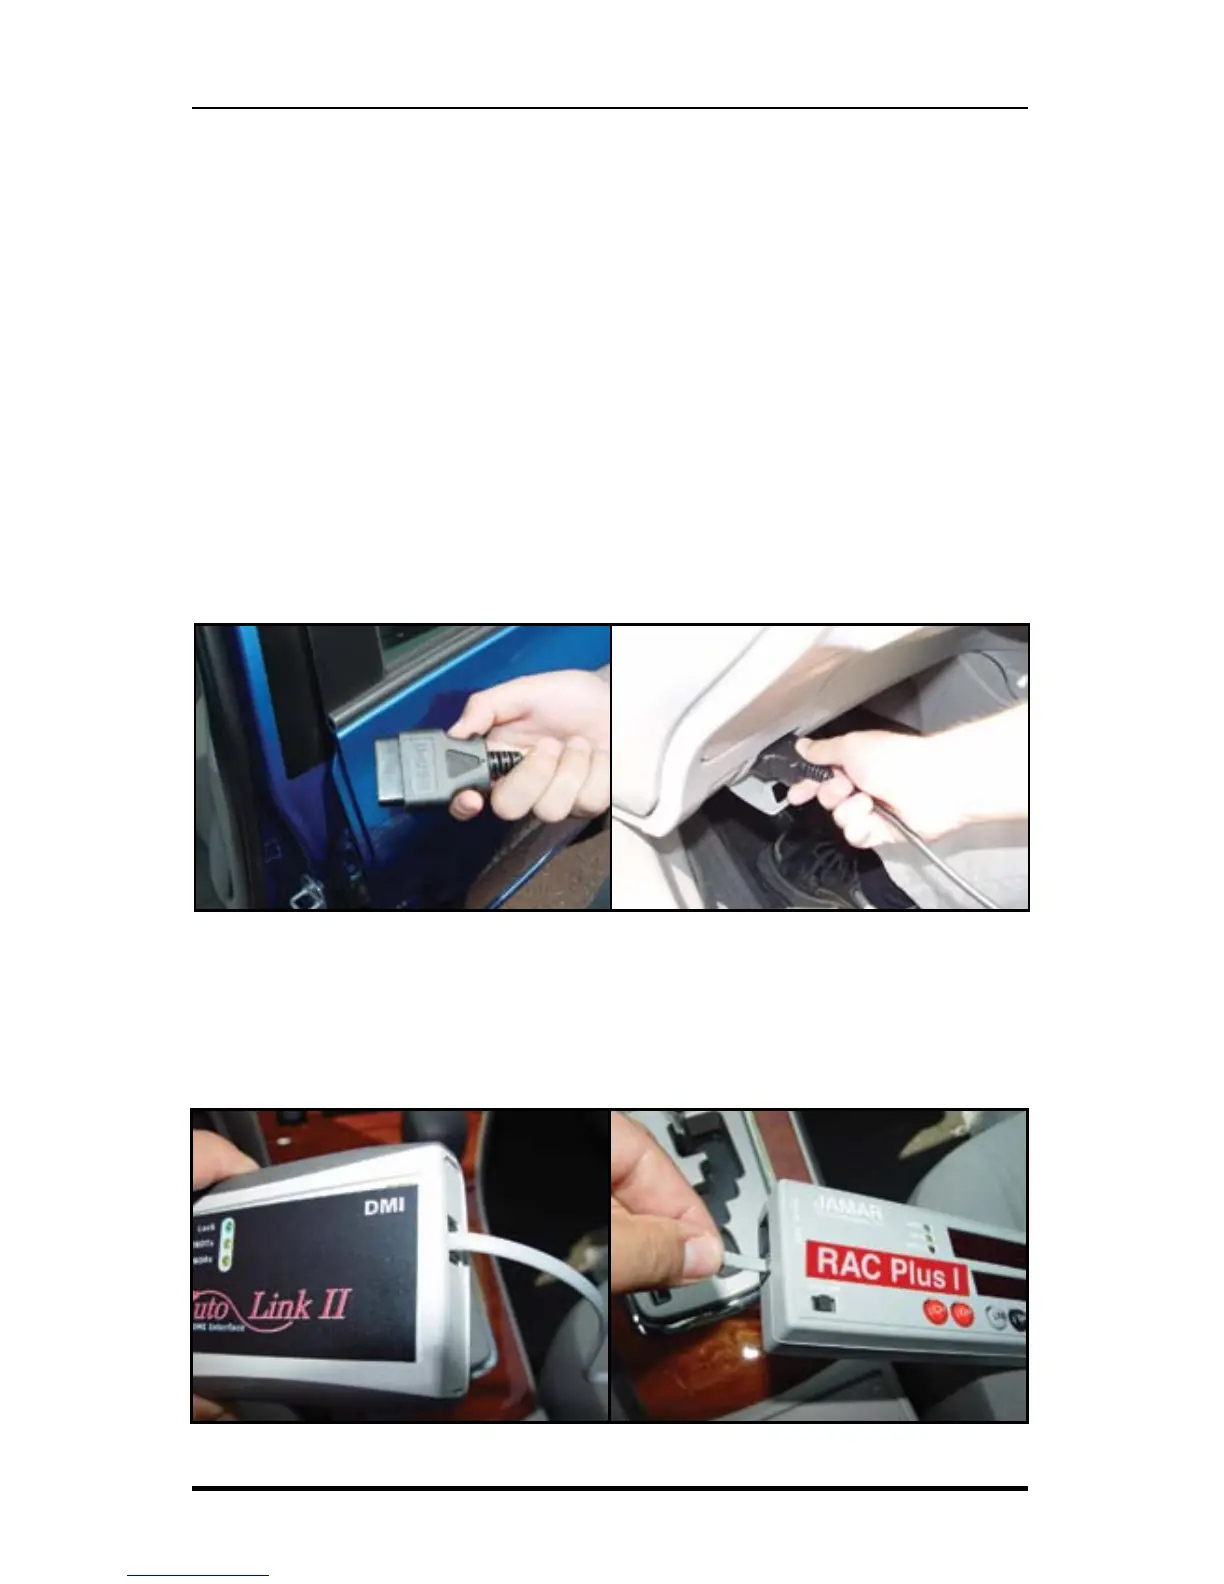
Step 1
Plug the large OBD cable attached to the AutoLink II into the vehicle
OBD connector. The OBD connector is typically found under your dash
near your steering wheel column.
Step 2
Connect the grey telephone-style cable from the AutoLink II to the
RAC Plus Power (PWR) port.
Fig. 2.1 – Plugging in to the OBD Port
Fig. 2.2 – Connecting the OBD Sensor to the RAC Plus I