39
When setting up on soft ground, you may wish to place a wood pad or the equivalent under
each stabilizer jack foot to help keep the jack from sinking into the ground.
1. To lower each jack, insert the jack crank onto the applicable stabilizer jackshaft.
2. Turn the crank clockwise to lower each leg until it contacts the ground and stabilizes
the RV.
To raise each jack, insert the jack crank onto the applicable stabilizer jack shaft and turn the
crank counter-clockwise.
Control switches for the stabilizer jacks are typically located on the (door) side of the unit
above the stabilizer jack(s). To lower each jack, press the control switch until each leg con-
tacts the ground and stabilizes the unit. To raise the jack, press the control switch until the
jack is returned to the retracted position.
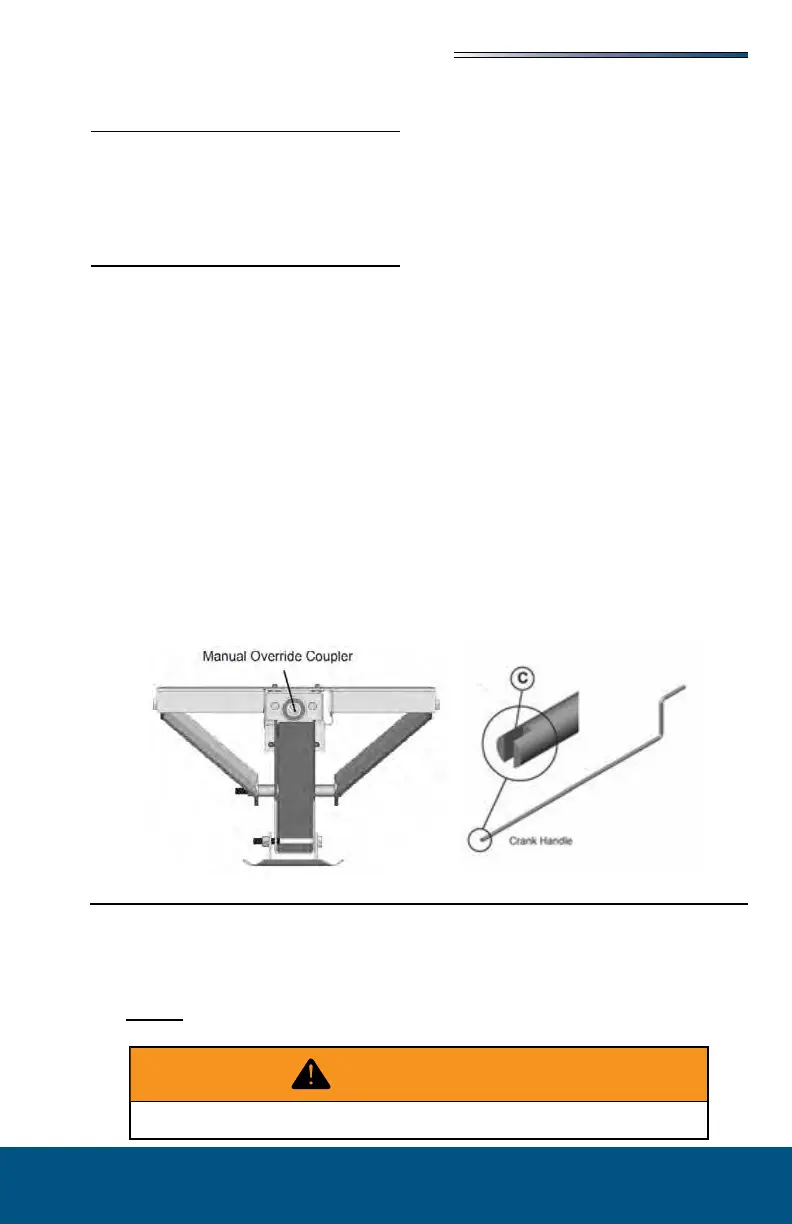
The electric stabilizer jacks may have a built in manual override system. The override
coupler is located on the end of the stabilizer jack opposite the electric motor. One of the
wire motor leads must be disconnected to prevent back loading the motor and causing more
damage.
Insert the 1/2” diameter crank handle inside the coupler. The slot in the end of the crank
handle accommodates the pin inside the coupler to allow manual extension/retraction of the
stabilizer jack. Rotate the handle clockwise to retract and counter clockwise to extend the
jack.
Emergency Stopping
Always carry road ares or reective warning signs. Pull o the roadway as far as possible
for emergency stopping. Turn ON your vehicle hazard warning ashers. If traveling at night,
use three red warning indicators such as ares, reectors or lanterns as required by the Uni-
form Vehicle Code and Model Trac Ordinance.
For personal safety, always stand o the road and out of the way of trac.