Rotate spindle to its start position
1) Retract the ram until it stops moving and then move it
forward slightly. If left fully retracted, the ram will pull the
spindle to the rear and lock it up. This does not harm
anything, it just won’t let you rotate the spindle by hand.
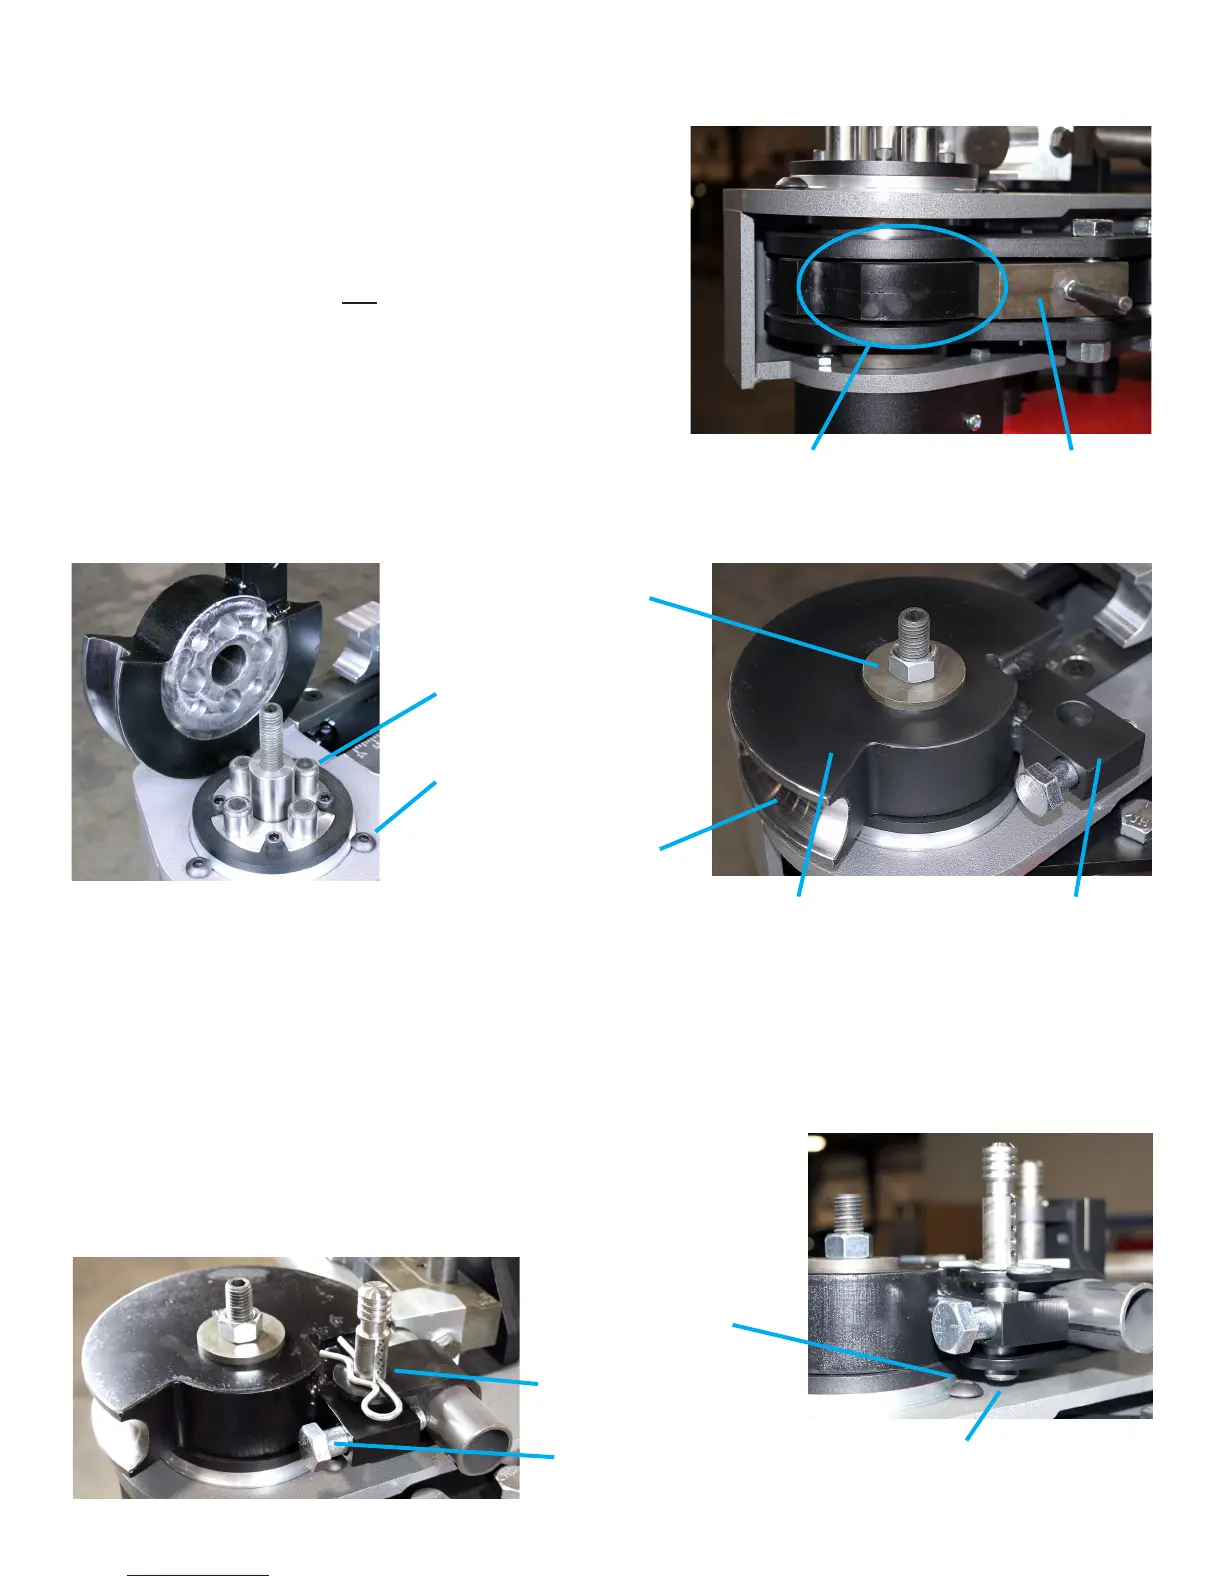
2) The drive hub has 7 teeth. One of them is much larger than
the others. This is the rst tooth. Pull the spring loaded
drive pawl’s handle out and rotate the spindle until the
drive pawl engages this tooth. This is shown to the right.
Installing the forming die onto the spindle
1) Examine the spindles upper surface and remove any debris
that may not allow the forming die to sit at. Also make
sure the four large 1” dowel pins are seated completely.
2) Install the forming die with it’s u-strap towards the cylinder.
Install the die washer and nut. Tighten securely.
Installing the round tube/pipe U-strap
1) Wipe the forming die’s groove clean. Never lubricate the groove as this would allow the tube to easily slip
during bending. Place the tube into the groove’s die.
2) Install the u-strap and insert the u-strap pin. The u-strap uses a clip pin to limit how far down the pin goes into
the u-strap. It is very IMPORTANT that you place the clip pin into a u-strap hole that allows the u-strap pin to
protrude past the u-strap’s lower surface by a 1/4” or more without the possibility of the pin hitting the spindle
button head bolts or the frame while rotating. This is shown in the picture to the lower right.
3) If bending thin wall tubing (.065” or less) you may need to tighten the
u-strap lock bolt to help prevent the tube from slipping backwards into
the die while bending. If the bolt tries to mar the tube, make a small
piece of curved metal and place it between the bolt and the tube.
Loading a Round Tube/Pipe Die Set
Drive hub’s 1st tooth Drive pawl
Forming die
Spindle top view.
U-strap block
U-strap pin must extend past u-strap’s
lower surface by a 1/4” or more
U-strap pin must clear
the button head bolts as
shown here
U-strap lock bolt
1” dowel pin
Button head bolt
Page 9
Die Washer
and nut
NEVER lubricate the
forming die’s groove
U-strap pin and clip pin