4. SERVICE.4. SERVICE.
4. SERVICE.4. SERVICE.
4. SERVICE.
InstInst
InstInst
Inst
allation and stallation and st
allation and stallation and st
allation and st
art.art.
art.art.
art.
Xplore 600W/WCO2Xplore 600W/WCO2
Xplore 600W/WCO2Xplore 600W/WCO2
Xplore 600W/WCO2
4.4.
4.4.
4.
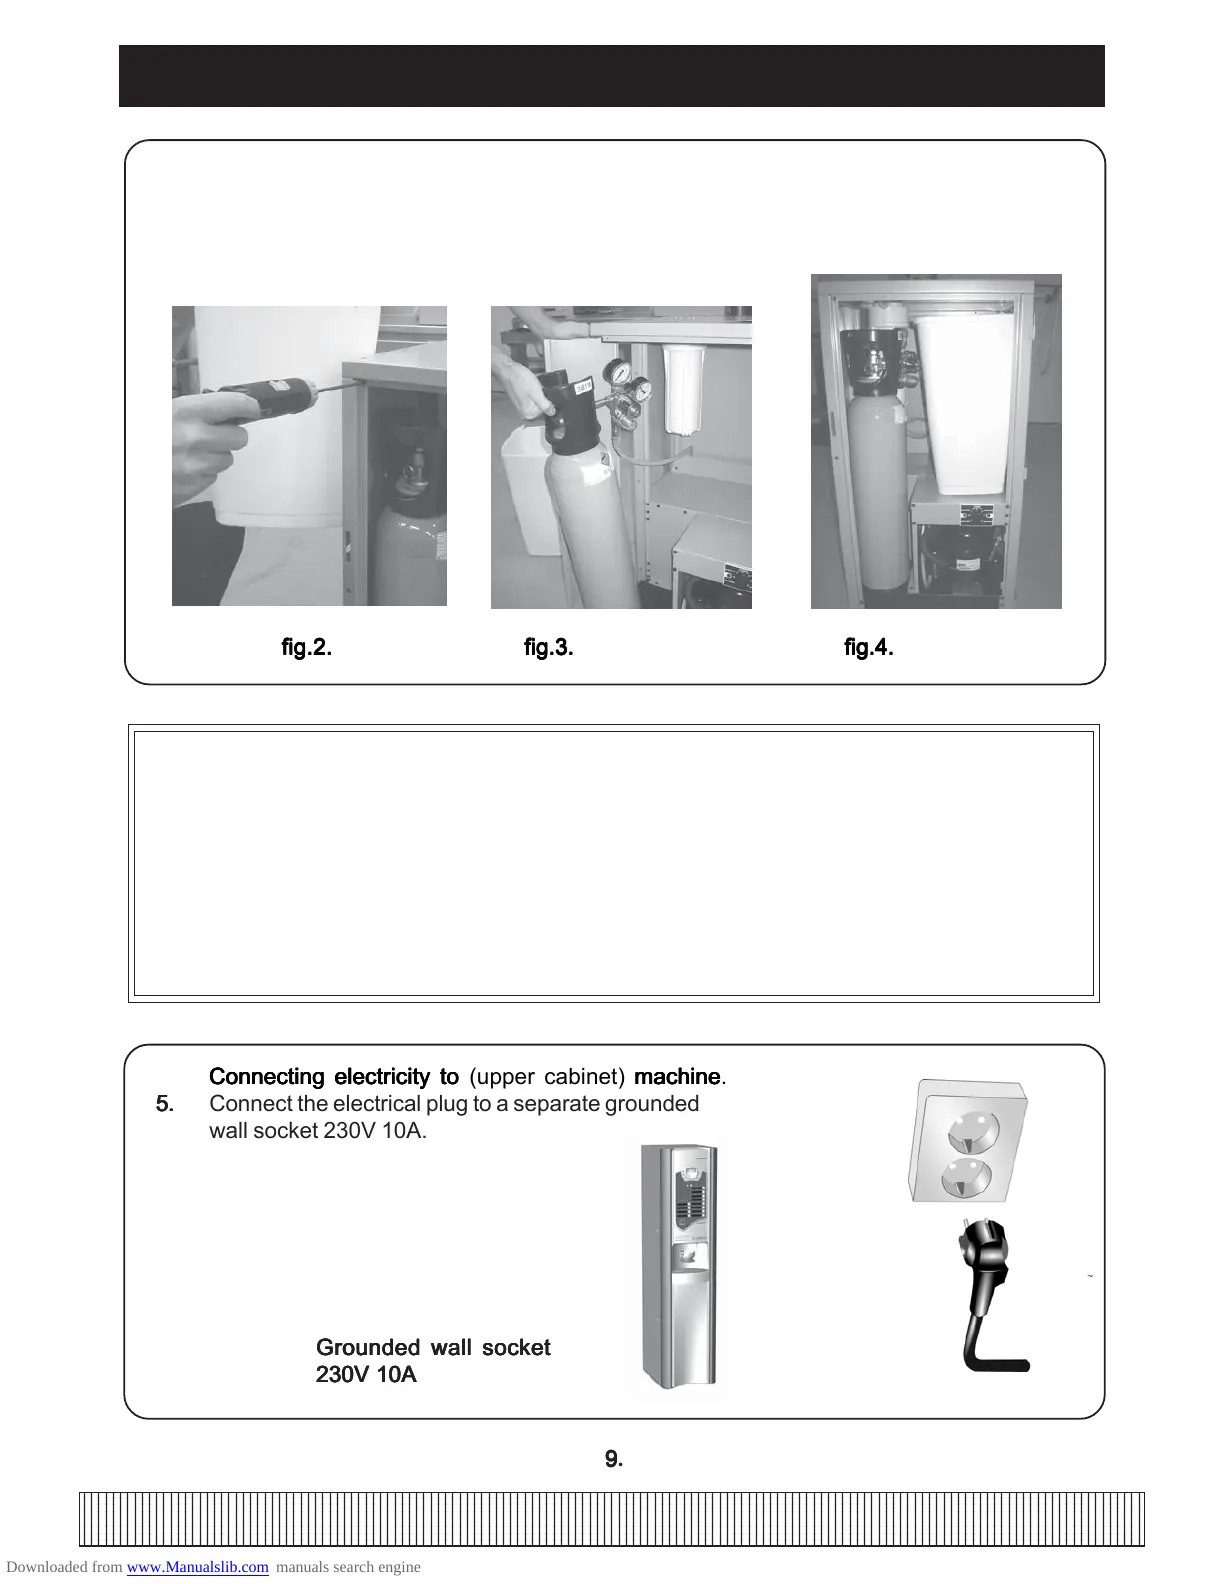
Apply carbon dioxide tube. Apply carbon dioxide tube.
Apply carbon dioxide tube. Apply carbon dioxide tube.
Apply carbon dioxide tube. (See fig.2). Open the tap,Check the manufacturing
pressure: 3.5bar. Adjustable:+ 0.5 -1.0 bar. Loosen screws and dismantle left
side sheet. (see fig.2). Place carbon dioxide tube.(fig.3). Lift in waste box.
(see fig.4)
NOTE! NOTE!
NOTE! NOTE!
NOTE!
V V
V V
V
alid for freshbrew cofalid for freshbrew cof
alid for freshbrew cofalid for freshbrew cof
alid for freshbrew cof
fe machine with chilled water unit, onlyfe machine with chilled water unit, only
fe machine with chilled water unit, onlyfe machine with chilled water unit, only
fe machine with chilled water unit, only
..
..
.
Installation and start,Installation and start,
Installation and start,Installation and start,
Installation and start, starting up machine.
(No pressure increase pump in machine.)
Follow these directions; no 1, 2, 3b, 5, 6, 7, 8, 9,10, 11, 12, 13, 14. 16, 17, 18.
99
99
9.
fig.2.fig.2.
fig.2.fig.2.
fig.2.
fig.3. fig.3.
fig.3. fig.3.
fig.3.
fig.4. fig.4.
fig.4. fig.4.
fig.4.
Connecting electricity to Connecting electricity to
Connecting electricity to Connecting electricity to
Connecting electricity to (upper cabinet)
machinemachine
machinemachine
machine.
5.5.
5.5.
5. Connect the electrical plug to a separate grounded
wall socket 230V 10A.
Grounded wall socketGrounded wall socket
Grounded wall socketGrounded wall socket
Grounded wall socket
230V 10A230V 10A
230V 10A230V 10A
230V 10A