GETTING TO KNOW YOUR VEHICLE 31
NOTE:
Do not pry back to open, as this will break the
plastic cover.
4. Pull up on the red locking tab to unlock the
wiring harness.
Closed Wiring Harness
5. Push and hold down the black security tab
under the wiring harness, and lift the
harness into the open position.
Open Wiring Harness
6. With the wiring harness open, pull
downward on the wiring connector to
unplug. Store the wiring connector in the
lower door basket.
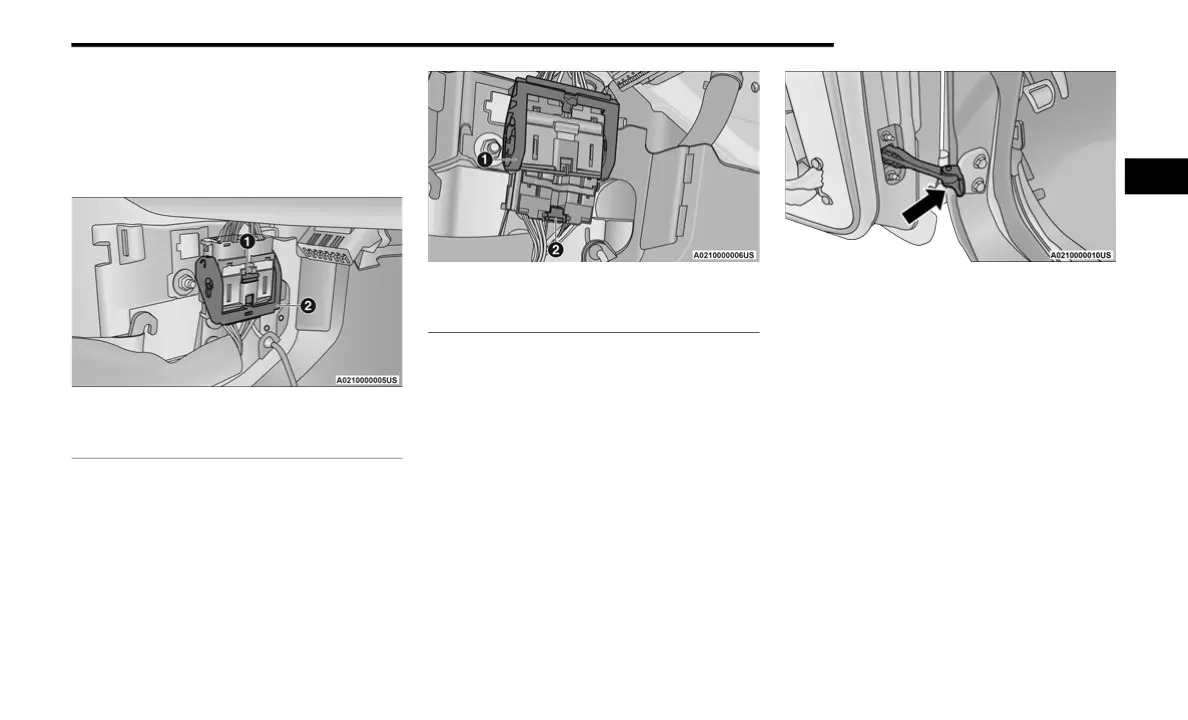
7. Remove the check screw from the center
door check (using a #T40 Torx head driver).
Door Check (Detached)
8. With the door open, lift the door with the
help of another person, to clear the hinge
pins from their hinges and remove the door.
To reinstall the door(s), perform the previous
steps in the reverse order.
NOTE:
The upper hinge has a longer pin, which can be
used to assist in guiding the door into place
when reinstalling.
1 – Locking Tab
2 – Wiring Harness
1 – Wiring Harness
2 – Black Security Tab
2
21_JL_OM_EN_USC_t.book Page 31