EasyManua.ls Logo

Jenn-Air 730-0171 - User Manual

Jenn-Air 730-0171
30 pages
Print Icon
To Next Page IconTo Next Page
Loading...
STAINLESS STEEL NATURAL GAS GRILL
MODEL NO.: 730-0171 ITEM NO: 127141
Jenn-Air is a Trademark of the Maytag Corporation and is used under license to Lowe’s Companies, Incorporated.
350
300
250
200
150
100
50
°C
°F700
600
500
400
300
200
100
FOR OUTDOOR USE ONLY
PLEASE CONTACT 1-800-554-5799 FOR ASSISTANCE
DO NOT RETURN TO PLACE OF PURCHASE
Question and Answer IconNeed help?

Do you have a question about the Jenn-Air 730-0171 and is the answer not in the manual?

Summary

Safety Instructions

Recognized Safety Symbols, Words, and Labels

Explains safety symbols, warning, and caution labels used in the manual for hazard identification.

Safety Practices to Avoid Injury

Outlines essential safety practices for operating the grill to prevent accidents and injuries.

Placement of the Grill

Clearance Requirements

Specifies minimum clearances from combustible materials for safe grill installation and operation.

Location Considerations

Advises on choosing a suitable location, considering wind, traffic, and ventilation.

Pie Cart Assembly

Step 1: Remove Back Panel

Unscrew and remove the back panel from the pie cart as the first step in assembly.

Step 2: Loosen Side Panel Screws

Loosen specific screws on the side panel to prepare for pie cart attachment.

Step 3: Align and Lock Pie Cart

Align the pie cart with screw heads and push down to lock it in place before tightening.

Step 4: Re-tighten Top Screws

Re-tighten top screws and apply screws/washers to the bottom part of the side panel.

Step 5: Attach Side Burner Hose

Connect the main burner manifold hose to the side burner cart and manifold.

Repeat Assembly for Left Side

Repeat assembly steps for the left side of the serving cart and secure the back panel.

Side Burner Hose Quick-Connect

Connecting the Quick-Connect Fitting

Details the process of connecting the side burner hose to the main grill manifold via a quick-connect fitting.

Leak Testing the Connection

Instructions for performing a leak test on the quick-connect fitting as per safety guidelines.

Battery Assembly

Install Ignition Battery

Step-by-step guide to removing the housing, inserting the battery, and replacing the housing.

Installation of Natural Gas Regulator

Connect Natural Gas Hose to Supply Line

Connects the PVC natural gas hose to the house supply line using a quick-connect fitting.

Attach PVC Hose to Regulator

Attaches the PVC natural gas hose to the regulator as illustrated in the diagram.

Leak Testing

Leak Test Procedure

Step-by-step instructions for performing a leak test on all gas connections using a soap solution.

Gas Flow Check

How to check burner flame characteristics for proper gas flow and performance.

Installer Final Check

Pre-Installation Checks

Lists essential checks to be performed by the installer before final use.

Operating Instructions

General Grill and Rotisserie Use

Provides an overview of general operation for both the grill and rotisserie functions.

Using the Grill

Instructions on how to use the main grill burners for searing and cooking various foods.

Using the Rotisserie Burner

Guide for operating the rotisserie burner for cooking with the spit.

Rotisserie Skewer Assembly and Loading

Instructions on assembling and loading food onto the rotisserie skewer for cooking.

Lighting Instructions

Before Lighting the Grill

Pre-lighting checks including hose inspection and leak testing.

Lighting the Grill Burner

Step-by-step guide for igniting the main grill burners using the igniter.

Flame Characteristics

Explains how to interpret burner flame color and stability for proper operation.

Lighting the Rotisserie Burner

Instructions on how to ignite the rotisserie burner using the igniter.

To Match Light the Grill

Manual Lighting Procedure

Provides steps for lighting a burner manually with a match if the igniter fails.

Lighting Illustrations

Main, Side, and Rotisserie Burner Lighting

Visual guide illustrating the process of lighting main, side, and rotisserie burners.

Side Burner Operations and Maintenance

Side Burner Lighting

Steps for lighting the side burner, including manual lighting if needed.

Side Burner Cleaning

How to clean the side burner exterior and ports for optimal performance.

Side Burner Grate Care

Instructions for cleaning the stainless steel side burner grate.

Stainless Steel Cleaning

Guidance on cleaning and maintaining stainless steel surfaces on the grill.

Care & Maintenance of the Grill

Stainless Steel Care

How to clean and maintain stainless steel surfaces, addressing grease buildup and rust appearance.

Grill Rack Cleaning

Best practices for cleaning the grill rack while it is still hot.

Grill Burner Cleaning and Maintenance

Instructions for cleaning grill burners, including removal and reinstallation.

Grease Tray Cleaning

How to properly clean and maintain the grease tray to prevent buildup and potential hazards.

Troubleshooting

When to Look for Spiders

Identifies conditions that may indicate spider or insect nests in burners, causing gas flow issues.

Before Calling for Service

Provides a checklist of common problems and solutions to try before contacting customer service.

Parts List

Model No. 730-0171 Parts

Comprehensive list of all parts for the grill, including reference numbers and quantities.

Grilling Hints

Grilling Preparation and Techniques

Tips for preparing meat and general techniques for achieving the best grilling results.

Grill Cooking Chart

A chart detailing cooking times and special instructions for various foods.

Grill Recipes

Featured Recipes

A selection of recipes including BBQ Salmon, Baked Chili Corn, Tangy Seafood Kabobs, and more.

Additional Grill Recipes

More Grill Recipes

Additional recipes for Beef and Lamb Kabobs, Eggplant Caviar, Chicken Tandoori, Pork Roast, and Turkey.

Limited Warranty

Warranty Claim Procedure

Outlines the steps for submitting a warranty claim for service or replacement parts.

Overview

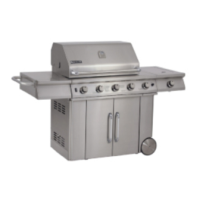
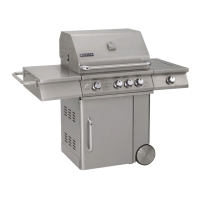
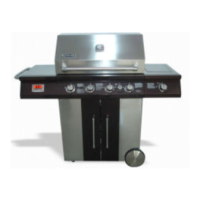
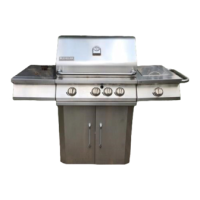
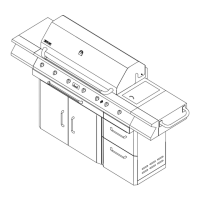
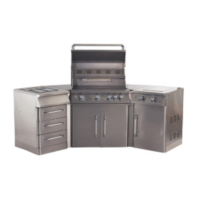
The Jenn-Air Model No. 730-0171, Item No. 127141, is a stainless steel natural gas grill designed for outdoor cooking. Jenn-Air is a trademark of the Maytag Corporation, used under license to Lowe's Companies, Incorporated. This grill is a comprehensive outdoor cooking appliance, featuring multiple burners, a rotisserie, and integrated storage, all built into a cart design with granite tops.

Function Description:

The Jenn-Air 730-0171 is primarily a natural gas-fired outdoor cooking appliance. Its core function is grilling, but it also offers rotisserie cooking and a side burner for additional culinary tasks. The grill is designed for efficient cooking without the need for lava rocks or briquettes, utilizing stainless steel flame tamers positioned above each burner to radiate heat. The appliance is intended for outdoor use only and should not be installed in or on recreational vehicles, boats, or enclosed areas like buildings, garages, sheds, or breezeways.

Important Technical Specifications:

The total gas consumption of the 730-0171 Natural Gas Grill, with all burners set to "HI," is 100,000 BTU/Hr. This is distributed among its various burners:

  • Main burners: 39,000 BTU/Hr. (Each main burner is rated at 13,000 BTU/Hr.)
  • Sear burner: 23,000 BTU/Hr.
  • Rear burners (Rotisserie Burner): 14,000 BTU/Hr.
  • Side burner: 24,000 BTU/Hr.

The grill is tested in accordance with ANSI Z21.58 Latest Standard and CSA 1.6 Latest Standard for Outdoor Cooking Gas Appliances. Installation must conform with local codes or, in their absence, with the National Fuel Gas Code ANSI Z223.1/NFPA 54, or CSA B149.1 Natural Gas and Propane Installation Code, and the National Electrical Code, ANSI/NFPA 70.

Clearance requirements for safe operation include a minimum of 3 inches from the back of the grill to non-combustible materials for the lid to open fully, and a minimum clearance of 24 inches from all sides to combustible materials. The rotisserie motor is equipped with a grounded plug and requires a properly grounded receptacle.

Usage Features:

The grill features multiple control knobs for its various burners, each with an integrated igniter. To light a burner, the user presses and turns the control knob to the "HI" setting, which sends a spark to the pilot flame. If the igniter fails, a match lighting rod is provided for manual ignition. The rotisserie burner also has its own control knob and igniter.

  • Grilling: Most foods are cooked at a "HI" heat setting for searing and browning. For larger pieces of meat or poultry, the heat may be adjusted to a lower setting after initial browning to ensure thorough cooking without burning the exterior. The grill lid should be closed during the 15-minute preheat period.
  • Rotisserie Cooking: The grill is capable of back burner rotisserie cooking. The rotisserie burner reaches cooking temperature in about 1 minute. The rotisserie motor can handle up to a 12lb cut of meat or poultry. The skewer is assembled by inserting the pointed end into the motor and sliding the grooved bushing into a slot on the opposite side of the grill. A counter balance apparatus helps balance heavier meat cuts. The warming rack should be removed when using the rotisserie burner to prevent bending from high heat.
  • Side Burner: The side burner is used for additional cooking tasks, such as preparing sauces or heating side dishes. It has its own control knob and igniter.
  • Safety Precautions: The manual emphasizes several safety instructions, including not operating the grill if gas odor is present, keeping face and hands away from the grill when lighting, and ensuring proper ventilation. It warns against storing flammable vapors or liquids near the appliance. Regular inspection for spider and insect nests in the burners is crucial to prevent gas flow disruption and potential fires. The grill should never be left unattended while cooking.
  • Gas Hook-Up and Leak Testing: The grill uses a natural gas regulator and hose assembly. A quick-connect fitting is used to connect the PVC natural gas hose to the house gas supply line. A complete gas tightness check must be performed at the installation site and periodically thereafter using a soap and water solution. Bubbles indicate a leak.
  • Flame Characteristics: Burner flames should be blue and stable, without yellow tips, excessive noise, or lifting. Yellow flames indicate insufficient air, while noisy or lifting flames suggest too much air.

Maintenance Features:

Regular maintenance is crucial for the grill's safe and reliable operation.

  • Burner Cleaning: The exterior of the burners should be cleaned with a wire brush. Clogged burner ports can be cleared with a straightened paper clip, taking care not to enlarge the ports. Wooden toothpicks should not be used as they may break off and clog the port. Burners should be inspected at least twice a year for spider and insect nests, which can disrupt gas flow and cause fires.
  • Grill Rack Cleaning: The easiest time to clean the grill racks is immediately after cooking, with the flames turned off. A bristle barbecue brush dipped in tap water is recommended.
  • Grease Tray Cleaning: The grease tray should be emptied, wiped down, and washed with a mild detergent and warm water solution after each use. A small amount of sand or cat litter can be placed in the bottom to absorb grease. Excess grease accumulation should be avoided.
  • Stainless Steel Care: Grease specks can bake onto stainless steel surfaces, appearing as rust. An abrasive pad with a stainless steel cleaner can be used for removal, scrubbing in the direction of the grain. Steel wool should be avoided as it can scratch the surface. Noticeable scratches can be touched up by lightly sanding with dry 100-grit sandpaper in the direction of the grain.
  • Side Burner Grate Cleaning: The stainless steel side burner grate should not be cleaned while hot to avoid burns. It can be washed with hot, soapy water, rinsed, and wiped dry. Hot grates should never be immersed in water.
  • Rotisserie Motor Care: The rotisserie motor cord should be kept away from heated surfaces. When not in use, the motor should be removed and stored in a dry location.

The grill's components, such as the cast brass burners, sear burner, stainless steel flame tamer, and stainless steel cooking grids, carry a lifetime warranty. The valves and hose regulator, igniter, and related parts have a 1-year warranty, while all stainless steel parts have a 2-year warranty. For assistance or parts, customers are directed to contact Jenn-Air customer service rather than returning the product to the place of purchase.

Jenn-Air 730-0171 Specifications

General IconGeneral
BrandJenn-Air
Model730-0171
CategoryGrill
LanguageEnglish

Related product manuals