INSTALLATION INSTRUCTIONS
30" (76.2 CM), 36" (91.4 CM) AND 48" (121.9 CM)
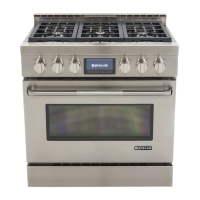
PRO-STYLE
®
GAS CONVECTION RANGES
for residential use only
INSTRUCTIONS D’INSTALLATION
CUISINIÈRES À CONVECTION -
À GAZ PRO-STYLE
®
DE 30" (76,2 CM), 36" (91,4 CM)
ET 48" (121,9 CM)
pour utilisation résidentielle uniquement
W10526092B
Table of Contents/Table des matières
RANGE SAFETY.......................................................................... 2
INSTALLATION REQUIREMENTS............................................. 3
Tools and Parts......................................................................... 3
Location Requirements ............................................................ 4
Electrical Requirements............................................................ 6
Gas Supply Requirements........................................................ 6
INSTALLATION INSTRUCTIONS............................................... 8
Unpack Range .......................................................................... 8
Install Anti-Tip Bracket ............................................................. 8
Make Gas Connection.............................................................. 9
Verify Anti-Tip Bracket Location............................................. 10
Level Range ............................................................................ 10
Install Griddle.......................................................................... 10
Electronic Ignition System...................................................... 11
Reinstall Kick Plate ................................................................. 12
Complete Installation.............................................................. 12
GAS CONVERSIONS ................................................................ 13
LP Gas Conversion................................................................. 13
Natural Gas Conversion ......................................................... 21
Wiring Diagrams ..................................................................... 29
Strip Circuits ........................................................................... 31
SÉCURITÉ DE LA CUISINIÈRE................................................ 34
EXIGENCES D'INSTALLATION................................................ 35
Outils et pièces ....................................................................... 35
Exigences d’emplacement ..................................................... 36
Spécifications électriques....................................................... 38
Spécifications de l'alimentation en gaz.................................. 39
INSTRUCTIONS D’INSTALLATION......................................... 40
Déballage de la cuisinière....................................................... 40
Installation de la bride antibasculement................................. 41
Raccordement au gaz............................................................. 42
Vérification de l'emplacement de la bride antibasculement .. 42
Réglage de l'aplomb de la cuisinière...................................... 43
Installation de la plaque à frire................................................ 43
Système d'allumage électronique .......................................... 43
Réinstallation du garde-pieds................................................. 45
Achever l’installation............................................................... 45
CONVERSIONS POUR CHANGEMENT DE GAZ ................... 46
Conversion pour l'alimentation au propane ........................... 46
Conversion pour l'alimentation au gaz naturel....................... 55
Schémas de câblage .............................................................. 63
Schémas des circuits.............................................................. 65
IMPORTANT:
Save for local electrical inspector's use.
Installer: Leave installation instructions with the homeowner.
Homeowner: Keep installation instructions for future reference.
IMPORTANT :
À conserver pour consultation par l'inspecteur local des installations électriques.
Installateur : Remettre les instructions d'installation au propriétaire.
Propriétaire : Conserver les instructions d'installation pour référence ultérieure.