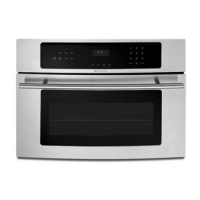
Microwave Oven Built-In Kit i [] 'JENN-AIR
Models MK27 and MK30 3035SHADELAND-tNDIANAPOLIS.tN46226-0901
J
With use of Model M16g Microwave oven.
p.-
INSTALLATION
INSTRUCTIONS
PART NO. 21 0777
Step 1. Electrical Requirements
OBSERVE ALL GOVERNING CODES AND ORDINANCES.
A. A 120-Volt, 60Hz, AC, 15 ampere, fused electrical sup-
ply is required (time-delay fuse or circuitbreaker is rec-
ommended.) However, if your home has a circuit wired
and fused for 20 amperes, this is preferred. If you are
installing a new circuit, one wired and fused for 20
amperes is recommended. Itisalso recommended that
a separate circuit serving only this appliance be pro-
vided. Do not use an extension cord.
B. Electrical Connection
ELECTRICAL GROUND IS REQUIRED ON THIS AP-
PLIANCE. DO NOT, UNDER ANY CIRCUMSTANCES,
REMOVE THE POWER SUPPLY CORD GROUND
PRONG. Note: A 27" minimumwidecabinetmustbe provided
toinstallTrimKitMK27.
For your personal safety, this appliance must be prep-
_ erly grounded and polarized. This appliance isequipped Note:A30"minimumwidecabinetmustbeprovidedto
with a power supply cord having a 3-prong grounding installTrimKitMK30.
plug. To minimize possibleshock hazard, the cord must
be plugged into a mating 3-hole grounding type wall
receptacle, grounded in accordance with the National
Electrical Code, local codes and ordinances. If a mat- Step 2. Bottom Rail
ing wall receptacle is not available, it is the personal
responsibility and obligation of the customer to have a A. Set microwave on itsback so bottom is accessible. R,
properly grounded and polarized 3-hole wall receptacle move left outboard screwand corresponding righthar
installed by a qualified electrician. (See Figure 1.) screw from bottom frontand attach bottom rail as shov
in Figure 2 with same screws.
3-Prong
GroundingPlug
PowerSupply1 i " '_'_
PropedyPolarJz_l • :_"
3-HoteGrounding
Fig. 1 Type WaltReceptacle
Required Grounding Method Fig. 2



 Loading...