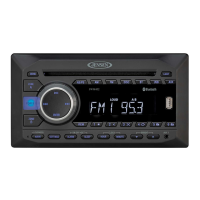
CD1213
What’s in the Box
CD1213 Head Unit
Cosmetic Trim Ring
Wiring Harness Power/Speaker
Mounting Hardware
Remote Control
3.5mm Media Cable
Owners Manual
Installation Guide
•
•
•
•
•
•
•
•
Tools and Supplies
You will need these tools and supplies to install your
CD1213:
Torx type, fl at-head and Philips screwdrivers
Wire cutters and strippers
Tools to remove existing radio (screwdriver,
socket wrench set or other tools)
Electrical tape
Crimping tool
Volt meter/test light
Crimp connections
18 gauge wire for power connections
16 – 18 gauge speaker wire
•
•
•
•
•
•
•
•
•
Installation Guide
WARNING! Never install this unit where operation and viewing could interfere with safe driving
conditions.
AUX I N
CD1213
+
15
Wiring Diagram
IMPORTANT: Incorrect wiring connections can damage the unit. Follow the wiring instructions carefully, or have
the installation handled by an experienced technician.
Need Help? For technical assistance, call the Jensen customer support line at 1-800-323-4815.
NOTE: When replacing a
fuse, make sure the new
fuse is the correct type
and amperage. Using
an incorrect fuse could
damage the radio. This
head unit uses one 15
amp fuse located below
the wiring connector (15
amp fast blow ATO).
Power Antenna (dark blue wire) Connect to
the power antenna or an amplifi er. If not used,
tape the bare end of wire.
Accessory/Ignition (red wire)
Connect to the existing radio wire or radio fuse.
Ground (black wire)
Connect to the ground terminal or a clean,
unpainted part of the chassis.
Memory/Battery (yellow wire)
Connect to the battery or to a 12 volt power
source that is always live. The radio will not
work if this wire is not connected.
Antenna
RCA Outputs to Amplifi er
Left Front Speaker
Right Front Speaker
Left Rear Speaker
Right Rear Speaker
Dark Blue
Black
Yellow
Red
Grey
Grey/Black (-)
Grey (+)
White/Black (-)
White (+)
Violet/Black (-)
Violet (+)
Green/Black (-)
Green (+)
15 Amp Fuse
SERIES