- - 3 - -
Jet Inc. 750 Alpha Drive Cleveland, OH 44143 www.jetincorp.com 800.321.6960
Wiring at the Jobsite
1. All cable and conduit should be installed from the tank to control panel
location by the system installer.
USE ONLY NON-METALLIC CONDUIT WITH THE MODEL 197
CONTROL PANEL. METALLIC CONDUIT IS NOT APPROVED
FOR INSTALLATION WITH THE MODEL 197 CONTROL
PANEL.
2. Use only UL listed Direct Burial and non-metallic conduit and wiring for
control and aerator installation.
3. Cable should be carefully measured; cables and wiring must not be
spliced. Spliced connections could result in aerator or alarm sensing
malfunctions.
4. When ordering and measuring cable be sure to:
a. Leave ample cable in aerator mounting casting to install aerator at
desired depth
b. If direct burial cable is used it must be encased in conduit from the
aerator mounting casting to the edge of the concrete tank. It should
not cross over any access covers or panels
c. If direct burial cable is used leave slack in the line to allow for
possible settling in the trench or tank
d. Above grade entrance to the house is recommended if the control
panel is mounted inside the dwelling. If direct burial cable is used
conduit should be in place from the beginning of the foundation to
the entrance of the dwelling.
5. Jet recommends burying cable and conduit at least two feet deep to
prevent accidental damage to the external wiring
6. Proper procedures and solvents must be used to protect the integrity of
the external wiring.
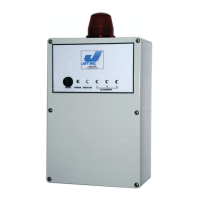
Control Panel Installation
The control panel should be given to the electrician on site for installation. The
installer or distributor must make sure that the control panel settings are correct
for the type of system and components being installed. Refer to control panel
settings section for more information on desired system configurations.
1. Mount the control panel in a location that will be easily accessible, clearly
visible from at least 50 feet and out of reach from children. The panel is
weather proof and can be mounted outdoors. If outdoor installation is
required consideration should be taken to minimize the impact of climate
on the panel. If possible do not mount the panel in direct sunlight.
a. To mount panel remove the panel cover by removing the four
Philips head screws, the panel can then be mounted with the four
 Loading...