EasyManua.ls Logo

JL Audio Stealthbox Series

JL Audio Stealthbox Series
2 pages
To Next Page IconTo Next Page
Loading...
Stealthbox
®
INSTALLATION GUIDE
SB-D-QDRAM/10W3v3, JL AUDIO, Inc 2018
Page 1
for the
SB-D-QDRAM/10W3v3
SKU# 94049
2002-Up Dodge 1500 Ram Quad Cab &
2003-Up Dodge 2500, 3500 Ram Quad Cab
This Stealthbox is a product which
requires professional installation skills
and tools.
Please read this installation guide thor-
oughly before beginning the project.
It will guide you step by step through
the installation. Several of the steps in
this process may require two people to
accomplish.
It is absolutely vital that the enclo-
sure be properly mounted to the
vehicle according to these instructions.
Failure to mount the enclosure properly
presents two problems: 1) The sub-
bass performance will suffer due to the
movement of the enclosure caused by
the force exerted by the woofer(s) and
2) A loose enclosure presents a serious
safety hazard in the event of a collision
or sudden deceleration.
Please enjoy your JL Audio Stealthbox
responsibly.
STEP 1:
Remove the passenger side metal floor
extension, if equipped.
STEP 2:
Remove the paper backing and place
supplied wax square onto the floor.
The center of wax square needs to measure 5”
from transmission hump.
The rear edge of the wax square is against the
start of the curvature.
STEP 3:
Thread the supplied socket set screw
into the Stealthbox. Leaving 1/2” exposed.
STEP 4:
Place the Stealthbox into the passen-
gers side cavity and push down.
STEP 5:
The threaded rod will leave an
impression, onto the was square.
STEP 6:
With a 1/2” drill bit. Drill a hole into the
floor using the imprint in the wax square as guide.
START
HERE
Continued on Next Page
www.jlaudio.com
Question and Answer IconNeed help?

Do you have a question about the JL Audio Stealthbox Series and is the answer not in the manual?

JL Audio Stealthbox Series Specifications

General IconGeneral
MaterialMDF (Medium Density Fiberboard)
Enclosure TypeSealed or ported
Subwoofer SizeVaries by model (typically 10-13.5 inches)
Woofer CompositionPolypropylene
Woofer SurroundRubber
SensitivityVaries by model
Frequency ResponseVaries by model
ImpedanceVaries by model (typically 2Ω or 4Ω)
Mounting DepthVaries by model and vehicle
FinishCarpeted

Summary

Installation Steps

Prepare Floor Mounting Point

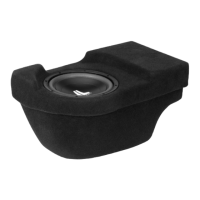
Prepare the floor by removing extensions, placing a wax square, and marking for drilling.

Install Threaded Screw

Thread the socket set screw into the Stealthbox, leaving 1/2" exposed.

Position Stealthbox

Place the Stealthbox into the passenger's side cavity and push down.

Mark Drilling Location

The threaded rod leaves an impression on the wax square to mark the drilling location.

Drill Mounting Hole

Drill a hole into the floor using the imprint in the wax square as a guide.

Run Speaker Cable

Run speaker cable to the Stealthbox and check for proper woofer operation.

Secure Stealthbox

Insert the socket set screw through the drilled floor and secure with washers and nut.

Specifications

Enclosure and Driver Details

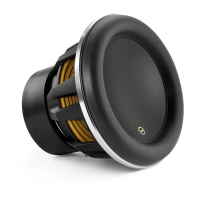
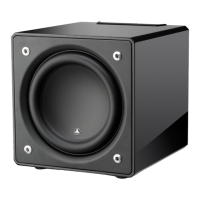
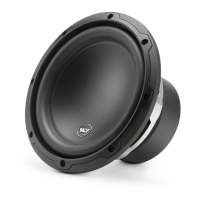
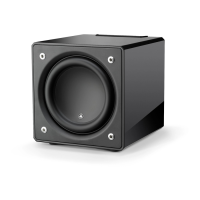
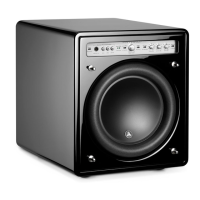
Details on enclosure type, driver, impedance, and power handling.

MidHigh Frequency Driver Information

Front and Rear Driver Fitment

Information on front and rear location driver sizes and applicable JL Audio products.

Related product manuals