Do you have a question about the JL Audio fathom v2 and is the answer not in the manual?
Read and retain instructions, heed warnings, and follow all operating and use instructions.
Avoid water/moisture, ensure proper ventilation, keep away from heat, protect power cords.
Connect to correct power supply, protect cords from damage, and avoid overloading outlets.
Clean only as recommended, unplug during nonuse, disconnect during storms, and handle carefully.
List of conditions requiring qualified service personnel, including damaged cords, liquid entry, or physical damage.
Avoid overloading outlets, do not defeat grounding prong, disconnect during storms.
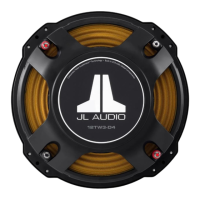
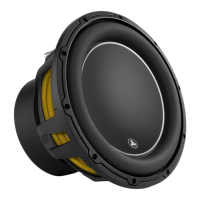
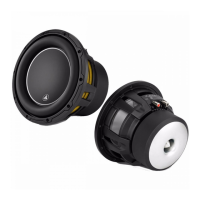
Includes DMA Motor System, OverRoll Surround, W-Cone, Floating-Cone Attach, Plateau-Reinforced Spider.
Features Elevated Frame Cooling, Radially Cross-Drilled Pole Piece, and High-Damping Feedback Circuit.
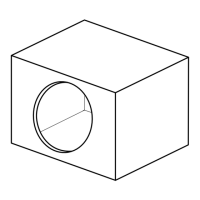
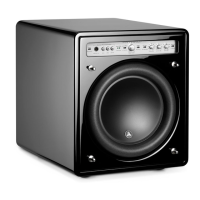
If you are planning to install your Fathom v2 inside a cabinet, please refer to the guidelines on page 8.
The 'Power' switch determines the operational readiness of the Fathom v2 subwoofer and should be the only switch used to turn the Fathom v2 on and off.
A powerful feature of the JL Audio Fathom v2 subwoofers is their innovative Digital Automatic Room Optimization (D.A.R.O.) technology.
This input is for connecting the supplied JL Audio calibration microphone to the Fathom v2 subwoofer.
Buttons for demo tones, D.A.R.O. defeat, and calibration sequence initiation.
LEDs indicating Master or Slave input mode selection.
Switch to select between 'Reference' and 'Variable' output level modes.
Controls the output level when the 'Variable' Level Mode is selected.
Selects indicator light modes: Off, Dim, or On.
Sets LP filter slope (Off, 12 dB, 24 dB) and cutoff frequency (30 Hz - 130 Hz).
Adjusts extreme low frequency (-12 dB to +3 dB at 24 Hz) for room tailoring.
Selects between normal (0 deg) and reversed (180 deg) signal polarity.
Adjusts subwoofer output timing relative to main speakers (0-270 degrees).
Connect using XLR or 1/4-inch TRS connectors for superior noise rejection and grounding.
Connect using RCA-type connectors; optically isolated for minimizing noise.
Select between 'Grounded' or 'Isolated' mode for unbalanced RCA inputs to minimize hum.
Designates units as 'Master' or 'Slave' for multi-subwoofer systems and D.A.R.O. optimization.
Connects master Fathom v2 to slave units via balanced XLR output for signal distribution.
Connects the included power cord; ensure voltage compatibility and use dedicated circuits if needed.
Confirm system settings before beginning the setup process for a neutral starting point and effective setup.
Set speaker size, distances, subwoofer level, and tone controls before subwoofer setup.
Configure active crossover or bass management for low-pass and high-pass filters and output level.
Set Power switch to 'On' and Lights switch to 'On'.
Confirm Input Mode indicators and set Level Mode switch to 'REF'.
Set LP Filter, LP Freq, e.l.f. trim, Polarity, and Phase controls.
Press the D.A.R.O. defeat switch to keep the red light lit.
Adjust subwoofer level to blend with other speakers using receiver control or Master Level knob.
Adjust Polarity switch and Phase control to achieve natural sound and smooth transition with satellite speakers.
Experiment with subwoofer placement to achieve smooth bass. Re-run setup after moving.
Connect calibration microphone to Fathom v2 and place at listening seat.
Press 'Calibrate' button and return to listening seat within 5 seconds.
Subwoofer plays noise sequence for ~3 mins while D.A.R.O. measures and corrects room response.
Press Demo and Defeat buttons quickly to clear D.A.R.O. settings and turn off Calibrate light.
Adjust the 'e.l.f. trim' control to adjust extreme low bass extension at 24 Hertz for room tailoring.
Avoid placing objects on subwoofer; ensure 3-4 ft separation from TV for magnetic shielding.
Auto mode uses minimal power; unplug during storms and extended absences for safety.
Check power, connections, receiver settings, and cables if the subwoofer produces no sound.
Address level changes, muddy bass, or heavy bass by checking settings, trim, and placement.
Troubleshoot hum or noise by checking input modes, upstream components, and cables.
Troubleshoot calibration failure due to microphone issues or incorrect connections.
Address excessive volume by reviewing Master Level, seeking noise isolation, or moving the subwoofer.
Contact authorized dealer for warranty returns with proof of purchase. Return only defective components.