EasyManua.ls Logo

JL Audio XD600/1 User Manual

JL Audio XD600/1
36 pages
To Next Page IconTo Next Page
Page #1 background imageLoading...
Page #1 background image
Thank you for purchasing a JL Audio amplifier for
your automotive sound system.
Your amplifier has been designed and manufactured to exacting
standards in order to ensure years of musical enjoyment in your vehicle.
For maximum performance, we highly recommend that you have
your new amplifier installed by an authorized JL Audio dealer. Your
authorized dealer has the training, expertise and installation equipment
to ensure optimum performance from this product. Should you
decide to install the amplifier yourself, please take the time
to read this manual thoroughly so as to familiarize yourself
with its installation requirements and setup procedures.
If you have any questions regarding the instructions in this
manual or any aspect of your amplifier’s operation, please contact your
authorized JL Audio dealer for assistance. If you need further assistance,
please call the JL Audio Technical Support Department
at (954) 443-1100 during business hours.
OWNER’S MANUAL
600W Monoblock Subwoofer Amplier
Question and Answer IconNeed help?

Do you have a question about the JL Audio XD600/1 and is the answer not in the manual?

JL Audio XD600/1 Specifications

General IconGeneral
BrandJL Audio
ModelXD600/1
CategoryAmplifier
LanguageEnglish

Summary

Protect Your Hearing

Record Your Serial Number

Installation Applications and Warnings

Planning Your Installation

Cooling Efficiency Considerations

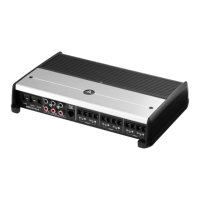
Ensures proper heat dissipation by keeping the amplifier's shell exposed to airflow.

Safety Considerations

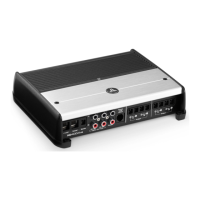
Emphasizes dry, ventilated mounting, avoiding interference with safety systems, and secure mounting.

Mounting Guidelines

Discourages upside-down mounting and requires space above for cooling when mounted under a seat.

Common Installation Mistakes to Avoid

Warns against drilling into vital systems, running wires externally, and improper wire routing.

Product Description

Typical Installation Sequence

Power Connections

Vehicle Ground Wire Upgrade

Recommends upgrading vehicle ground wires to 4 AWG for systems with main fuses over 60A to prevent voltage drops.

Fuse Requirements

Specifies the necessity of fusing the main power wire within 18 inches of the battery post with a 50A fuse.

Turn-On Lead Connection

Input Section and Voltage Range

Input Sensitivity Controls

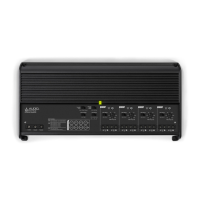
Explains how to adjust input sensitivity to match source unit output for maximum clean output.

Speaker-Level Inputs

Details using speaker output wires directly as inputs, avoiding the need for line output converters.

Filter Controls Overview

Low-Pass Filter Operation

Describes the variable low-pass filter (50-500 Hz) and selectable slopes (12dB/24dB) for smooth transitions.

Precise Frequency Selection

Recommends consulting Appendix B for precise filter frequency selection using detent positions.

Defeating the Low-Pass Filter

Explains how to disable the low-pass filter by setting the switch to 'Off' for external crossover use.

Infrasonic Filter

Optional Remote Level Control

Preouts for System Expansion

Preout Signal Requirements

Requires a stereo input signal for stereo output from preouts; mono input yields mono output.

Subwoofer Outputs

Subwoofer Load Recommendation

Recommends loads of 2 ohms nominal or greater; loads below 2 ohms may activate protection mode.

Status LED and Protection Circuitry

LED Off / Unexpected Shutdown

Indicates low battery/remote voltage (<10V) causing shutdown; requires charging system inspection.

Servicing Your JL Audio Amplifier

Appendix A: Input Sensitivity Level Setting

Necessary Equipment for Setup

Lists required equipment, including a digital AC voltmeter and a sine-wave test tone CD.

Input Sensitivity Adjustment Procedure

Details the nine steps for setting input sensitivity using a voltmeter and test tone for optimal output.

Important Input Sensitivity Warning

Warns against increasing input sensitivity beyond the established maximum to avoid distortion and speaker damage.

Appendix B: Precise Frequency Selection Chart

Appendix C: XD600/1 Specifications

Appendix D: Troubleshooting

Setting Input Sensitivity

Refers to Appendix A for setting input sensitivity for maximum, low-distortion output.

Troubleshooting No Power

Guides on checking fuses, connections, and remote turn-on voltage to resolve power issues.

Troubleshooting Ticking/Popping Sound

Suggests checking for speaker shorts, impedance issues, and verifying the Status LED indication.

Troubleshooting Fluctuating Output

Recommends checking amplifier connections and input connector contact for intermittent issues.

Troubleshooting Shutdown at High Volumes

Troubleshooting No Output

Limited Warranty (USA)

Service and Returns

Outlines the procedure for warranty returns, requiring proof of purchase and authorized dealer involvement.

Service Contact Information

Provides JL Audio Customer Service phone number and address for inquiries and service.

Related product manuals