13
Using the Compressor
Start with the Compressor and Meequalizer off and adjust the input and
output gain so that the VU Meter reads around 0dB.
Set ‘COMPRESSION’ and ‘ATTACK’ fully anti-clockwise and ‘RELEASE’ at
mid-position. Press the ‘COMP’ push-button and turn up the ‘COMPRES-
SION’ control until the compressor GR meter starts to read 2dB or 4dB on
audio peaks. You should now be able to hear the compressor working as
the volume diminishes. Use the Output Gain control to restore the signal
to its previous (uncompressed) level. Try slowing the Attack and listen for
percussive sounds getting louder. Reducing the Release time should em-
phasise this even more and the compressor should start to “pump” audibly.
The overall result of compression depends on the combined settings of the
Input and Output Gain, Compress, Attack and Release controls. Experi-
ment with different combinations to discover what best suits the material
you wish to compress. Watch the GR meter and don’t overdo things - it’s
possible to apply 20dB of gain reduction before you realise it!
Use the ‘COMP’ switch to make comparisons between compressed and
uncompressed signals.
Using the Meequalizer
Always start with the Meequalizer boost/cut controls (LF, MID and HF) set
to “0” (the control knobs set vertically, in their centre notches). This setting
is also known as “flat”.
You need to be careful about too much boost or “lift”, since boosting
takes the threeQ closer to overload. The threeQ has generous over-
load margins, but when a lot of boost is used, it may be necessary to
compensate by reducing the Output Gain or the Input Gain (the latter
will affect the Compressor setting though).
Keep an eye on the VU Meter when adjusting the EQ. When the red
LED (labeled “+12”) lights, the threeQ is within 4dB of clipping. This
may therefore be regarded as a “Peak” or “overload” LED. Occasional
flashes are OK but if it is on all the time, turn something down!
The way to use the MID FREQ is to apply quite a lot of boost, then
sweep the frequency until you “tune in” to the sound you are inter-
ested in. Once you find it, adjust the amount of boost or cut to give the
desired effect.
Experiment with combinations of settings of EQ and try to picture
how the audio signal is being affected. Use the “EQ” switch to make
comparisons between EQ’d and non-EQ’d signals.
12
Using the threeQ
GETTING CONNECTED
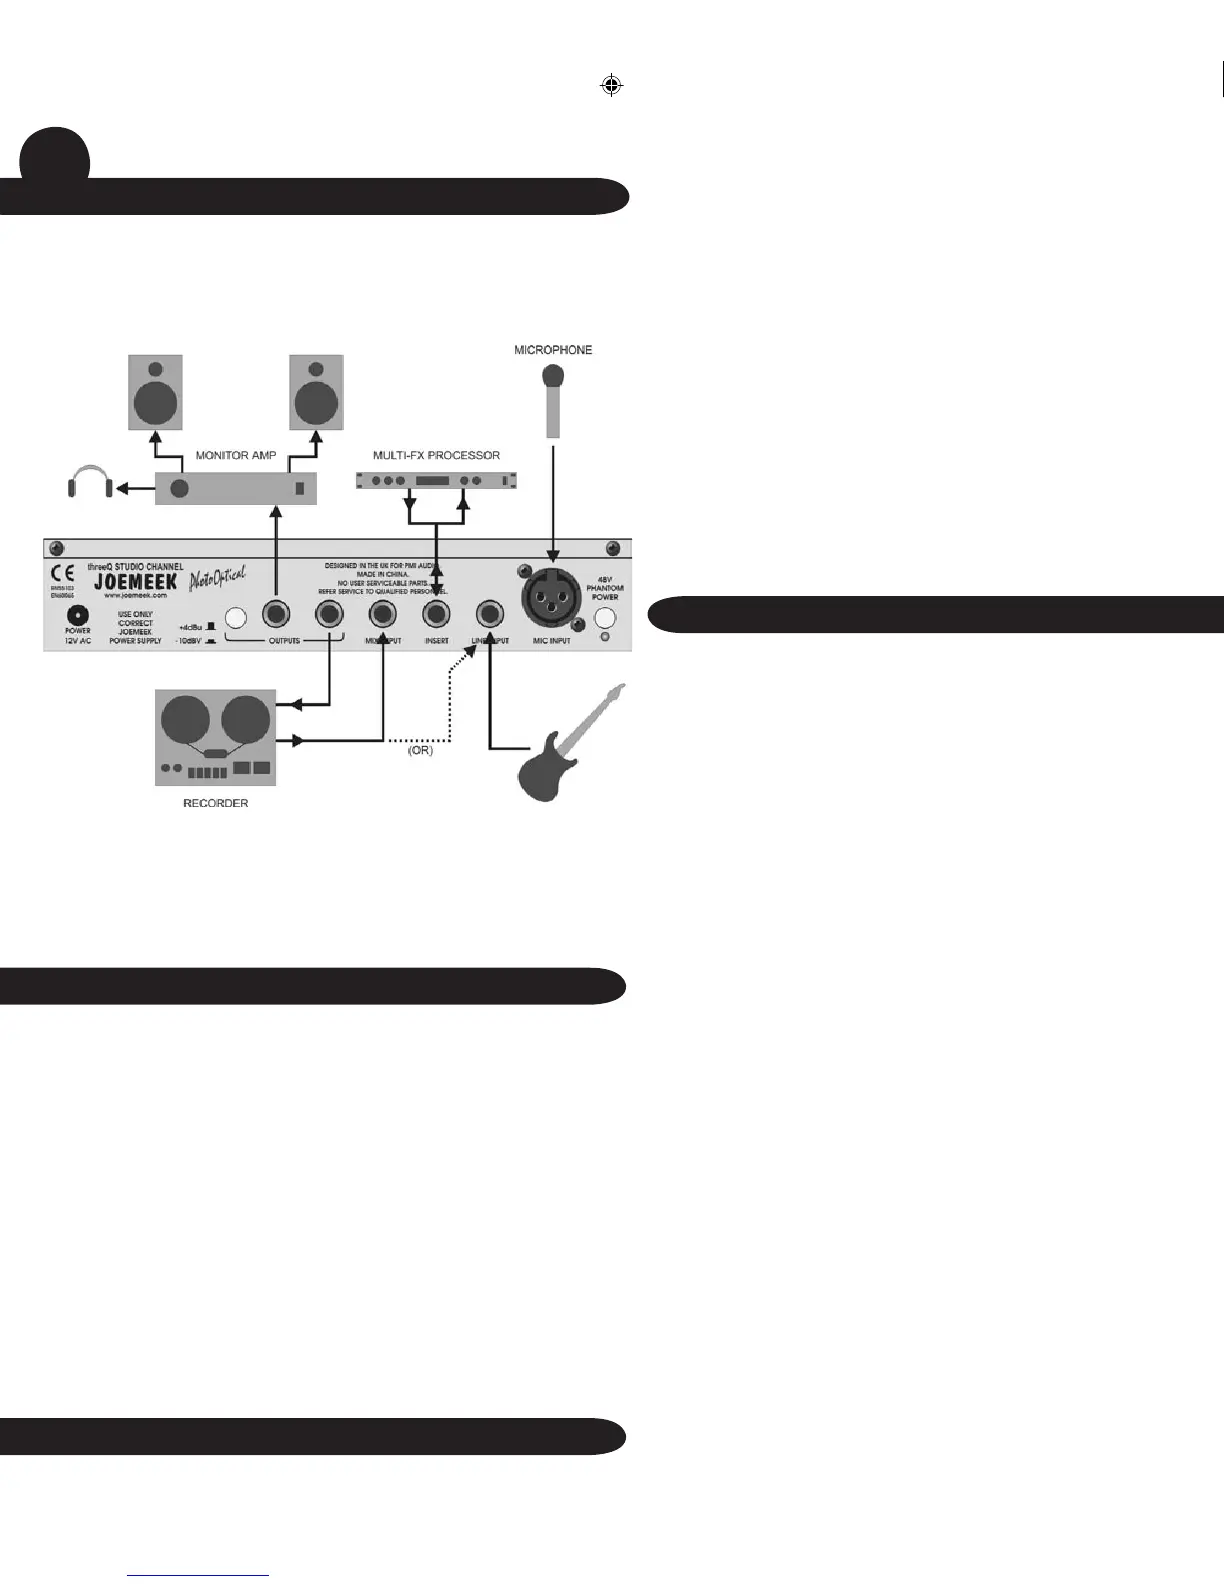
The figure shows the threeQ being used instead of a mixing desk
in a recording setup
• A microphone is connected to the Mic Input
• An additional source is being fed into the Line Input
• The insert point is being used to divert the preamplified signal through
an external effects processor
• The recorder output is connected to the Mix Input for monitoring and
overdubbing
• Previously recorded tracks may also be replayed via the Line Input,
to permit compression and equalization
POWER SUPPLY
Connect the threeQ Power Supply to the AC connector on the rear
panel and switch on the mains supply. NB: Use only the 12V ac mains
adaptor supplied. Use of any other power supply may damage the
threeQ and will invalidate the warranty.
Using the Preamp
Turn the ‘INPUT GAIN’ control to minimum and connect the input
source. If you are using a condenser microphone, remember to switch
on the 48V Phantom Power. Set the ‘OUTPUT GAIN’ to “0dB”. Turn
up the ‘INPUT GAIN’ until the microphone sound registers on the
LED VU Meter, adjusting it so that the yellow “0” or “+4” LEDs light on
sound peaks. When the red LED (labeled “+12”) lights, the threeQ is
within 4dB of clipping. This may therefore be regarded as a “Peak” or
“overload” LED. Occasional flashes are OK but if it is on all the time,
turn the Input Gain down!
 Loading...