A419
MENU
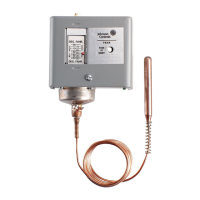
2-1/4
56
2-13/16
71
6-1/8
155
1-3/4
44
1-1/16
27
71
2-13/16
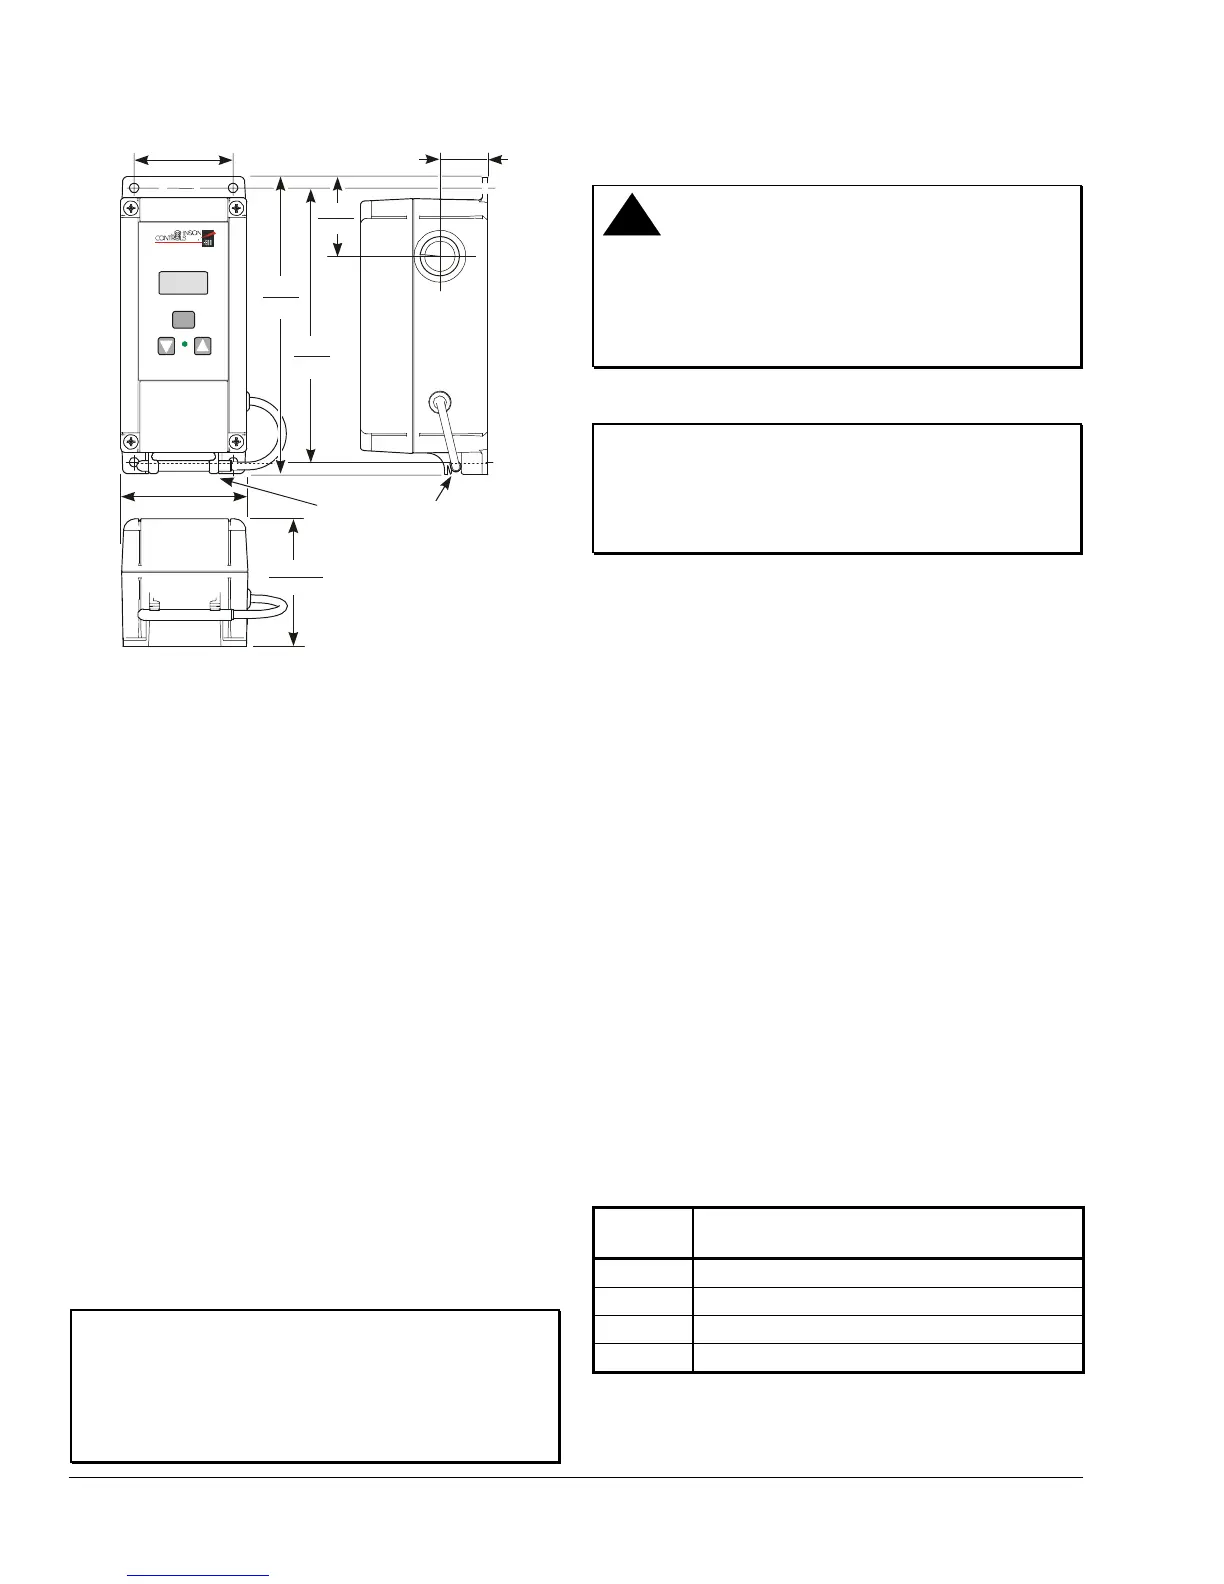
Position the A99 sensor
in bracket at bottom of
A419 NEMA 4X enclosure.
6-5/8
168
Figure 2: Dimensions for A419 Temperature
Controls with NEMA 4X Enclosures, in./(mm)
Mounting
An A419 control has either a standard high-impact
plastic NEMA 1 or a NEMA 4X watertight enclosure.
The A419 control is not position sensitive but should
be mounted for convenient wiring and adjustment. The
NEMA 4X models may be mounted to flat vertical
surfaces using the four screw holes at the enclosure
corners. See
Figure 2.
Note: When mounting the control to rigid conduit,
attach the hub to the conduit before securing the hub
to the control enclosure. For a NEMA 4X model, use a
watertight fitting rated for the ambient environment.
On NEMA 4X models select the knockout to be
removed. Place a screwdriver blade on the knockout
near the edge. Apply a sharp blow to the screwdriver
handle to loosen the knockout. Be careful not to
damage the control’s interior components.
An additional low-voltage, two-wire cable is required to
operate the A419 control’s temperature offset function.
On NEMA 4X enclosures you must install a suitable
water-tight fitting in an available knockout to pass the
two-wire cable through the enclosure wall.
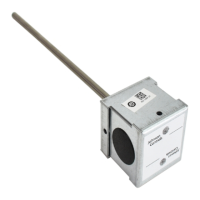
IMPORTANT: The short-lead A99 sensor,
included with A419 NEMA 4X controls, must be
mounted on the bottom of the control in the bracket
on the NEMA 4X housing. Mounting the sensor on
top of the control may reduce the accuracy of the
displayed temperature. See Figure 2.
Wiring
!
WARNING: Risk of Electrical Shock.
To avoid the risk of electrical shock, disconnect all
power sources to the control before wiring any
connections. More than one disconnect may be
required to completely de-energized the control and
equipment.
IMPORTANT: All wiring must conform to local,
national, and regional regulations. Use copper
conductors only for all wire connections. Do not
exceed the electrical ratings for the A419 control or
the equipment it is wired to.
Observe the following guidelines and refer to Figure 3
and
Table 1 when wiring the A419 control to your
equipment.
• Use wire no larger than 12 AWG when connecting
to the two lower terminal blocks (TB1 and TB2).
• Use wire no larger than 16 AWG when connecting
to the upper sensor terminal block (TB3).
• Wire insulation rating must be 90°C, minimum.
• A99 temperature sensors are not polarity
sensitive. Wire the leads to (+) SEN and (-) COM
on the sensor terminal block (TB3). See
Figure 3.
• Keep the leads between the control and sensor as
short as possible/practical in your application. The
additional resistance in long sensor leads creates
error between the actual temperature and the
displayed temperature. Refer to
Table 1 when
extending sensor leads.
• Temperature sensor signals may be affected by
electrical interference. When extending sensor
cable beyond 50 ft (15.2 m) use a twisted-pair,
shielded cable to reduce electrical interference.
Table 1: Maximum Recommended Sensor Cable
Lengths and Wire Sizes
Wire
Gauge
Maximum Sensor Cable Length*
feet (meters)
16 AWG
500 (150)
18 AWG
300 (100)
20 AWG
200 (60)
22 AWG
125 (40)
* At the listed maximum cable lengths there is less than
1F° (0.6C°) error in the actual temperature vs.
displayed temperature.
2 A419 Electronic Temperature Control with NEMA 1 and NEMA 4X Watertight Enclosures Installation Instructions

 Loading...