Mounting
About this task:
For wall mounting, select a suitable mounting area away
from windows or doors that open, and avoid areas subject
to high vibrations or excessive moisture. The enclosure
has a hinged cover with a latch. The enclosure offers two
entry points for wiring, one on top and one on bottom,
and one rubber grommet installed in the bottom wiring
hole. The hole provided is for conduit or cable gland
mounting and is 0.86 in. (21.38 mm) in diameter.
To install the sensor, complete the following steps:
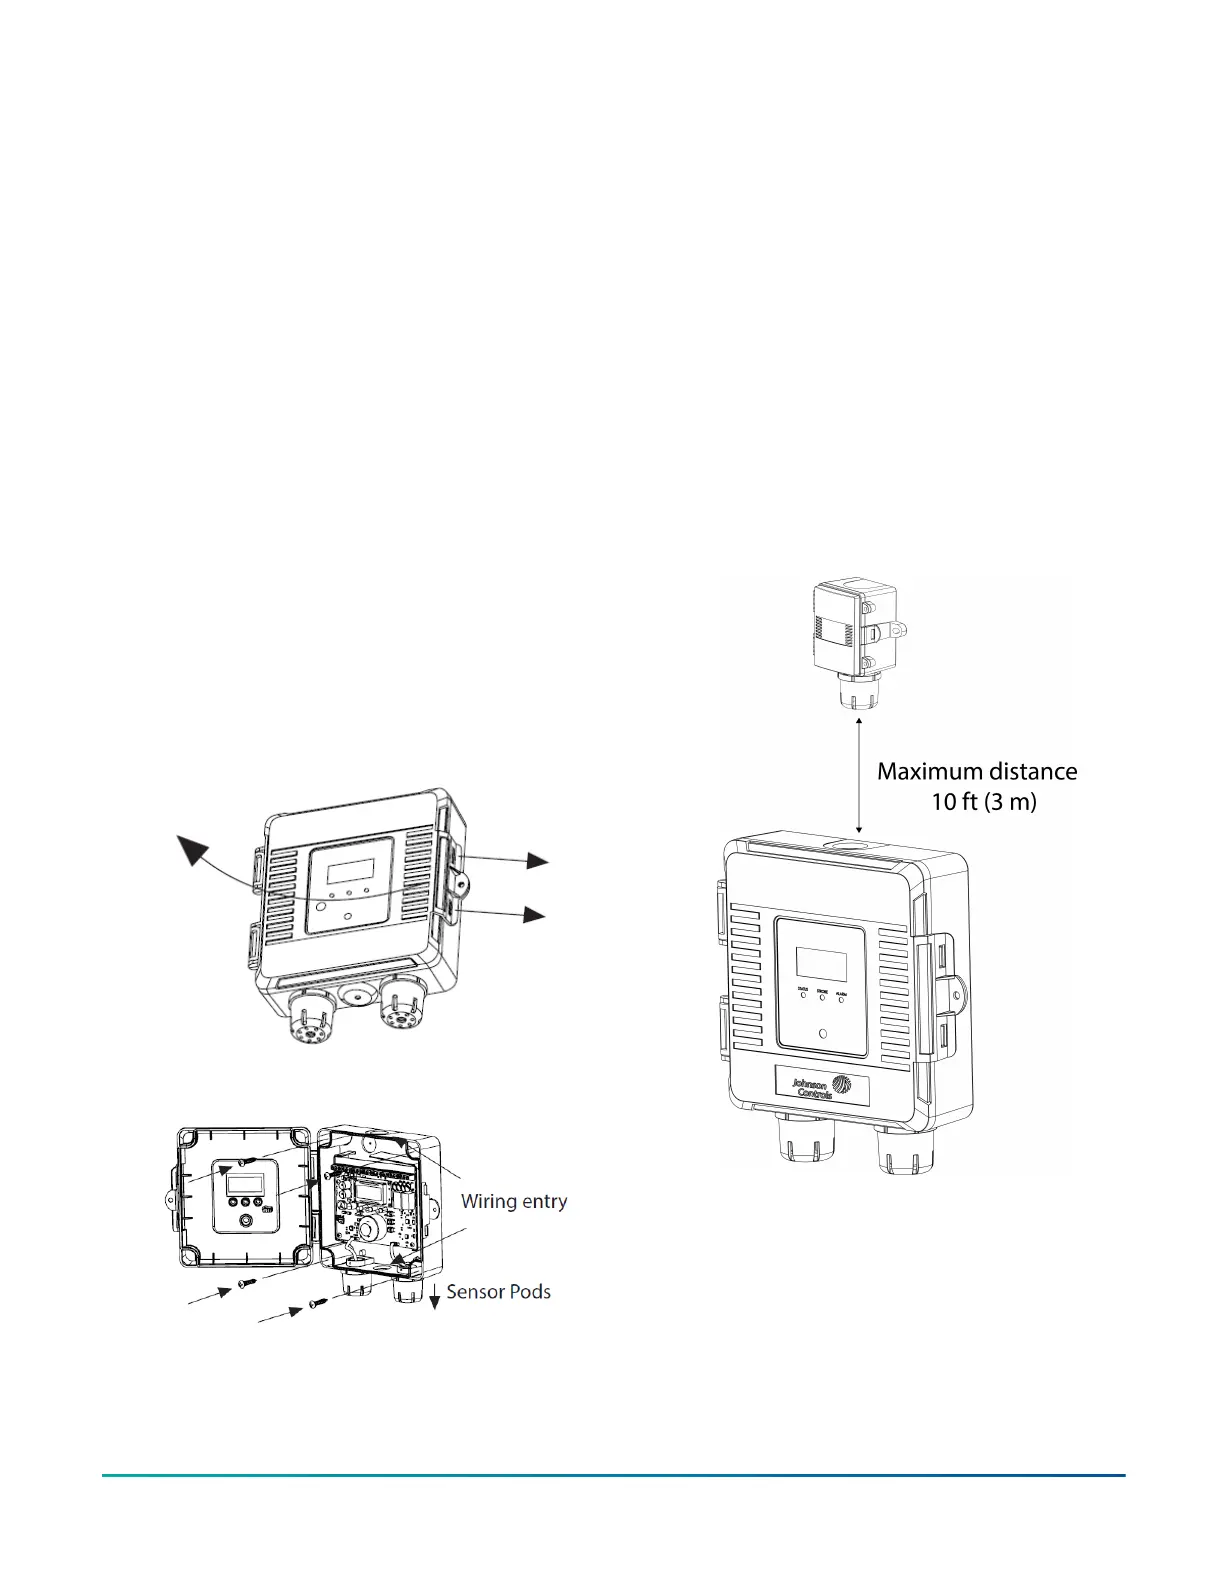
1. To open the cover, pull slightly on the latch on the
right side of the enclosure. See Figure 3.
2. To mount the device directly to a flat surface, use
the four integrated mounting holes provided on
each corner of the enclosure using screws, not
provided.
3. Ensure the sensor pods point downwards. See
Figure 3.
4. Route the installation wire through the top or
bottom hole and place the grommet in the unused
hole. See Figure 4 for locations of wiring holes.
5. To wire the connections, see Figure 9 and Figure 10.
6. When you complete the wiring and device setup,
close and latch the cover. The enclosure also
includes a hole for the use of an anti-tamper
device.
Figure 3: Opening the GS3000 Series sensor cover
Figure 4: Location of wiring holes
Remote NO
2
mounting
About this task:
Mount the remote NO
2
sensor within 10 ft (3 m) of the
main enclosure as shown in Figure 5. The enclosure has a
hinged cover with a latch.
1. Secure the enclosure to the selected section of wall
above the main enclosure with two no. 10 x 1 in. (25
mm) self-tapping screws, not provided.
2. Tighten the screws until the enclosure is tight
against the wall and ensure the enclosure does not
move. See Figure 6.
3. To open the cover, pull slightly on the latch on the
right side of the enclosure. At the same time, pull
on the cover.
4. To wire the connections, see Figure 12.
5. Close the door until it is securely latched. For
additional security, install the two provided screws
in the integrated screw tabs. See Figure 7.
Figure 5: Mounting the GS3000 Series NO
2
sensor
GS3000 Gas Detection Sensor Series Installation Guide2
 Loading...