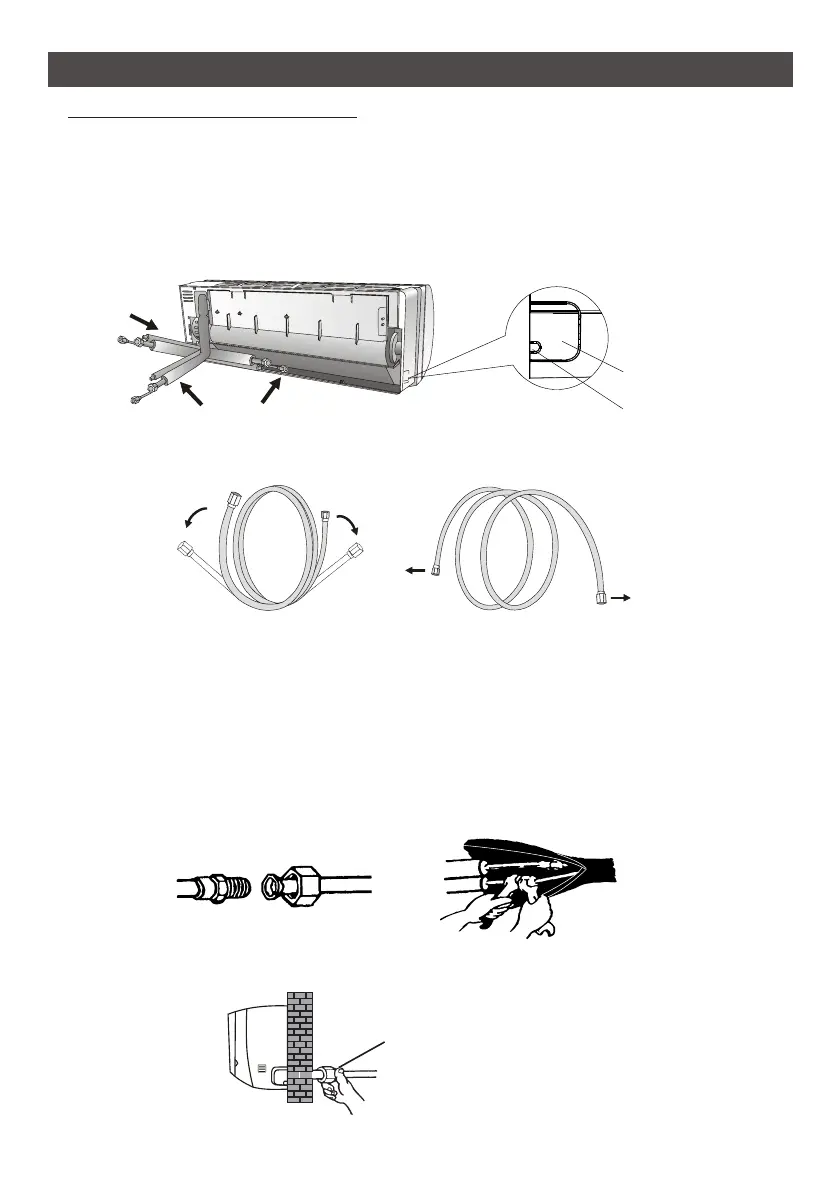
INDOOR UNIT INSTALLATION
4.1 According to the wall hole position, select the appropriate piping mode.
There are three optional piping modes for indoor units as shown in the figure below:
In Piping Mode 1 or Piping Mode 3, a notch should be made by using scissors to cut the plastic
sheet of piping outlet and cable outlet on the corresponding side of the indoor unit.
Note: When cutting off the plastic sheet at the outlet, the cut should be trimmed to smooth.
3
2
1
Piping outlet
Cable outlet
Step4: Connecting Refrigerant Pipe
4.2 Bending the connecting pipes with the port facing up as shown in the figure.
NO
YES
4.3 Take off the plastic cover in the pipe ports and take off the protective cover on the end of piping
connectors.
4.4
Check whether there is any sundry on the port of the connecting pipe and make ensure the port
is clean.
4.5 After align the center, rotate the nut of the connecting pipe to tighten the nut as tightly as possible
by hand.
4.6 Use a torque wrench to tighten it according to the torque values in the torque requirements table;
(Refer to the torque requirements table on section INSTALLATION PRECAUTIONS)
4.7 Wrap the joint with the insulation pipe.
Note: For R32 refrigerant, the connector should be placed outdoors.
The connector should be outdoor
OutdoorIndoor
24