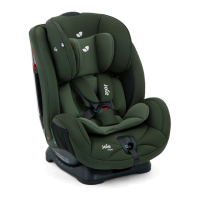
JUNIOR MODE
40
39
TODDLER MODE
Junior Mode
(Forward Facing Mode / for Child 15–25kg /
3–7 years old)
Reference age 3- 7 years old
Seat position Position 1-2 (with top triangle and red triangle aligned,
as Fig. 6.1)
1. Press the red button to disengage the buckle. (Fig. 16)
2. To remove the crotch pad, first locate the elastic on the inside of the
crotch pad. Pull both the elastic and the crotch pad over the buckle to
remove. (Fig. 28)
3. Remove the small child insert.
4. Detach the snaps (Fig. 29.1) and the velcros. (Fig. 29.2)
5. Lift the upper flap upward and pull the lower flap forward, and then store
the shoulder straps in their storage compartments. (Fig. 29.3)
6. Pull the buckle to the back of the seat pad, and then store the buckle
and buckle tongues in respective storage compartments.
(Fig. 29.4 & 29.5)
1. Just use the vehicle seat belt when installing the child restraint in the
junior mode﹐ do not use the small child insert﹐ shoulder straps or crotch
strap﹐ please store the shoulder straps﹐ buckle and buckle tongues in
respective storage compartments.
2. Please adjust the shoulder harnesses to proper length before store the
shoulder straps and buckle in their storage compartments. (Fig. 15)
3. Please adjust the child restraint to proper angle (2 positions for junior
mode). Angle indication: With top triangle and red triangle 1 and 2
aligned﹐ as Fig. 6.1﹐ Please refer to P. 34 (Recline Adjustment).
4. When installing and adjusting the safety belts﹐ make sure that both the
shoulder belt and the waist belt are not twisted and will not keep the
safety belts from being properly positioned.
Note
The assembled safety belt is shown as Fig. 25.
!
Shoulder belt passes through Lock-off Device, as Fig. 25.1.
!
Waist belt passes through the back slots, as Fig. 25.2.
!
The vehicle buckle tongue is engaged with the buckle correctly,
as Fig. 25.3.
ii. Securing your Child in the Child restraint
1. Pull up the webbing adjuster, while pulling the shoulder harnesses to
proper length. (Fig. 15)
Fig. 15.1 Webbing adjuster
2. Press the red button to disengage the buckle. (Fig. 16)
3. Leave the harnesses on the left side and right side of the seat. (Fig. 26)
4. Place the child in the child restraint and engage the buckle. (Fig. 19)
!
After the child is seated, recheck whether the shoulder harnesses are
at proper height, please refer to P. 34 (Height Adjustment for Head
support and Shoulder Harnesses).
5. Pull down the adjustment webbing and adjust it to the proper length so
that your child is snugly secured. (Fig. 27)
!
Make sure the space between the child and the shoulder harness is
about the thickness of one hand.
1. When installing the child restraint in the toddler mode﹐ do not use the
small child insert.
2. Please install the child restraint on the vehicle seat﹐ and then put the child
in the child restraint.
3. After the child is placed into the child restraint﹐ check whether the
shoulder harnesses are at proper height﹐ please refer to P. 34 (Height
Adjustment for Head support and Shoulder Harnesses).
Note

 Loading...