Selecting the right Template for your Project
Set up your CLINCHER and fence or CabinetMaker's System as described
earlier. All of the instructions for making joints with the CLINCHER use the
true-center zero
method which means that all fence settings are referenced
from the center of the router bit. Therefore, all cut lines on all CLINCHER
templates represent the exact center of the router bit.
Use high quality router bits for your joinery. The better bits will normally be
made to tighter tolerances and will cut cleaner. Diameter tolerance is VERY
critical when making box joints.
Getting Started
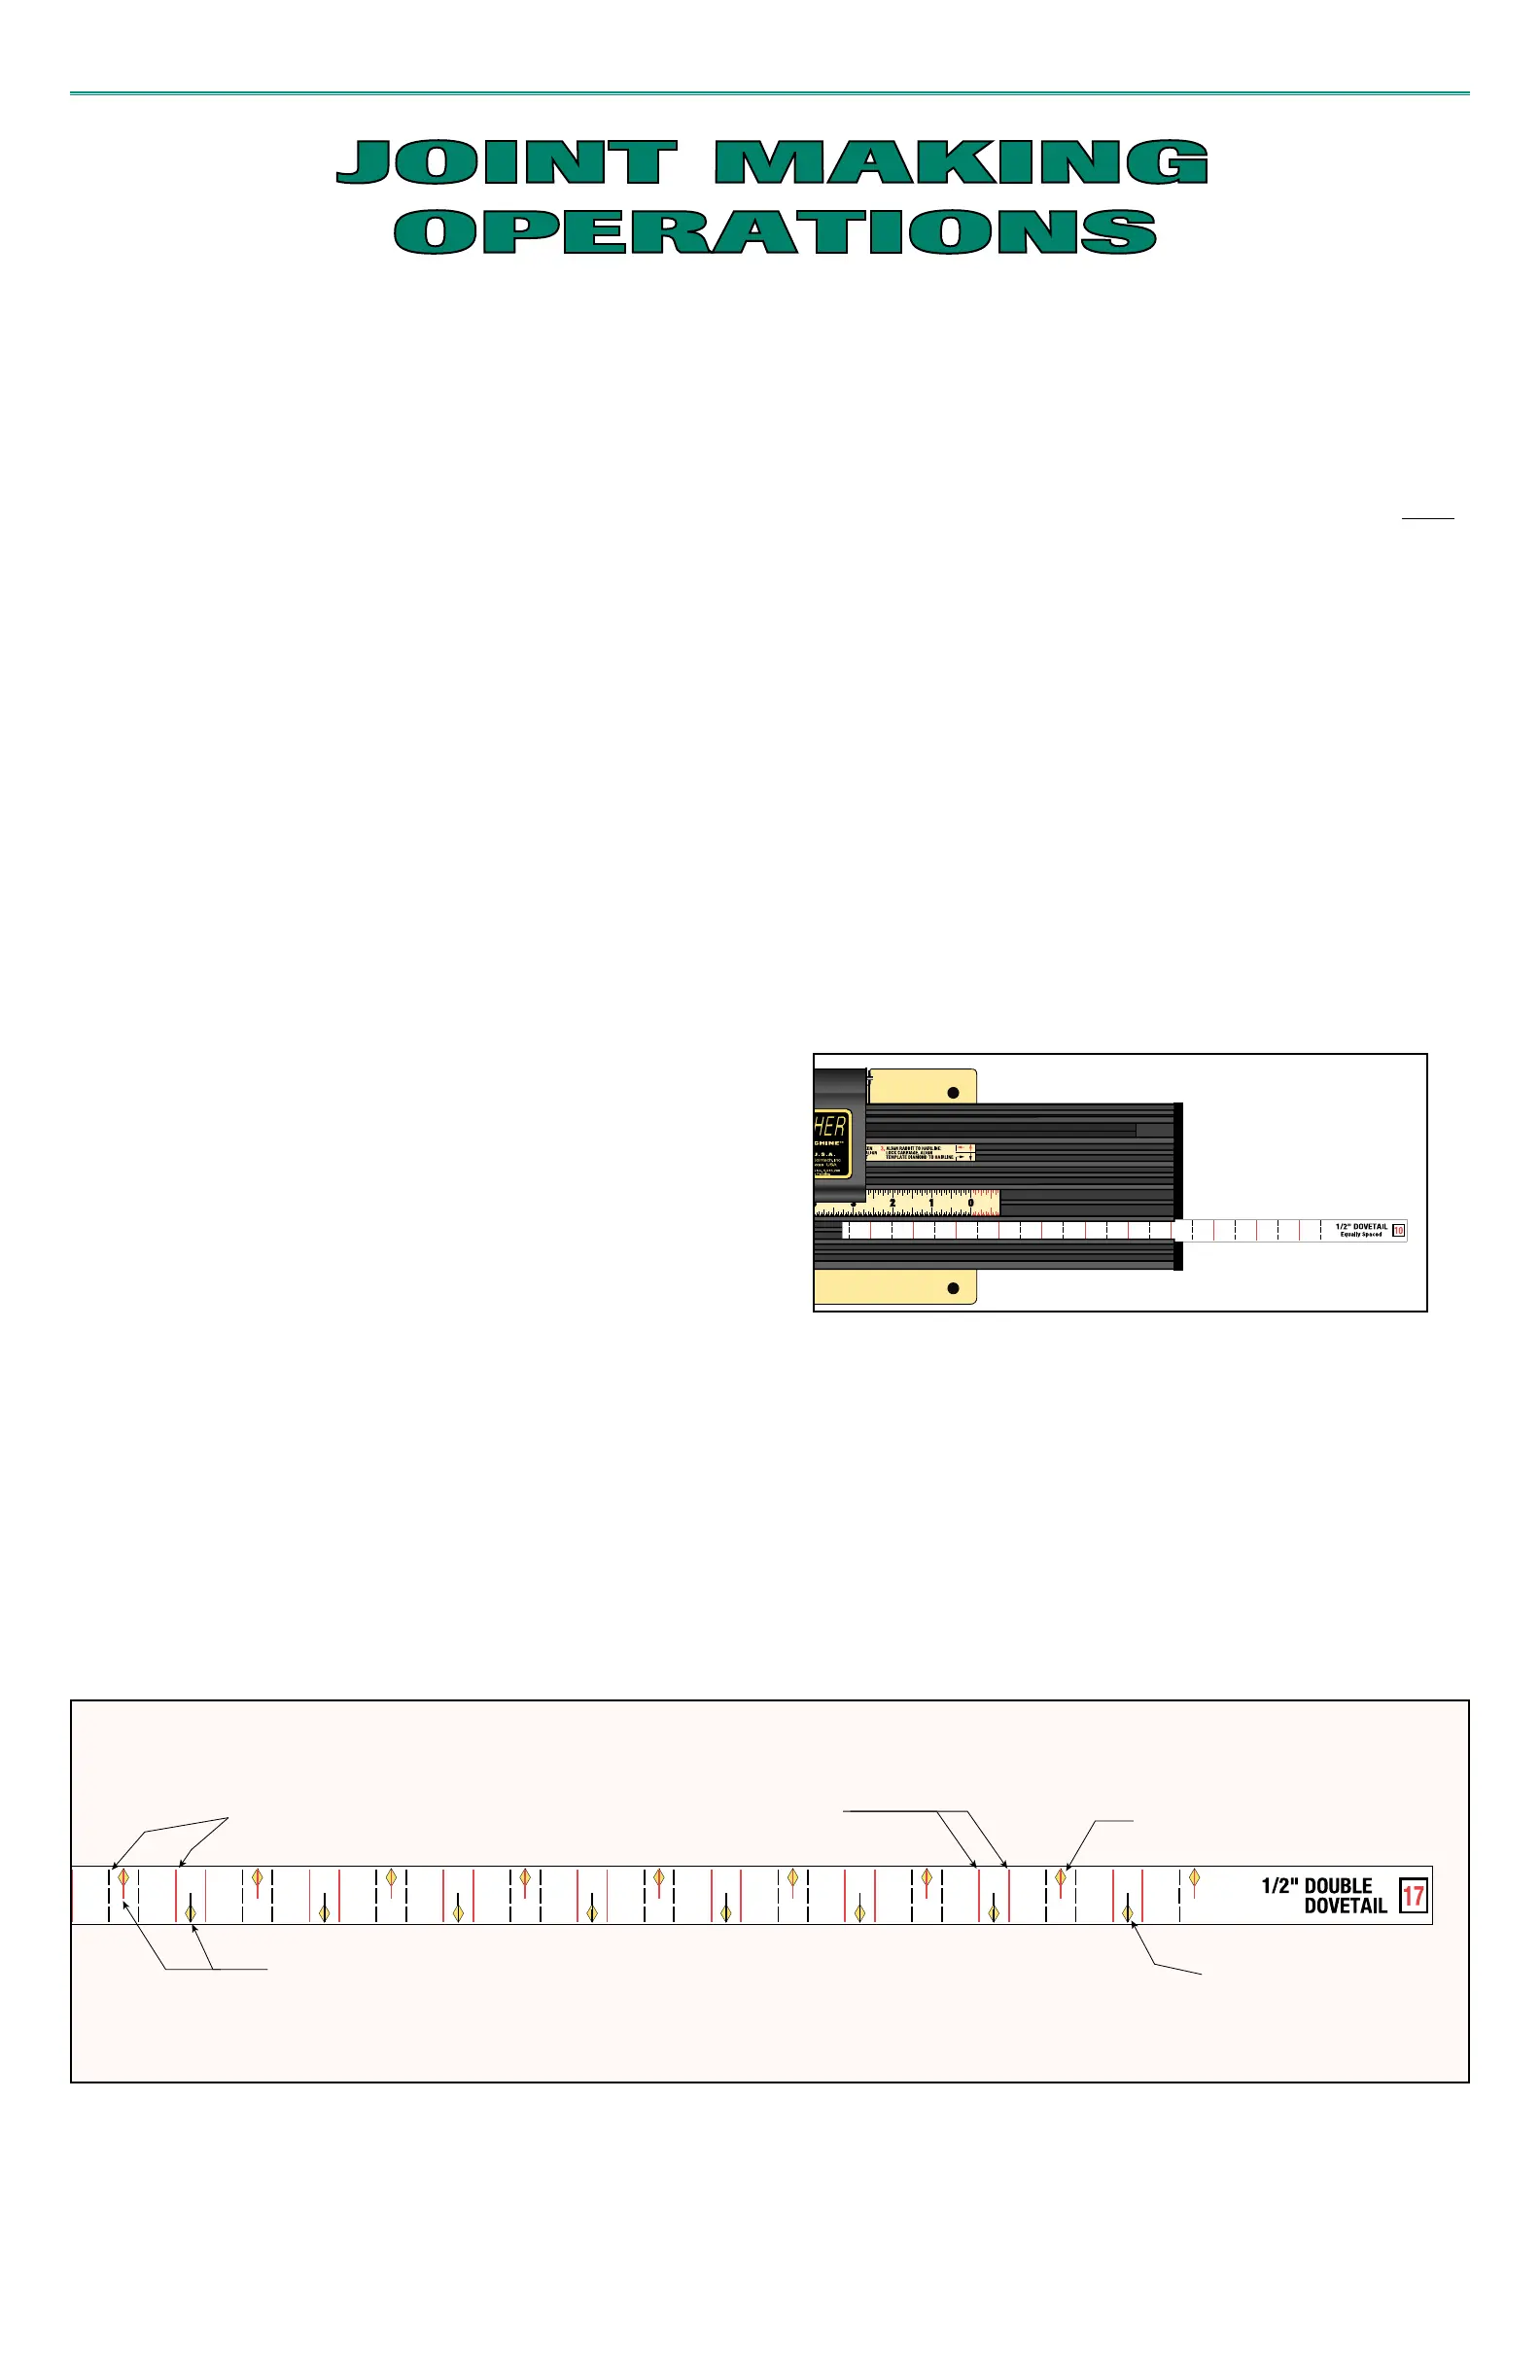
Templates slide into one of the auxiliary slots on CLINCHER carriage.
Carefully insert the selected template into slot at right end of CLINCHER.
Keep fingers close to machine end as you slide in template to prevent
bending or kinking. If you initially have difficulty inserting the template into a
slot, gently bow it between your fingers along its length. Once in the slot you
can move the template with finger pressure on its top. Its exact position will
be determined during the centering operation for symmetry.
Installing Clincher Templates
Using Clincher Templates
Once installed, making any joint is simply a matter of setting CLINCHER to
the pre-marked templates lines and making the cut. Templates for conven-
tional (non-inlay) dovetail and box joints use two series of pre-marked lines
for cuts; RED solid lines and BLACK dashed lines. The double-dovetail
patterns have four series of pre-marked lines while the double box joint and
the Boxtail™ patterns have six series of lines on one template. Except for
the
3
/
8"
Boxtail which requires two templates to complete its series of cuts,
Half Lines
(RED and BLACK, upper and lower) represent settings for making
the center (or inlay) sections in these decorative joints. The series of RED
or BLACK cut lines to use for the Pins and Tails can only be determined
by following the procedure in the next section
“Determine Pin and Tail
Cuts”
, on page 12.
The variably spaced and double inlay patterns which require cuts wider than
the router bit are accomplished by making successive passes with the cutter.
This is accomplished using side-by-side cut lines on these templates
Yellow diamonds on some templates are alignment marks which are used to
center your workpiece to achieve symmetry.
MAKING THE PERFECT JOINT
Once you have selected your project and the stock thickness has been
determined, select the type of joint that you want. Usually the design and
scale of your project, including the stock thickness and board widths to be
joined, will dictate the appropriate size router bit and type of joint to use.
For example, a small jewelry box would look better with small joints, perhaps
decorative, while a blanket chest made with much larger joints would have a
better appearance. Narrow workpieces would usually call for an equally
spaced pattern while with wide boards, variably spaced patterns might make
a better appearing joint. Each template in this book has a corresponding set
of full size plans for the joint which it produces to help you make your
selection. Each plan will show a diagram of the template, the joint that it will
make, plus other information such as pattern spacing, router bit diameter,
approximate settings for depth of cut, wall thickness of double-inlay patterns
and other notes to successfully complete the joint. Also listed is the metric
equivalent for all bit diameters which are available internationally. It is
suggested that you refer to the plan page before making final selection
because not all board widths may work well with your desired pattern. You
may have to revise your board width or change your template selection.
The decorative nature of double-inlay joints requires that certain board widths
be used in order to produce a finished joint that is both visually pleasing and
structurally sound. Unlike conventional joint patterns, the assignment of
template cut lines for all cuts have been predetermined for these board
widths. Charts on their respective plan pages will aid in selecting the board
width and corresponding symmetry mark for template alignment.
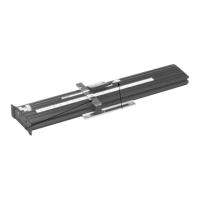
Full length cut lines used
for Pin and Tail cuts.
Side-by-side cut lines create
a cut wider than router bit.
Half lines used for making
center section cuts for
double inlay joints.
Upper symmetry diamond
(alignment mark).
Lower symmetry diamond
(alignment mark).
10