JOINT MAKING OPERATIONS
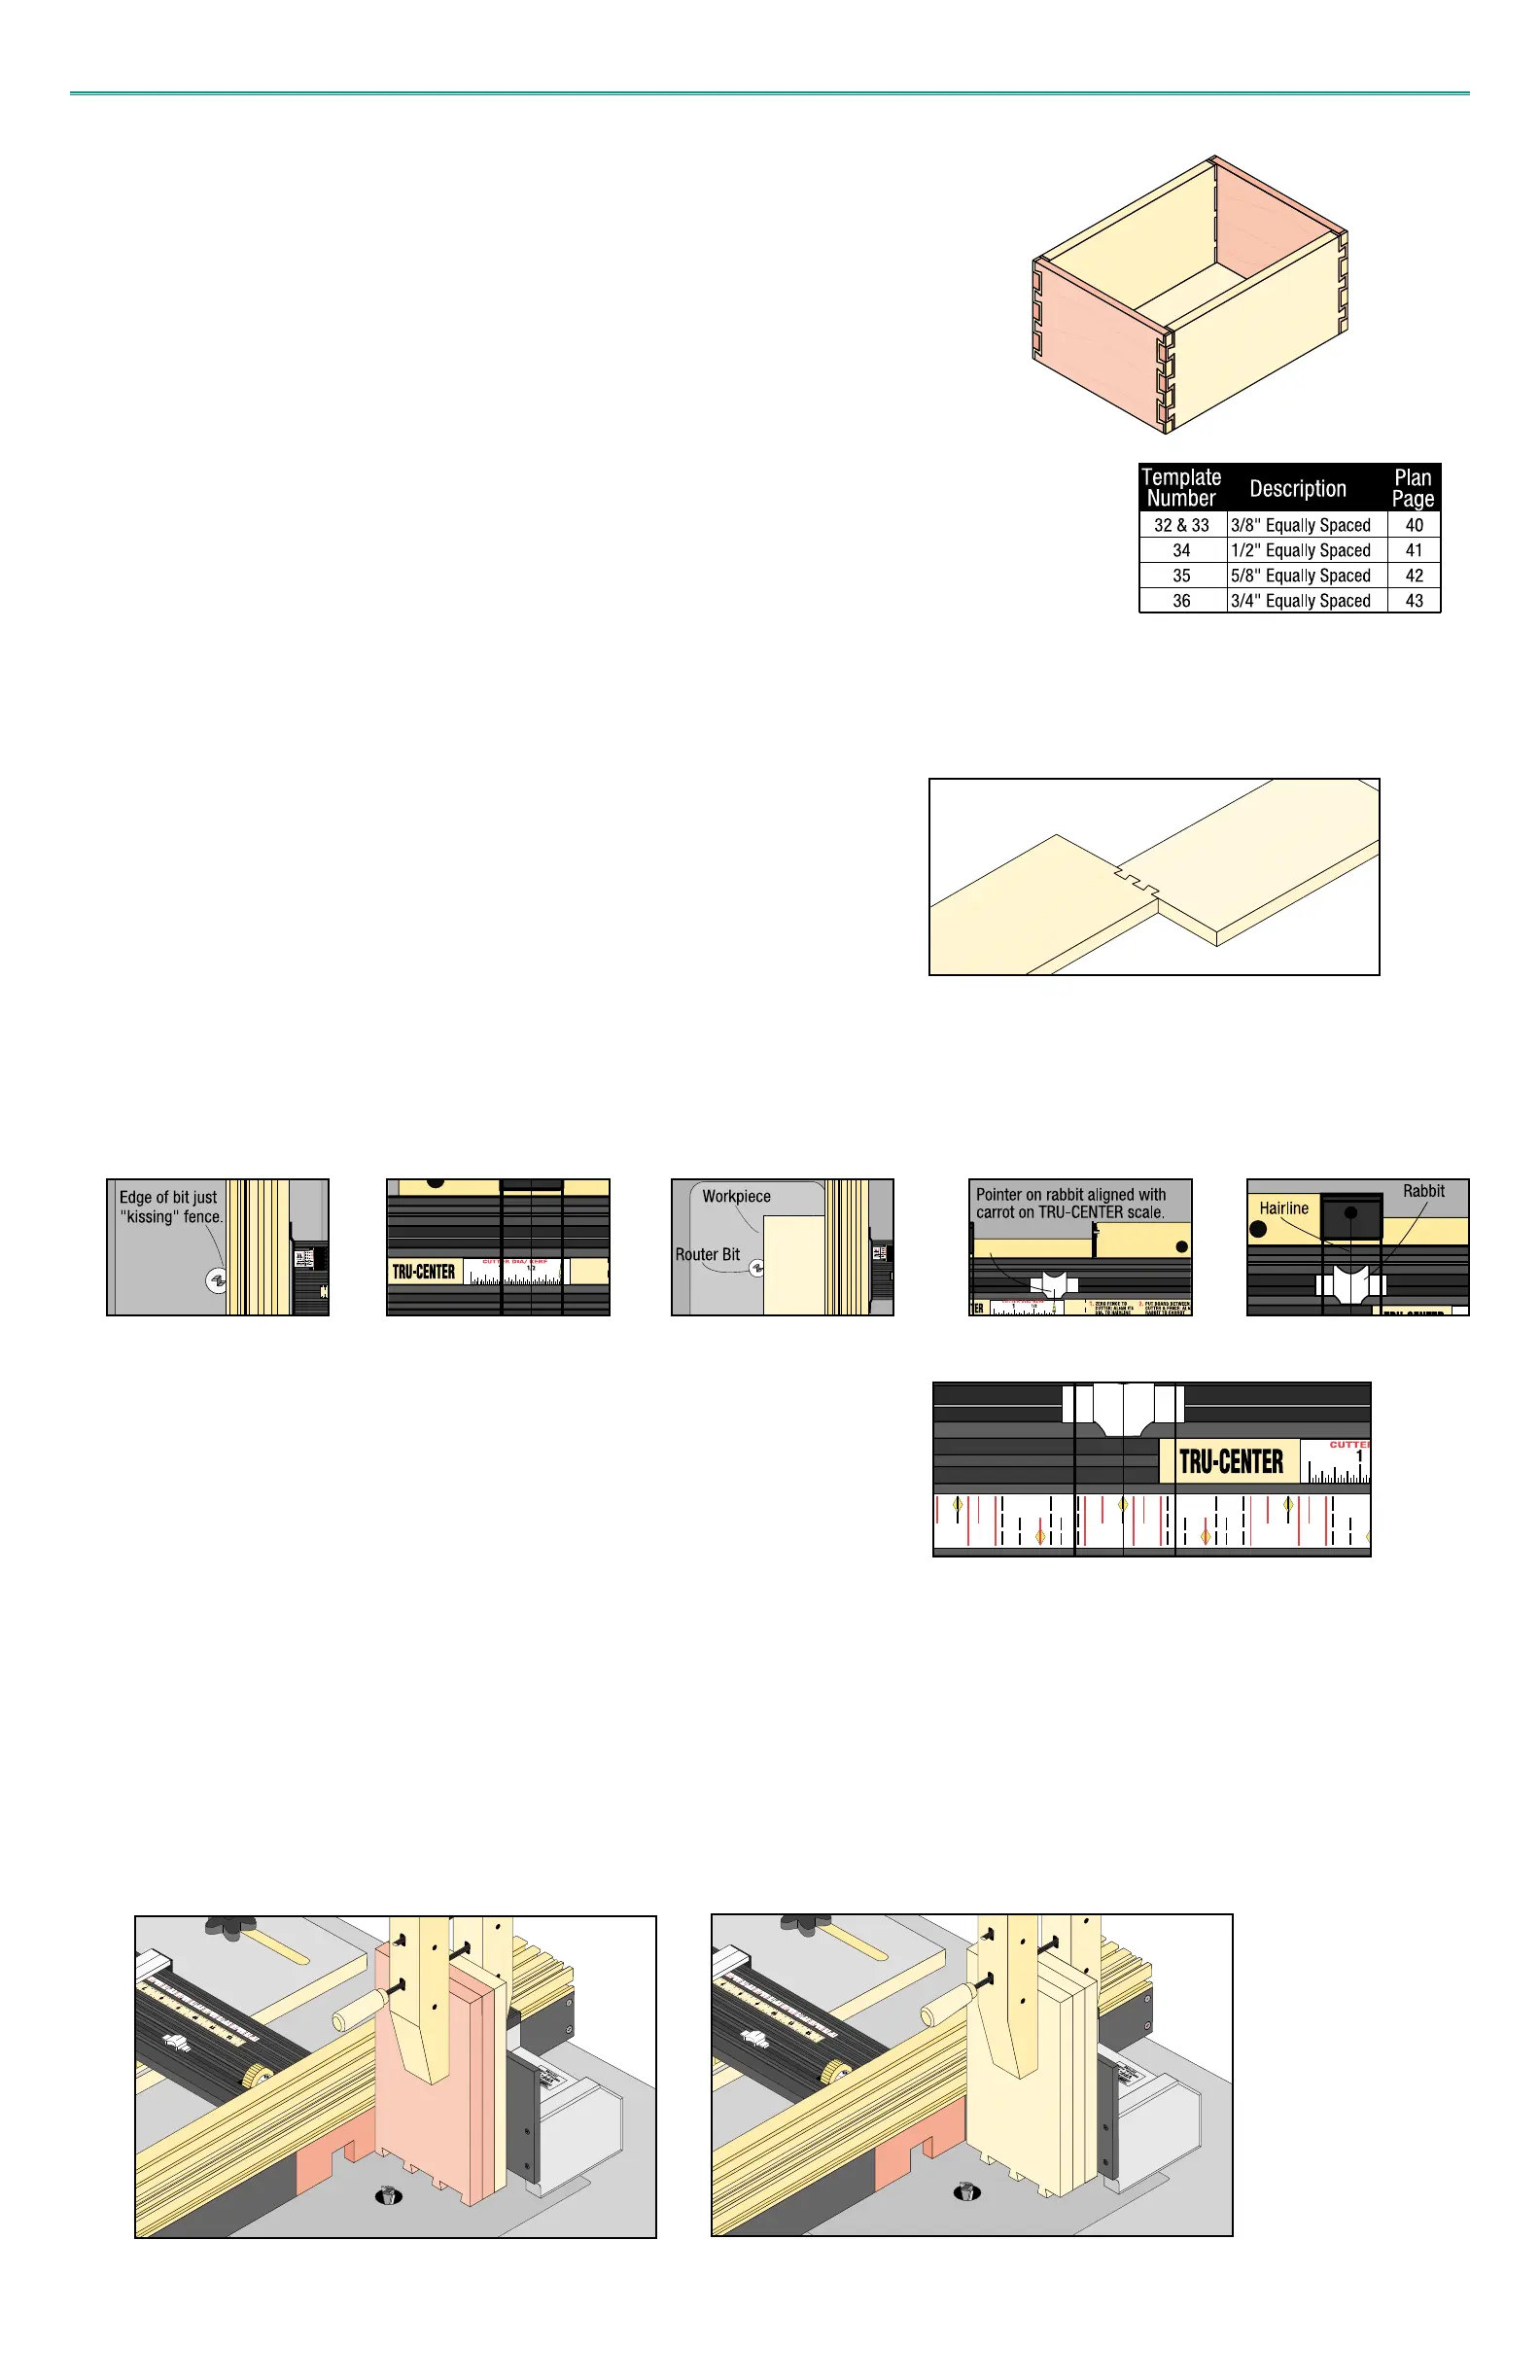
The Boxtail Joint is one of the more exotic appearing joints. Rather than dovetails only on
one side as with the Half Blind or Through Dovetail, the Boxtail has dovetails appearing
on both sides of its joint.
To make this joint the material thickness must be the same as the depth of cut. You must
either plane the stock to the depth of cut as determined by the fit of the joint or rabbet the
stock in the joint area to get the proper thickness.
Though is appears difficult it is deceptively easy to make. The steps are very similar to
the Double-Double Box Joint. The only difference is the use of a dovetail bit for the four
series of dovetail cuts followed by a straight bit for the final two series of cuts.
The depth
of cut is the same for both the dovetail bit and the straight bit.
BOXTAIL JOINTS
1. Select Stock Width
The decorative nature of the Boxtail Joint requires that certain stock widths be used in
order to produce a finished joint that is both visually pleasing and structurally sound. On
the full-size plan for each template pattern, there is a chart to help you select your stock
width and its corresponding symmetry mark. The selection of a stock width from this
chart then determines which series of cut lines will be used for the pin, tail and the two
middle section cuts. For example, if a lower symmetry mark is called for from your
selected stock width, any lower yellow diamond on template is a symmetry mark for
alignment to cursor.
If an upper symmetry mark is called for, any upper yellow diamond
on template can be used.
Note:
The 3/8” Boxtail requires two templates to complete all series of cuts.
Use template No. 32 (A) for all dovetail cuts.
2. Set Depth of Cut
Find the depth of cut for your dovetail bit following the instructions in the
previous section on Half Blind Dovetails.
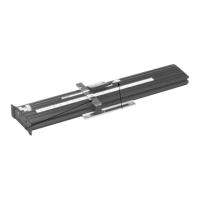
3. Center Board for Symmetry
Use the CLINCHER
Rabbit
and the TRU-CENTER scale to center the bit on your
workpiece following the instructions in the earlier Section on Making The Perfect Joint.
After finding center, lock carriage and install the selected template. Take one of your
workpieces and place a small pencil mark at its center on one end. You can do this by
placing it against the fence and up close to the bit.
4. Align Template
With Carriage locked and
Rabbit
still aligned to cursor, adjust the template in its slot until
one of the
symmetry
marks (upper or lower as pre-determined in step 1 from the
template’s Symmetry Chart) is in alignment with the cursor hairline. Be sure that there
will be enough cut lines to the left and right of cursor to make all the cuts over your board
width. You can quickly verify this by making a comparison of the center mark on your
board to the template and its position under cursor.
5. Making the Pins and Tails -
Dovetail Cuts
(Remember to include the middle-section wall thickness in length of boards)
Clamp your pin boards to the VPF with a backing board as shown. The backing board will
prevent splintering as the bit exits the cut. Install a stop block of fence to limit the travel of
the VPF to prevent damage to the fixture. Make the series of pin cuts. Flip the boards end
for end and repeat the same cuts. Now clamp the tail boards with a backing board to the
VPF and make its series of cuts on both ends. Note: The first cut on the tail board will be
an open cut meaning that you will be cutting away the edge of the board adjacent to the
fence. To prevent this first cut from splintering, make the cut in several small side by side
passes.
1. 2. 3.
5.
4.
22