48 - English
Repair Instructions
Replacing the heating element in the
rear handle
1
Remove the cylinder cover. Loosen the screw on
the left hand side of the rear handle and dismantle
the handle insert with the attached cables. See
Figure 11.
2
Fit the new handle insert with the heating element
and run the cabling through the handle out through
the openings in the front handle. . Connect the
cable and t the:
• Cable bracket with cabling
• Power switch
• Cover
• Cylinder cover
• Tighten the screw for the earth cable.
Fig 11
Replacing the front handle
1
Dismantle the following parts:
• Clutch cover
• Bar and chain
• Cylinder cover
2
Loosen the screws F and remove the front handle.
3
Fit the new handle and run the cabling through
the openings and tighten the screws F. Tightening
torque 3-4 Nm. Connect the cabling and t the
following parts:
• Cable bracket with cabling
• Power switch
• Cover
• Cylinder cover
• Tighten the screw for the earth cable.
• Bar and chain
• Clutch cover
F
F
Fig 12
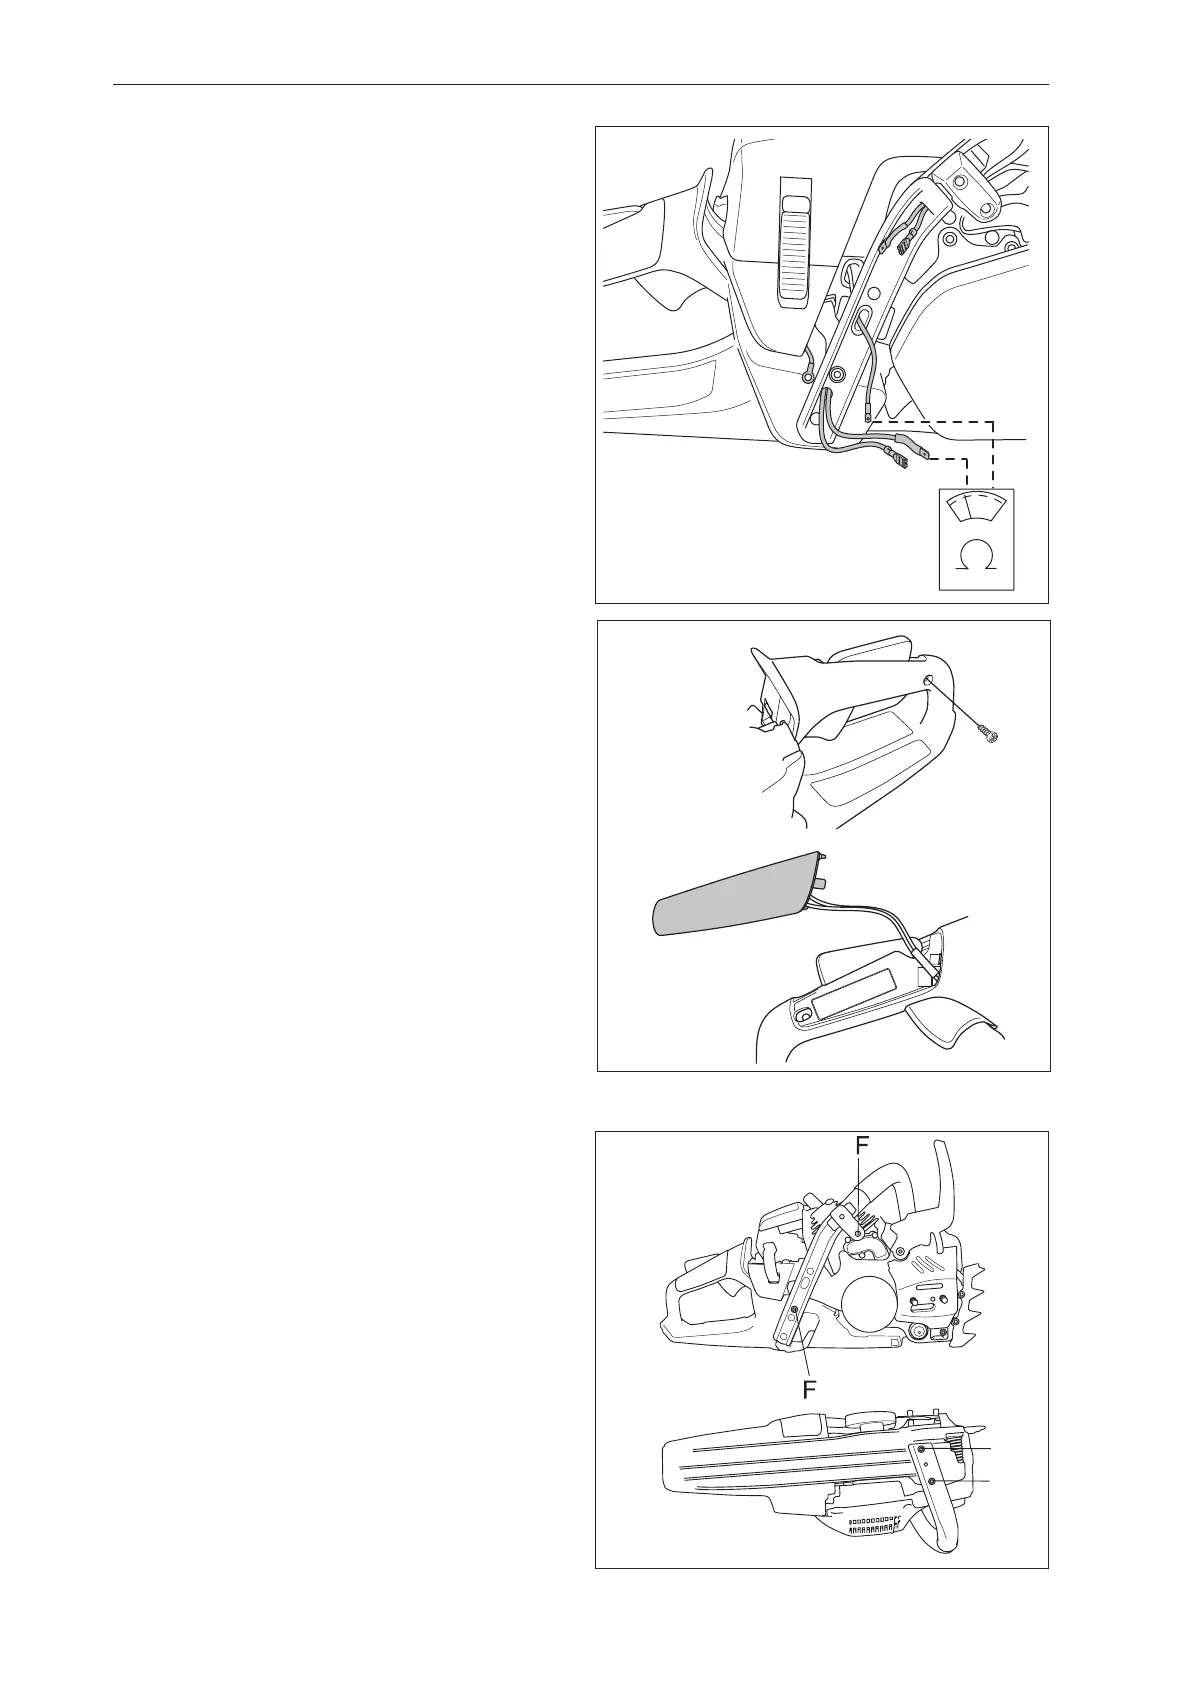
Troubleshooting the carburettor’s heating ele-
ment and thermostat
10
Connect the multimeter as outlined in Figure 10.
The measurement should be carried out at normal
room temperature (20°C/68°F) and should indicate
in that case 0 A.
Cool the thermostat for instance with a coolant
spray or a similar agent. The ammeter should then
have a reading of 0.5 A.
Replace the heating element and the thermostat if
you get another reading.
Fig 10
 Loading...