12
USER GUIDE HOTTAP
13
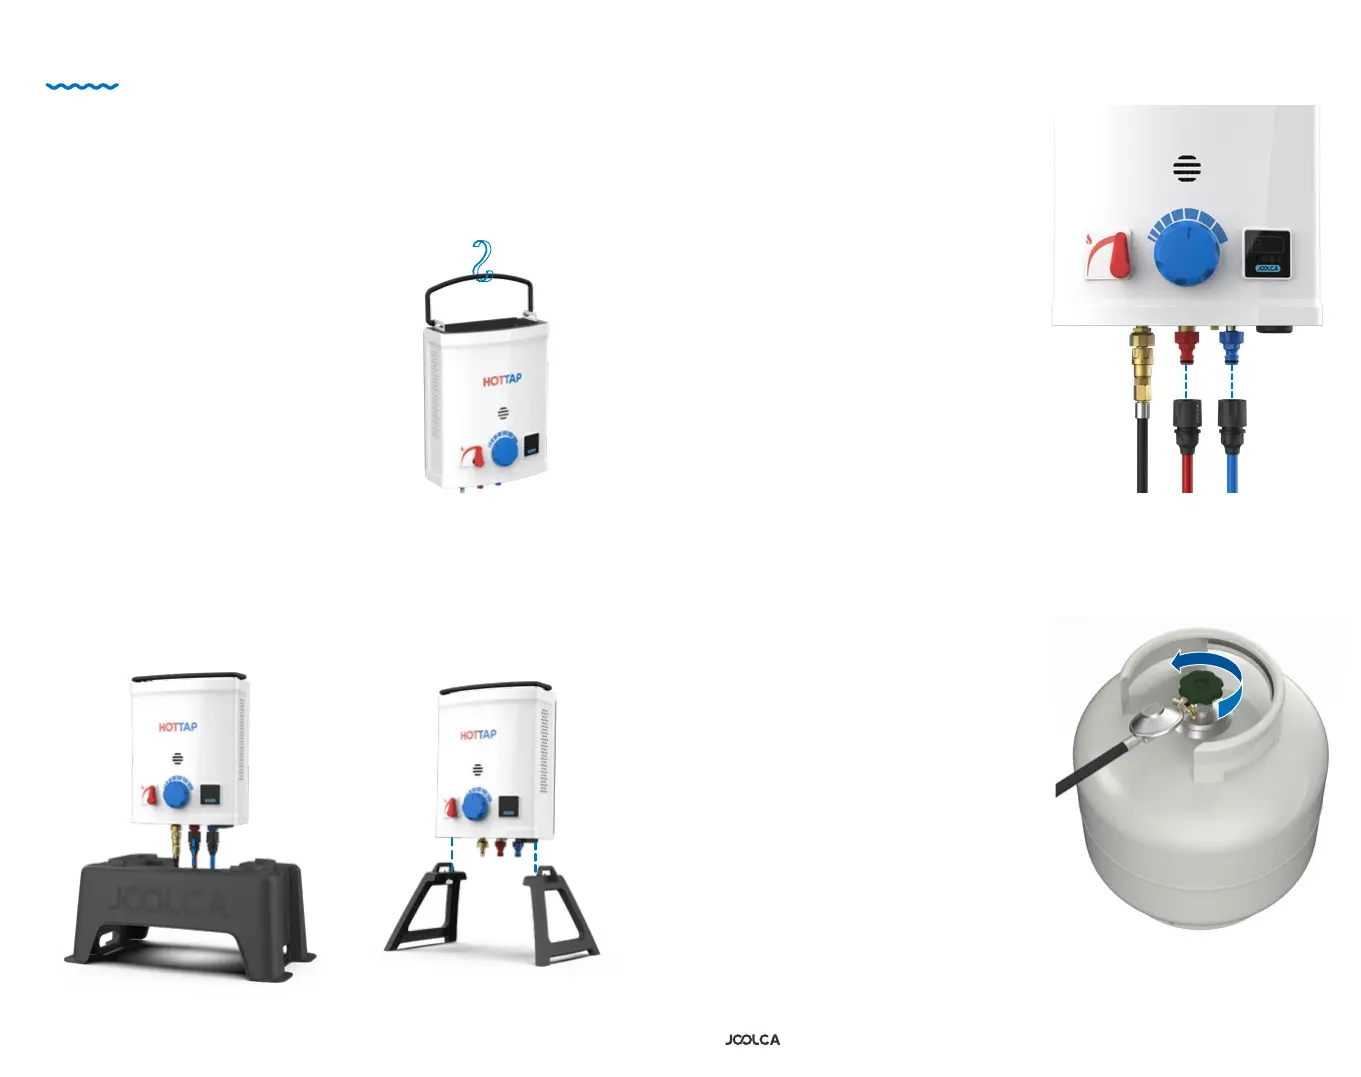
3.a. Heavy-duty stand
Connect all hoses (see
point 4.) and place unit
into the heavy-duty stand.
3.b. Hang the Hottap on a
suitable vertical surface
3. When mounting your
Hottap, please ensure
that there is sucient
clearance from people
and combustible
materials: at least
1,000mm from the top,
600mm at the rear and
at least 500mm from the
sides and front of the unit.
Depending on what
particular Hottap kit you
own, you may mount it in
one of three ways:
3.c. Lightweight legs
Fasten the lightweight
feet with the captive
thumb screws.
4. Attach the red shower
hose to the red quick-
connect tting.
Connect the blue hose to
your water source and to
the blue quick-connect
tting on the Hottap.
Attach the GasKnect brass
tting to the gas inlet.
5. Connect the regulator to the
gas cylinder. Open the gas
cylinder by twisting the valve
knob in an anti-clockwise
direction one full turn.
Check the entire gas line for
leaks by coating the hose and
connection points with soapy
water. Do not use a ame. If
bubbles are formed or you
can hear a leak, turn o the
gas at the cylinder. Tighten all
connections and test again.
Once you have determined
that there are no leaks, the
appliance is ready to use.
Turn the gas o.
Setting up Hottap