"0.8".
●
●
, , , 。
● :
● , 。
● 。
●
。
● , 。
● , 。
● ( )。
● “ ”
●
●
●
●
●
●
●
●
"0.8".
2.0 mm
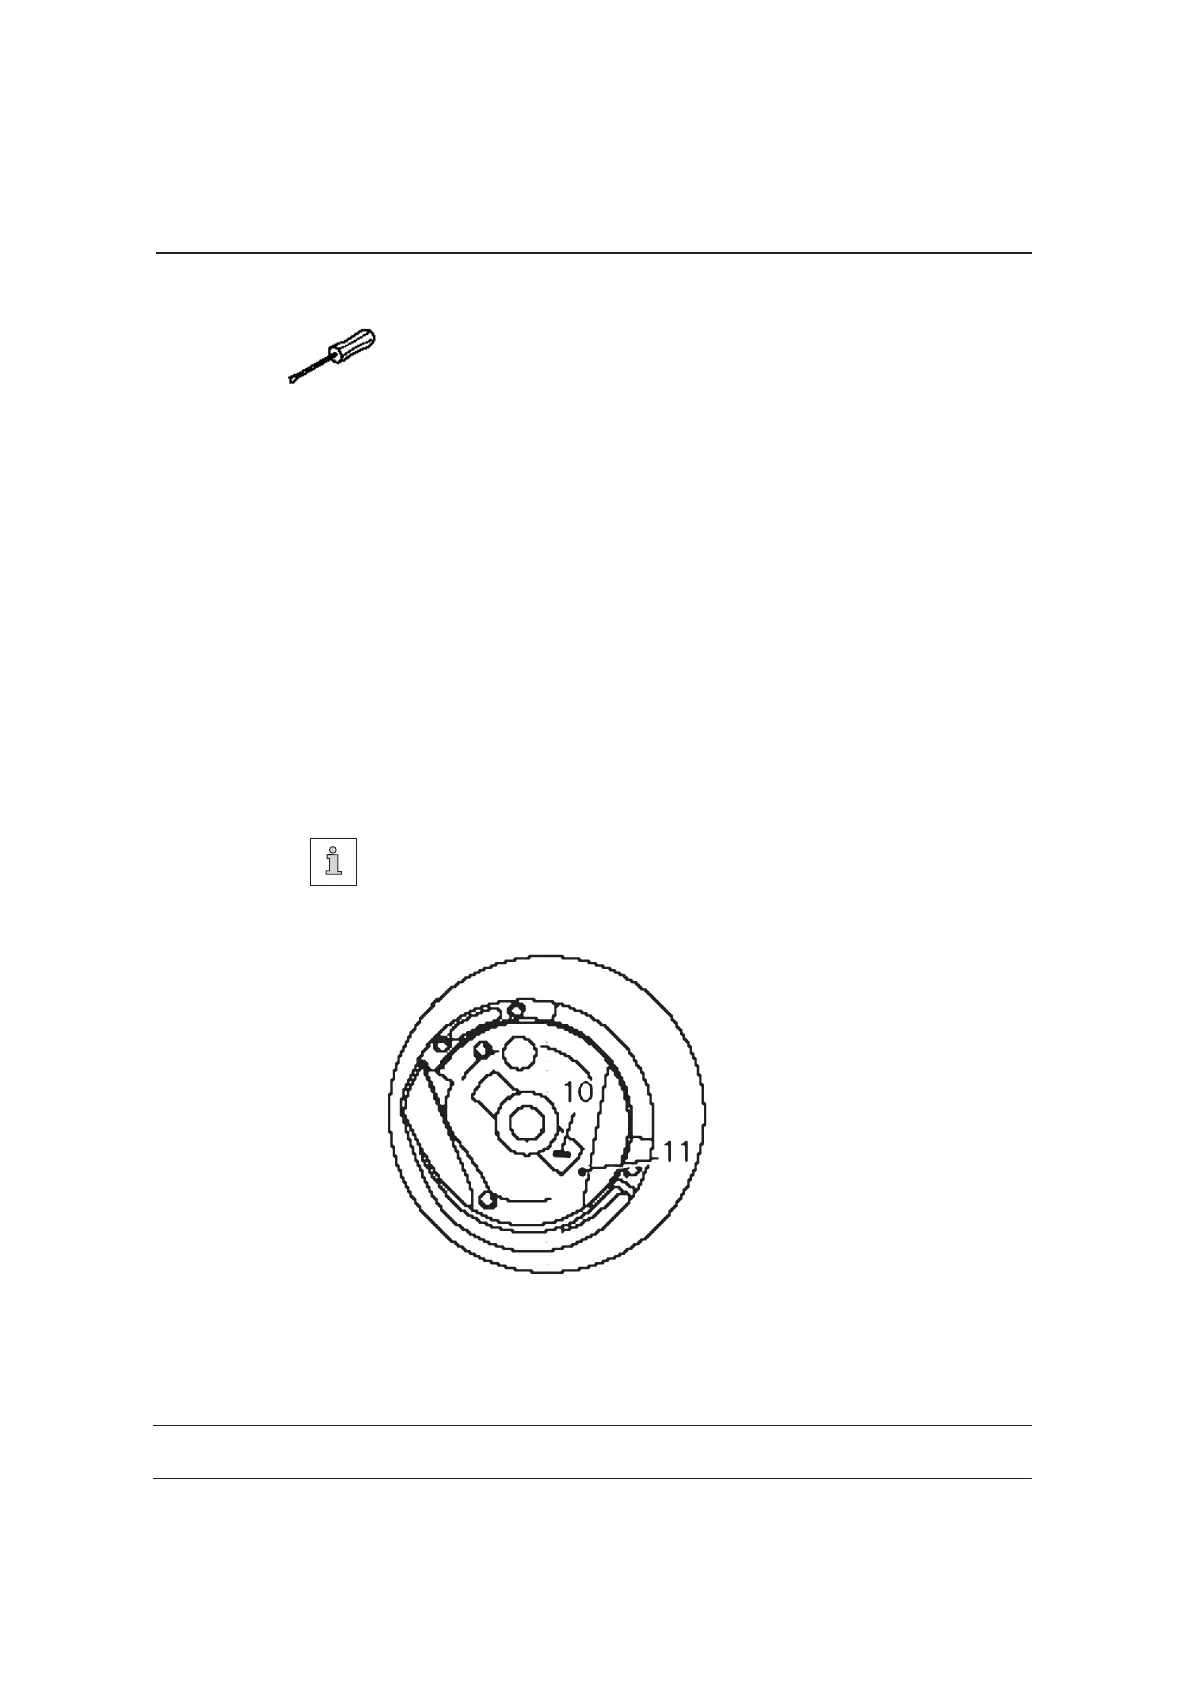
Set stitch length at 0.8 .
Loosen screw , , , and .
Bring needle bar to past bottom dead centre.
Set hook point at needle centre, making sure that the needle is not
deflected by needle guard .
Adjust needle height according to .
Adjust hook post according to and tighten screw .
Making sure that there is some play in the bevel gear, tighten screws .
With retaining collar tourching bevel gear tighten screws .
Adjust needle guard (screw ) according to .
1 2 3 4 5
6
2
1 4
2
7 8 1
3 6 9
1 2 3 4 5
2.0 mm
6
Requirement 2
Requirement 1 4
2
7 8 1
6 9 Requirement 3
both on one side.
Adjustment
Contents
1.01 Housing sections …………………………………………………………………………1-1
1.02 Needle head parts ………………………………………………………………………1-2
1.03 Arm parts …………………………………………………………………………………1-7
1.04 Bedplate parts …………………………………………………………………………1-10
2.01 Hook post, left(9620、 9625)…… … ……… ……… … ……… ………… ……… 2-1
2.02 Hook post, right(9610、 9620、 9630)… … … … … … … … … … … … … … … … 2-3
2.03 Feed wheel post(9610、9630)………………………………………………………2-5
2.04 Feed wheel mounting plate(9625)……………………………………………………2-6
3 Thread trimmer(-D, 9630)………………………………………………………………3-1
4.01 Automatic presser foot lifter(-D3)……………………………………………………4-
1
4.02 Automatic presser foot lifter(9630)…………………………………………………4-2
5.01 Presser foot(-D3)…………………………………………………………………………5-1
5.02 Backtacking mechanism(9630)………………… ………………………………… …5-2
5.03 Bcaktacking mechanism(-D3)……………………………………………………………5-3
5.04 Bcaktacking mechanism(9630)………………… ………………………………… …5-4
5.05 Bcaktacking mechanism(9625-D3、 9620-D3)… … … … … … … … … … … … … 5-5
5.06 Bcaktacking mechanism(9630)… … … ^… … … … … … … … … … … … … … … … 5-6
5.07 Bcaktacking mechanism(9610-D3)… … … … …… … … … … … … … … … …… … … 5-7
6 Peneumatic equipment………………………………………………………………………6-1
7 V-belt…………………………………………………………………………………………7-1
8 Knee lifter parts……………………………………………………………………………7-1
9 Reel stands……………………………………………………………………………………9-1
10 Parts for table top…………………………………………………………………………9-1
11.01 Set-point generator and control box(Electric control 1)……………………11-1
11.02 Cable tree to sewing head (Electric control 1)………………………………11-2
11.03 Built-in motor (Electric control 1)……………………………………………11-3
11.04 Synchronizer(Electnic control 1)…………………………………………………11-4
12.01 Set-point generator and control box (Electric control 2)…………………12-1
12.02 Electric control 2……………………………………………………………………12-2
12.03 Built-in motor(Electric controt 2)………………………………………………12-3
13.01 Gauge parts………………………………………………………………………………13-1
13.02 Gauge parts………………………………………………………………………………13-2
13.03 Gauge parts………………………………………………………………………………13-3
9630 Parts List
9.03.09 9610 9630
Needle position crosswise to sewing direnction on the
9610 9630
、
、
,。
Requirement
As seen crosswise to the sewing direction, the needle must penetrate in
the centre of the needle hole.
● , 。
●
( )1 2 3 4
1 2, 3 4
Requirement.
Adjust feed wheel post (screws and ) according to the
9-13
Adjustment
9.05.06
Bevel gear play ( )
( 9610 9630 ) 、
、on the 9610 9630
9-50
Adjustment
, 。
, 。
1. 6 7
2. 6 8
Requirement
6
7
6 8
1. when sewing forwards, there must be a slight play between bevel gear
and .
2. When sewing backwards, there must be a slight play between bevel
gear and .
1
1 2 3
1
2 4 5
1
2 3 Requirement 1
1
4 5 Requirement 2
●
。
● ()。
●
( )。
● ()。
● ( )。
●
●
●
●
●
/
Disconnect air supply of the air filter/lubricator.
Move unit by hand as far as possible to the right (see arrow).
Adjust screw (nut ) according to .
Move unit by hand as far as possible to the left (see arrow).
Adjust screw (nut ) according to .
19 0* 260
6 12
Zj 96 10、9620、9625、9630
08 .0 4.2
 Loading...