10 JUDO QUICKSOFT-DUO
Installation
The flange surface of the built-in rotary
flange must be in a vertical position! The
built-in rotary flange must be fitted so that
mechanical stresses cannot occur! Other-
wise mechanical damage can result in the
built-in rotary flange. This can result in major
water damage.
In this case, people close to the softener are
exposed to a health risk due to the large
quantities of water.
Therefore, during installation, ensure that no
large forces act on the pipe, built-in rotary
flange and softener.
4.1.5 Fitting the wall support
For further information, please refer to the
installation instructions for the wall support.
4.1.6 Assembling the softener
without a bypass valve
– At first flush the pipe with the newly
installed bypass valve (JQE) and shut off
the water supply.
– After flushing the water pipe take off the
assembly cover of the built-in rotary
flange.
The connection flange of the softener is
covered by a white protective disc. This pro-
tective disc is fastened with four cylinder
head screws M6x25.
– Loosen all four cylinder head screws
M6x25, but don’t remove them (bayonet
fixture)!
– Remove the white protective disc.
Do not grasp into the connection flange
of the device after removing the white
protective disc (danger of violent pres-
sure)!
The section of the profiled flange gasket
must point towards the built-in rotary flange.
Failure to observe this can lead to leaks and
water escaping. This can in turn cause water
damage to the house and its installations.
– Lift up the softener and swivel it through
approx. 30° in an anti-clockwise direction.
– Position it on the bulit-in rotary flange so
that the screw heads pass through the
bayonet fixing drill holes (see Fig. 7 I).
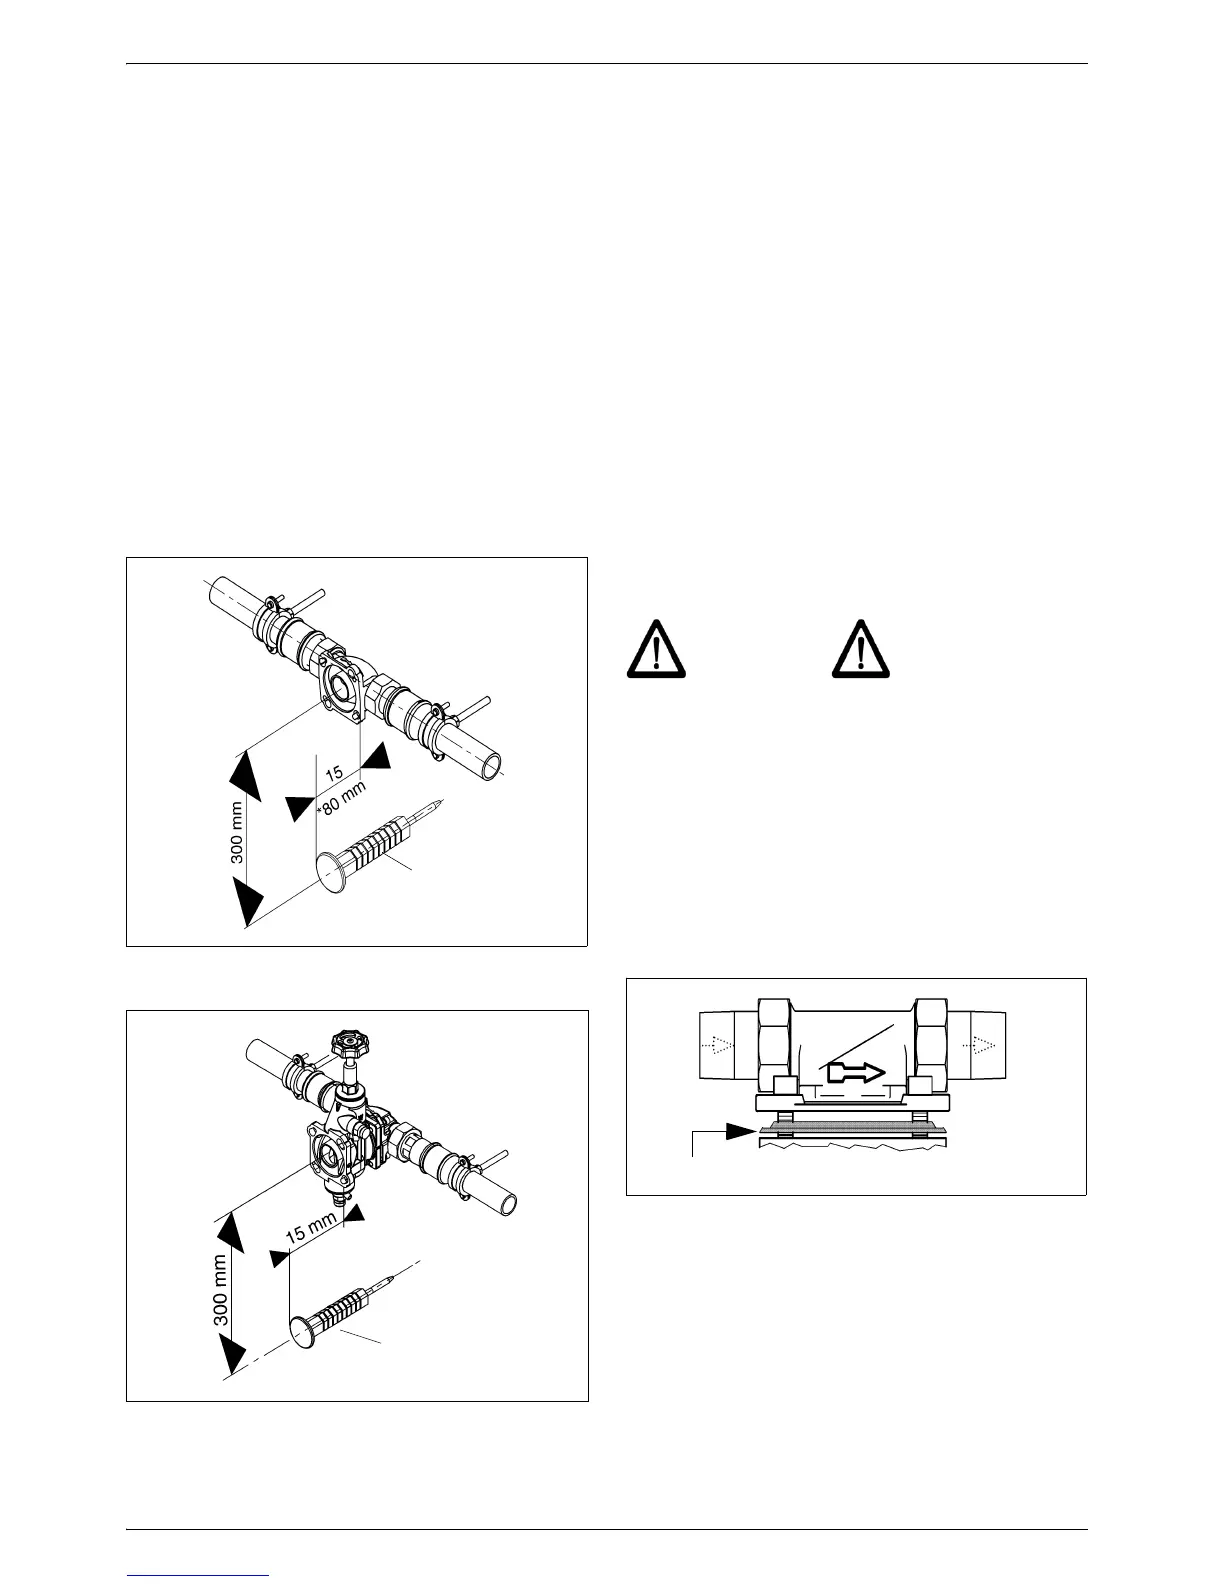
Fig. 4: Wall support without bypass valve
* If a JQX is to be installed.
Fig. 5: Wall support with bypass valve