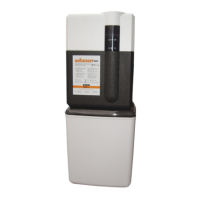
JUDO QUICKSOFT-DUO 11
Installation
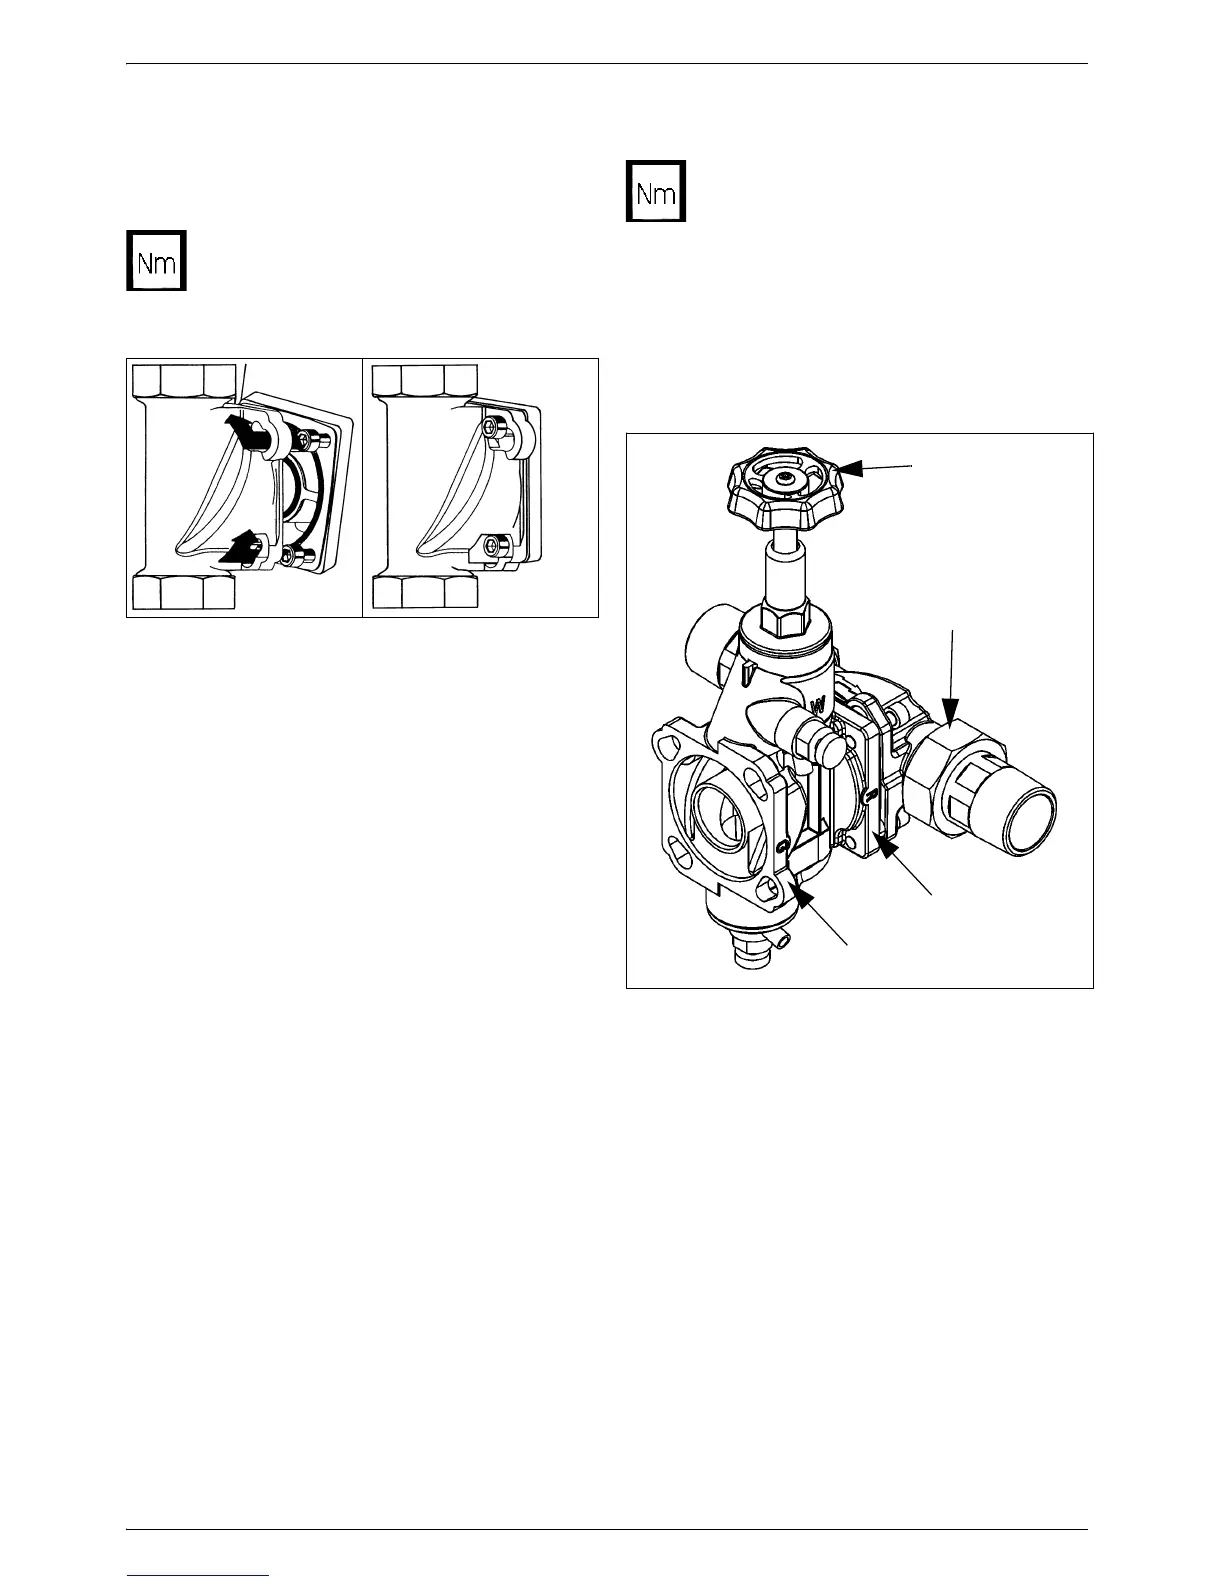
– Swivel the softener through approx. 30°
back in a clockwise direction.
– Tighten the four cylinder head screws
M6x25 (see Fig. 7 II).
After assembling the softener unscrew the
wall support so far that it rests against the
softener casing and the softener hangs
vertically to the wall.
4.1.7 Assembling the bypass valve
(accessories)
By assembling a bypass valve between the
built-in rotary flange and the softener a
bypass piping becomes redundant.
– At first flush the pipe with the newly
installed bypass valve (JQE) and shut off
the water supply.
– After flushing the water pipe take off the
assembly cover of the built-in rotary
flange.
– Connect the bypass valve on the flange
side with the cast in letter "R" (pipe
flange) to the built-in rotary flange by
engaging the bayonet fitting (see fig. 8).
– Tighten the four cylinder head screws
M6x25.
The hand-wheel of the bypass valve can be
positioned anywhere above the unit or to the
side. Depending on conditions on site,
installation should be carried out ensuring
sufficient access to the hand-wheel.
Select the torque (approx. 4 Nm) so
that the gasket closes and the
softener is not damaged or strained!
Fig. 7: Built-in rotary flange with bayonet fixture