13
JBP-SCRMBLR-MANUAL |
©
2021 JUICED BIKES
12
JBP-SCRMBLR-MANUAL |
©
2021 JUICED BIKES
Visually inspect your shipping box and the e-bike to see that
everything arrived without shipping issues. Take pictures if you
suspect excessive rough handling and contact us at Support.
JuicedBikes.com
Watch our assembly videos and feel free to invite a handy friend.
Call us with any assembly quesons or contact us at Support.
JuicedBikes.com and we can send you more specic informaon.
We oen generate new user guides based on the feedback we
receive from our customers.
Charge the baery pack. See “Charging the Baery Pack” on
page 31.
NOTICE
Use caution when opening the bike box. Do not cut into the box as it can damage the
bike and cabling. When removing the bike from the box, be aware of moving or loose
pieces. Inspect your box for any remaining items and keep it for a couple of days.
NOTICE
The kickstand is designed to support the e-bike only. Do not sit on the e-bike with
the kickstand engaged. Sitting on the e-bike with the kickstand engaged could result
in damaged to the kickstand.
NOTICE
The front wheel must be inspected before every ride to ensure it is securely attached
to the bike. Failure to test that the front wheel is properly secured could result in
signicant injury or even death.
3 ASSEMBLY
INSTALLING THE FRONT WHEEL
(CITYSCRAMBLER / MAG WHEEL)
There are rotang and moving parts in this assembly. Be sure the
bike is in a safe locaon and secured. The baery can be removed
for easier handling.
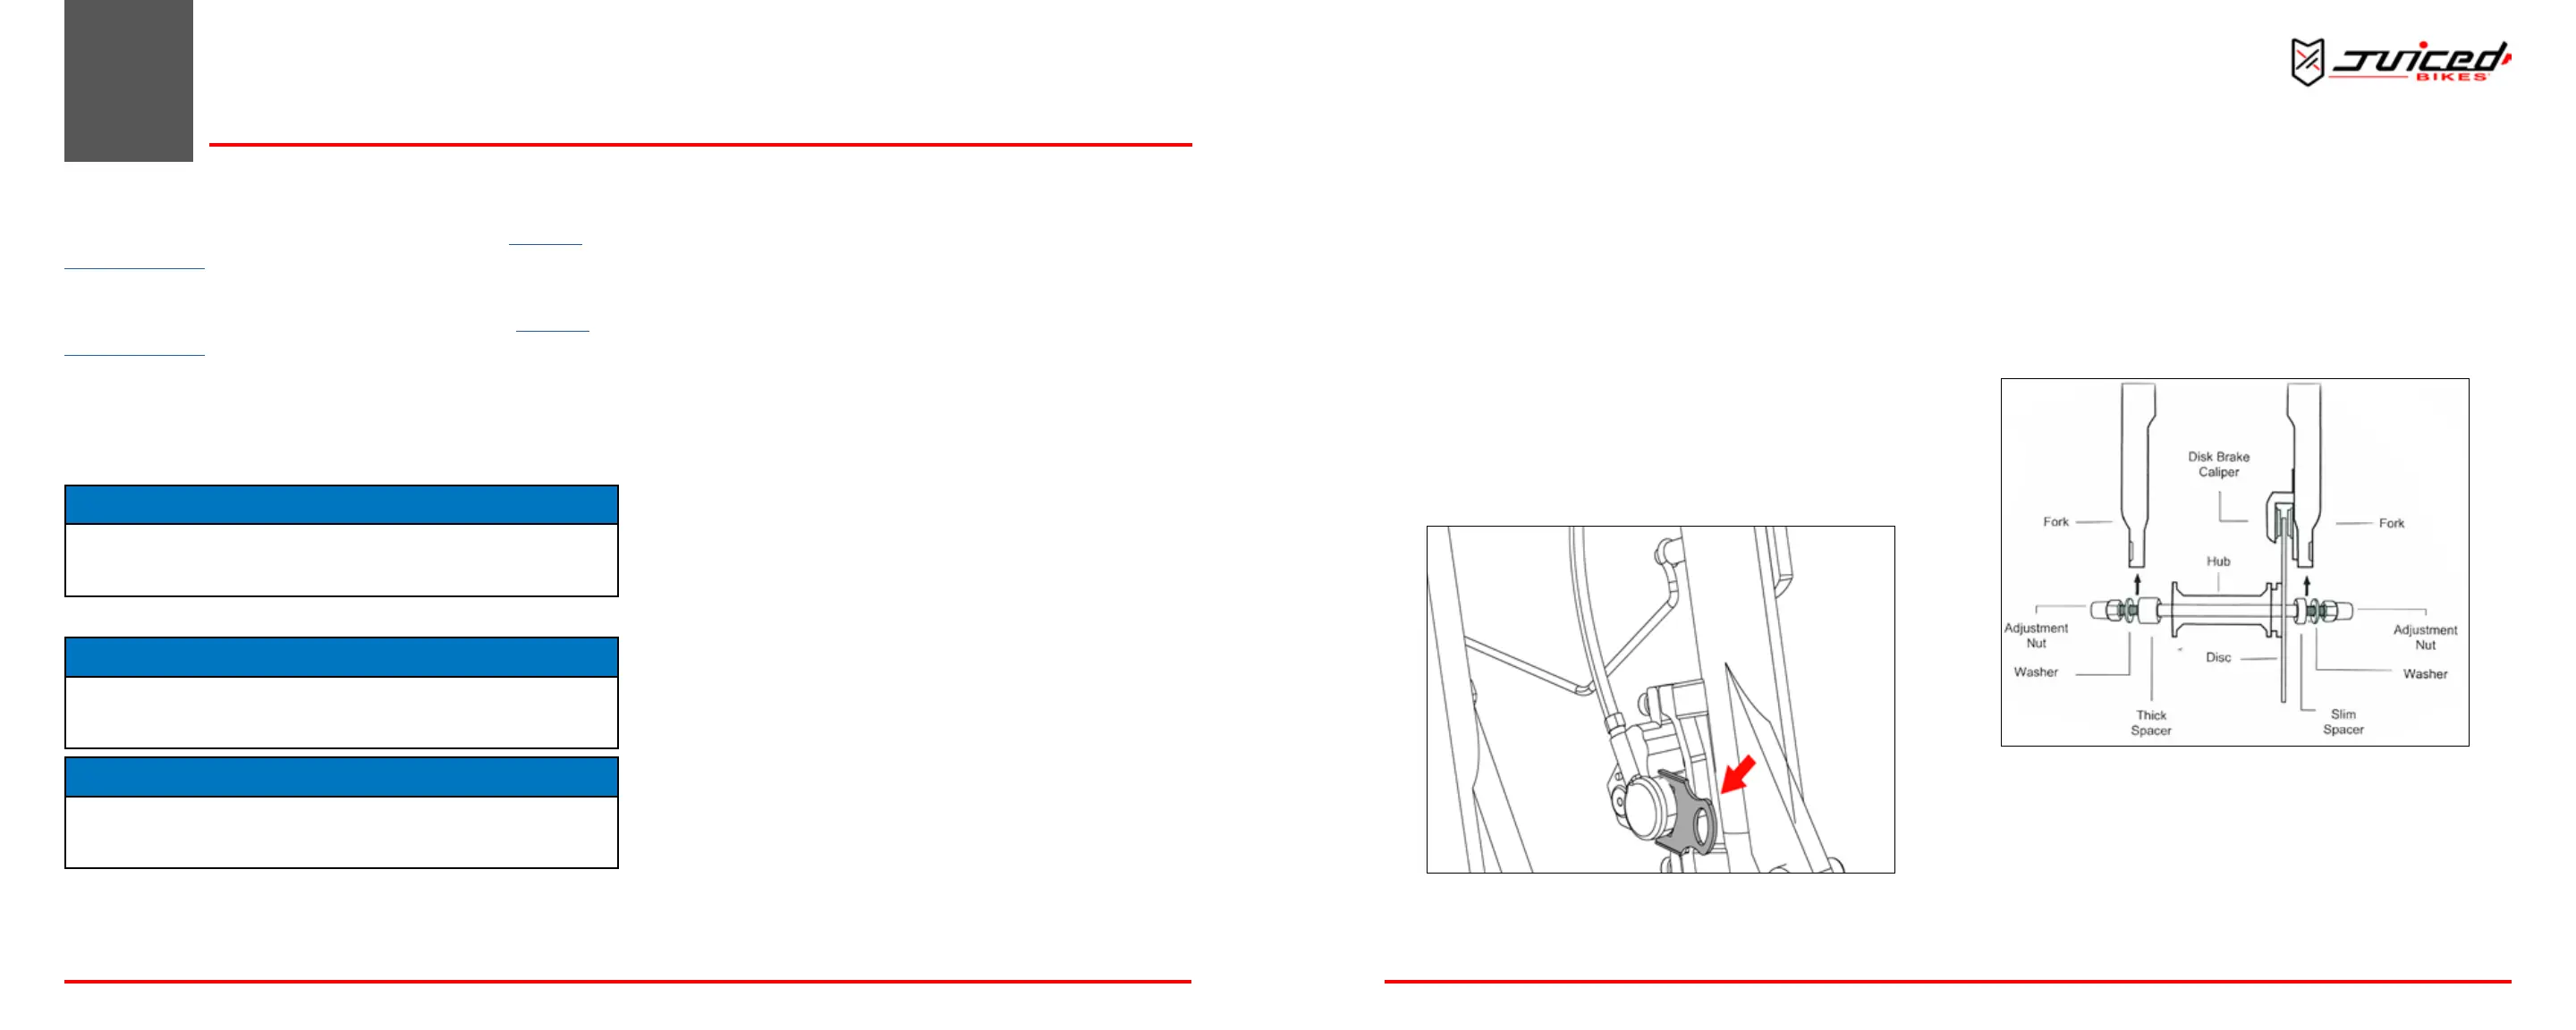
Remove the shipping spacer, bolt and nut from the front wheel
fork.
1. Remove the spacer between the front disc brake caliper.
Do not squeeze the front brake handle. Squeezing the front
brake handle will cause the pads to move and it may be
dicult to posion the front brake disc within the pads.
Fig. 9 -
Removing Shipping Spacer
2. Insert the axle into the front wheel hub. Posion the wide
spacer (chain drive side) and slim spacer (disc brake side)
on the axle. Insert the front wheel in between the forks
while posioning the front brake disc in the brake caliper.
Spacers must be in between the forks. The disk rotors are
sharo, take precauon while working with or close to them.
Visit a local mechanic for help with assembly if needed.
3. Place a washer onto the axle on the outside of the forks.
Fig. 10 - Installing the Front Wheel
4. Install and hand-ghten the two adjustment nuts equally.
Use the supplied 15 mm socket and 15 mm wrench to
nish ghtening the adjustment nuts, being sure each nut
is ghtened equally on both sides.
5. The adjustment nuts must be very ght; be sure to
reghten them aer your rst two rides.
ASSEMBLY