Do you have a question about the Juiced Bikes SCORPION 2021 and is the answer not in the manual?
Perform mechanical checks, tire inflation, and brake tests.
Obey traffic laws, ride defensively, and be aware of surroundings.
Requires specific skills, safety gear, and awareness of terrain.
Reduce speed and be cautious due to impaired visibility and traction.
Increased danger; wear reflective clothing and follow local laws.
E-bike limitations and increased injury risk.
Stability, avoiding wet conditions, and weather precautions.
Key safety advice including helmets, visibility, and rules.
Overview of e-bike components: motor, battery, controller, throttle.
Describes the rear-wheel motor that propels the bike.
How to use the gear shifter for optimal pedaling cadence.
Explanation of brake function and motor cut-off feature.
Details on the battery pack's protective fuses.
Location and function of the USB port on the handlebar.
Information on the e-bike's battery charger.
Step-by-step guide for installing the front wheel on mag wheel bikes.
Step-by-step guide for installing the front wheel on spoke wheel bikes.
Instructions for correctly installing the handlebars.
Guidance on identifying and attaching the left and right pedals.
How to adjust fork and rear shock settings for a personalized ride.
Recommendations for the first ride, including pedal assist settings.
Essential pre-ride checks for safe operation.
Proper technique for using brakes and their motor cut-off function.
Guidance on selecting gears for different riding conditions.
Explanation of the pedelec system and its sensors.
Steps to turn on and select pedal assist levels.
How to use the throttle for speed control.
Interpreting the battery level indicator on the LCD display.
Factors affecting range and tips to increase it.
Description of the buttons on the advanced matrix display.
Explanation of the metrics shown on the main display.
Procedures for powering the e-bike on and off.
How to increase or decrease pedal assist levels.
How to control the headlight and display backlight.
Using walk mode for assisted pushing.
How to activate and use the cruise control feature.
Key details and limitations of cruise control.
How to reset trip, Ah, and Wh counters to zero.
How to switch between main and advanced display modes.
Explanation of Voltage, Amps, and Power metrics.
Explanation of Speed, Controller Temp, and Trip Distance metrics.
How to enter and navigate the setup menu.
Overview of adjustable parameters like Unit, Speed Limit, Backlight.
Setting the automatic shutdown timer for power conservation.
Setting the pedal assist level limiter.
Option to enable/disable the torque sensor for pedal assist.
Setting the low voltage limit to protect battery life.
Chart explaining fault codes from the electronics system.
Steps to remove the battery for storage or transport.
Safety warnings and instructions for charging the battery.
Precautions and best practices for battery charging.
Steps to charge the battery while connected to the e-bike.
Maintenance and inspection of the hydraulic braking system.
Service for mineral oil cups by a trained mechanic.
Common e-bike issues, causes, and solutions.
Details on which products are included in the warranty coverage.
Duration of warranty coverage for various components.
Conditions and situations that void the product warranty.
Explanation of how warranty claims are processed and resolved.
Legal clause regarding the enforceability of warranty provisions.
Procedure for reporting and handling damage incurred during shipping.
Information on obtaining technical support and registering the bike.
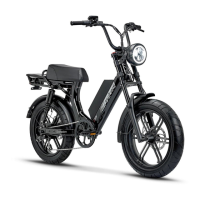
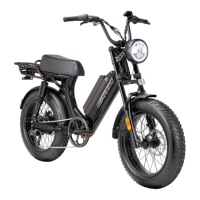
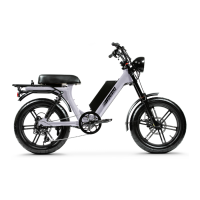
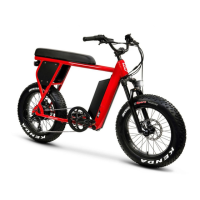
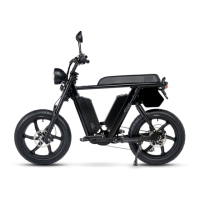
The device is an electric bicycle (e-bike) designed for various riding conditions, from casual commutes to off-road adventures. It combines traditional bicycle components with an electric motor, a rechargeable lithium battery pack, and an electronic control system, offering riders a boost of power when desired.
The e-bike operates similarly to a conventional bicycle but with the added benefit of an electric motor. The motor, integrated into the rear wheel hub, provides assistance to the rider, propelling the bike forward. This assistance can be engaged through two primary mechanisms: the throttle and the pedal assist control system.
The throttle, located on the right handlebar, allows the rider to control the bike's speed without pedaling. By rotating the throttle, a signal is sent to the controller, which then regulates the power delivered to the motor. This feature is useful for quick acceleration or maintaining speed without physical exertion.
The pedal assist control system, also known as "pedelec," provides motor assistance while the rider is pedaling. It utilizes sensors to measure the rider's torque (force) and cadence (speed) of pedaling. This information is transmitted to the bike's controller, which then generates the appropriate amount of power to assist the rider. The system offers multiple assist levels (ECO, 1, 2, 3, SPORT, and Race Track Mode), allowing riders to choose the desired level of assistance based on their riding style, terrain, and energy conservation goals. The pedal assist system can maintain a constant level of assistance, making rides more comfortable and efficient.
The e-bike is equipped with front and rear disc brakes for slowing down or stopping. These brakes use friction to effectively reduce speed. An important safety feature is an electrical switch on each brake lever that automatically cuts power to the electric motor when the brakes are applied. This prevents unintentional accelerations while braking and reduces wear on the motor and battery. The brake system undergoes a "bedding-in" period during the first 40-50 full stops, after which the brakes reach their full grip capacity.
A multi-speed gear set allows riders to change the ratio between the pedals and the rear wheel, enabling them to find a comfortable pedaling cadence for different riding conditions. Lower gears are suitable for starting, uphill riding, or carrying loads, while higher gears are used for downhill or faster riding. The gear shifter is located on the left handlebar, and gear selection is changed by rotating the left handlebar grip. The gear shifting system and pedal assist control system operate independently, meaning one does not affect the other's performance.
The battery pack, located on the bike frame, stores electrical energy for the motor and electronic systems. It consists of multiple lithium battery cells, similar to those found in mobile phones. The battery pack also includes two replaceable 30-amp fuses to protect the electronics from power surges.
An LCD display serves as the e-bike's dashboard, providing essential information to the rider. It shows the battery pack's voltage, which offers an estimate of the charge state, and allows control over various functions. The display can be toggled between a main screen and an advanced display screen, offering different sets of metrics.
Turning the E-bike On and Off: To power on the e-bike, the rider presses and holds the power button for 3 seconds. The LCD will illuminate, and the bike's systems will activate. To turn off, the same power button is pressed and held for 3 seconds, causing the LCD to power down and the bike to shut off. An automatic shutoff feature conserves power by turning off the electronic system after a preset period of inactivity, which can be adjusted in the setup menu.
Adjusting Assist Levels: Riders can increase or decrease the pedal assist level using dedicated "assist up" and "assist down" buttons on the display. Each press advances or decreases the assist by one level, cycling through modes like ECO, 1, 2, 3, and SPORT. The default assist setting is level 1, which appears each time the e-bike is turned on.
Activating Headlight and Display Backlight: The LED headlight and display backlight can be turned on or off by pressing and holding the "assist up" button for 2 seconds. A headlight status icon will appear on the screen when the light is active.
Walk Mode: For situations where the rider needs to push the bike uphill, the "walk mode" provides motor assistance at walking speed. This mode is activated by pressing and holding the "assist down" button for 2 seconds. Releasing the button or using either brake lever will stop the walk mode.
Cruise Control Function: The cruise control feature allows the e-bike to maintain a desired speed without continuous throttle or pedal assist input. To activate, the rider reaches the desired speed using the throttle or pedal assist, then presses and holds the "assist down" button for 2 seconds. A "C" graphic appears on the display, indicating that the current speed will be maintained. The cruise control is considered a type of throttle and has a maximum controllable speed of 20 mph, in accordance with regulations. If a speed above 20 mph is set, it will default to 20 mph. The cruise control can be disengaged by using the brakes, throttle, or pressing the "assist up" or "assist down" buttons. Pedal assist remains available while cruise control is active, allowing the rider to pedal faster than the preset speed, with the cruise automatically resuming if speed drops. The system can also provide more power to maintain the preset speed when encountering resistance.
Resetting Trip Counter: The LCD display tracks trip distance, Amp-hours (Ah), and Watt-hours (Wh) drawn from the battery. This data can be reset to zero by holding both the power button and "assist down" button for 3 seconds, then releasing them.
Advanced Display Screen: For more detailed ride statistics, the display can be switched to an "advanced display mode" by pressing the power button and "assist up" button simultaneously for 1 second. This mode shows expanded real-time data including voltage, power, amps, assist level, speed, watt-hours, amp-hours, controller temperature, and trip distance.
Adjusting Parameters in Setup Menu: The e-bike's behavior can be customized by adjusting parameters in the setup menu. This menu is accessed by holding the "assist up" and "assist down" buttons for about 3 seconds. Parameters such as unit (mph/kmh), speed limit, backlight brightness, wheel size, "power off" delay, NDW (pedal assist level limiter), torque sensor activation, and low volts setting can be adjusted. Navigation and value adjustments within the menu are done using the "assist up" and "assist down" buttons, and the power button is used to enter and exit settings.
Reading Battery Pack Level: The LCD display shows the battery pack's voltage, which fluctuates based on conditions like throttle use, pedal assist, and terrain. To get an accurate reading, the rider should release the throttle and allow the display lights to stabilize for 1 second. The display also provides a graphical representation of the battery charge level with bars indicating remaining charge. When the battery level is low (2 bars), recharging is recommended, and a lower assist level should be selected. At 1 bar, the throttle should be stopped, and the battery recharged.
Understanding Battery Pack Range: The e-bike's riding range varies significantly based on riding style, terrain, tire pressure, temperature, payload, and wind. Factors that decrease range include rapid accelerations, uphill riding, heavy payloads, headwinds, underinflated tires, and extreme temperatures. To increase range, riders are advised to pedal more, avoid rapid accelerations, use gears to assist on hills, reduce average pedal assist level, and coast to stops.
Battery Charging: The battery pack can be charged either while connected to the e-bike or when removed. To charge, the charger is plugged into the charge port on the battery pack, and then into an electrical outlet. The charger's indicator LED turns red during charging and green when fully charged. Charging typically takes 1-8 hours. It is crucial to use only the supplied or approved charger and avoid covering it during charging. The battery pack should be recharged at least once a month, even if unused, to prevent permanent capacity loss.
Hydraulic Brakes: The hydraulic braking system requires inspection and service for wear and tear. If components are worn, replacement is necessary. Riders are advised to inspect brakes before every ride and contact support or an authorized mechanic if any issues are detected. Mineral oil cups on the handlebars should be serviced by a trained mechanic.
Troubleshooting: The e-bike's electronic system has self-diagnostic capabilities and can report faults via error codes displayed on the screen. The manual provides a chart explaining common error codes and their corresponding solutions, such as checking throttle function, battery voltage, motor connections, or controller temperature. For further assistance, riders can consult the manufacturer's FAQ section or contact support.
Warranty: The e-bike comes with a limited warranty against manufacturing defects. Battery packs and other electronic components are covered for 1 year, and bicycle frames and mechanical components are also covered for 1 year. The warranty applies to products purchased in new condition by the original retail buyer. It covers replacement or repair of manufacturing flaws but excludes damage from normal wear and tear, accidents, improper maintenance, unauthorized alterations, or commercial use. Shipping damage claims must be reported promptly, within 14 days of receipt, with photographic evidence.
| Top Speed | 28 mph |
|---|---|
| Brakes | Hydraulic Disc Brakes |
| Max Load | 275 lbs |
| Display | LCD Display |
| Foldable | No |
| Suspension | Front and Rear |
| Lights | Integrated Headlight and Taillight |
| Frame Material | Aluminum Alloy |