14 15
JBP-SCRP-MANUAL |
©
2021 JUICED BIKESJBP-SCRP-MANUAL |
©
2021 JUICED BIKES
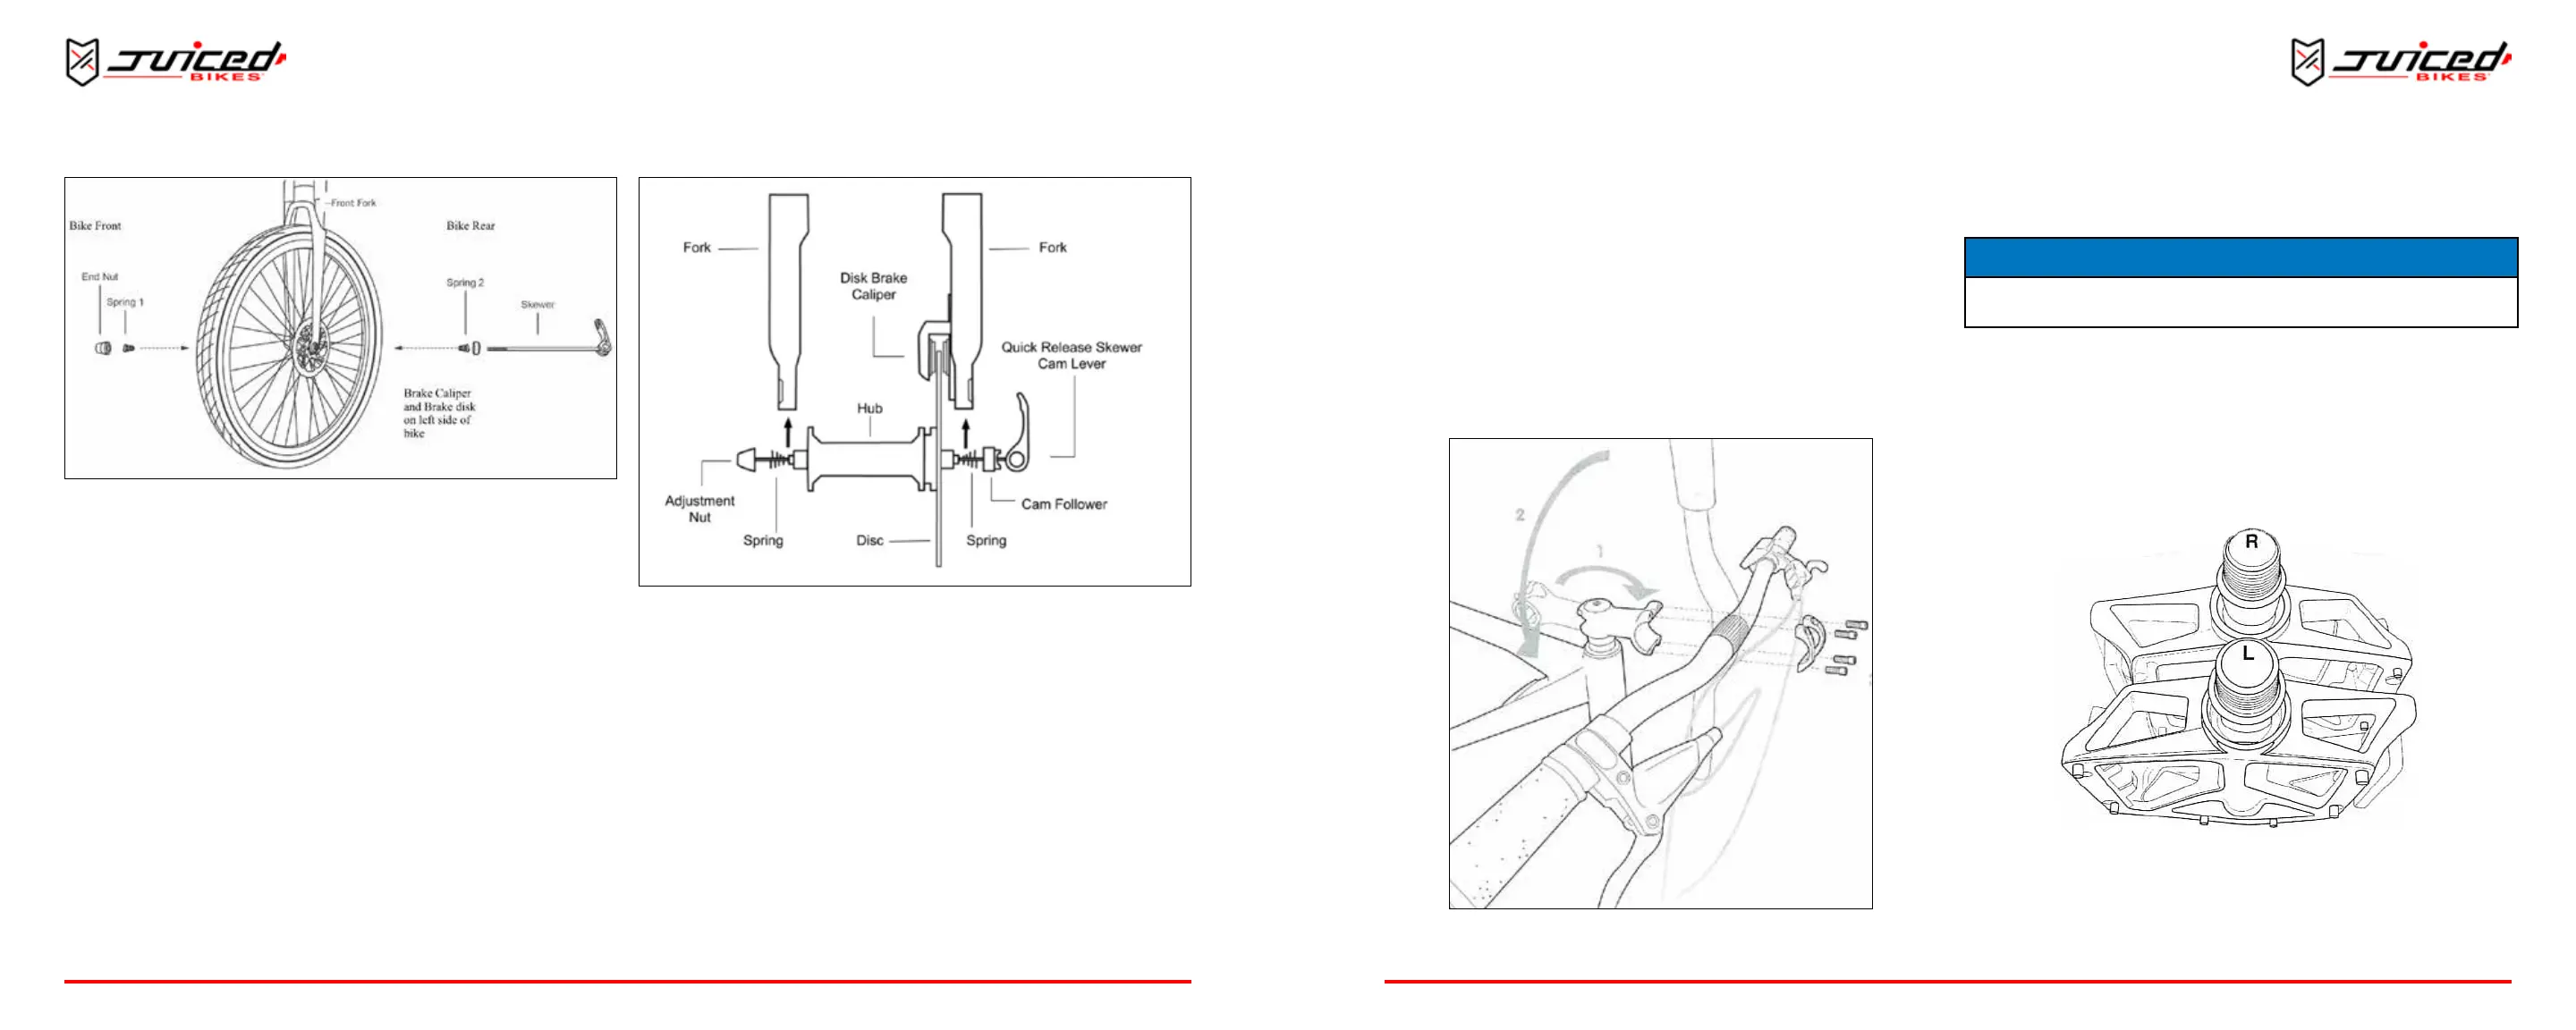
Fig. 14 - Inserng Skewer
5. Screw the skewer into the end nut unl almost ght.
6. Li the lever up and lock into place by closing it behind or
to the front of the fork. The lever must not be parallel to
the fork. You should feel the axle ghten into the front
forks. Your front wheel is now installed.
7. Be sure to inspect that your front wheel is secured properly
before every ride and adjust if necessary.
Fig. 13 - Inserng Front Wheel
3. Align the disk between the brake caliper as shown.
4. Insert the skewer into the wheel axle as shown. Keep the
spring, cam follower, and lever on the LEFT side, nearest
the disk brake. Keep the adjustment nut and spring on the
right side.
INSTALLING THE HANDLEBARS
1. Point the headset towards the front of the bike.
2. Center the handlebar in the headset, taking care not to
damage any wires.
3. Install the clamp and screws. Alternately ghten the screw
side-to-side unl secure.
4. Verify that the front re lines up with the headset.
5. Verify that all headset items are ght.
Fig. 15 - Installing the Handlebars
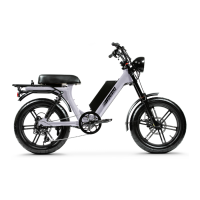
INSTALLING THE PEDALS
NOTICE
It’s critical that the pedals are tightened rmly in the crank arm to prevent the pedals
from loosening while riding, which will result in signicant damage to the bike.
1. Idenfy the le and right markings on the pedals. Be sure
to install the pedals on their respecve side.
• “L” is for the le pedal and is installed on the le crank
arm.
• “R” is for the right pedal and is installed on the right crank
arm (chain side).
Fig. 16 - Le and Right Idencaon Marks
NOTE: Both pedals ghten toward the front of the e-bike.
2. While keeping the pedal horizontal, carefully hand-start
OPERATION
OPERATION