19
JBP-SCRP-MANUAL |
©
2021 JUICED BIKES
18
JBP-SCRP-MANUAL |
©
2021 JUICED BIKES
NOTE: Be sure all the items you installed are properly torqued,
ghtened and connected. If you have any quesons, contact us.
See ”Contact Informaon” on page 1.
INITIAL RIDE
NOTE: Users can ride the e-bike like a normal bicycle with the
power turned ON or OFF. However, the pedal assist and throle will
acvate only if the power is turned ON.
We recommend that you ride your e-bike with the pedal assist
o at rst, to get familiar with the braking and gear shiing.
Then, you can start tesng the pedal assist levels incrementally
to gain familiarity with the opmal sengs for your riding style.
SAFETY CHECK BEFORE EACH RIDE
• The baery pack must be charged and properly installed.
• The display must turn on and funcon properly.
• The brakes must funcon properly.
• The res must be inated to the proper psi.
• The front and rear lights must work properly.
• The cable connecons must be ght.
USING THE BRAKES
The e-bike is equipped with front and rear disc brakes. Their
main funcon is to slow down or to stop the bicycle.
NOTE: Apply the rear brake before using the front brake in
low-tracon condions.
• The brake on the front wheel is controlled by the lever on
the le-hand side of the handlebar.
• The brake on the rear wheel is controlled by the lever on
the right-hand side of the handlebar.
• The front brake provides the majority of the e-bike’s
stopping power.
• When slowing down on slippery surfaces, use the rear
brake rst before applying the front brake.
• A signal wire from each brake lever automacally turns o
the motor when either brake is being used. This feature
prevents undue wear on the electric motor and baery.
Your new brakes will undergo a “bedding-in” period and will
wear down aer the rst 40-50 full stops. The brakes will reach
100% of their grip capacity aer this period. Adjust the brake
lever so that it adapts to the newly bedded-in brakes.
SHIFTING THE GEARS
The e-bike is equipped with a mul-speed gear set. Choose the
lower gears when starng o from a stop or when riding slowly
or climbing steep hills. Use higher gears when riding at speed.
When using this bike as a normal bike, you will get used to using
the gear sengs that are most comfortable for your ride and
trip. The gear shier is located on the le side of the handlebar.
Rotang the le handlebar grip will change the gear selecon.
The gear shiing system and pedal assist control system are
enrely independent; neither aects the other’s performance.
4 OPERATION
PEDAL ASSIST CONTROL SYSTEM
The pedal assist control system also is known as a “pedelec.”
The pedal assist uses a combinaon of sensors that measure
torque and cadence (force and speed) of your pedaling. This
informaon transfers to the bike’s controller, which generates
the needed power. The control system can be used to maintain
a constant level of pedal assist.
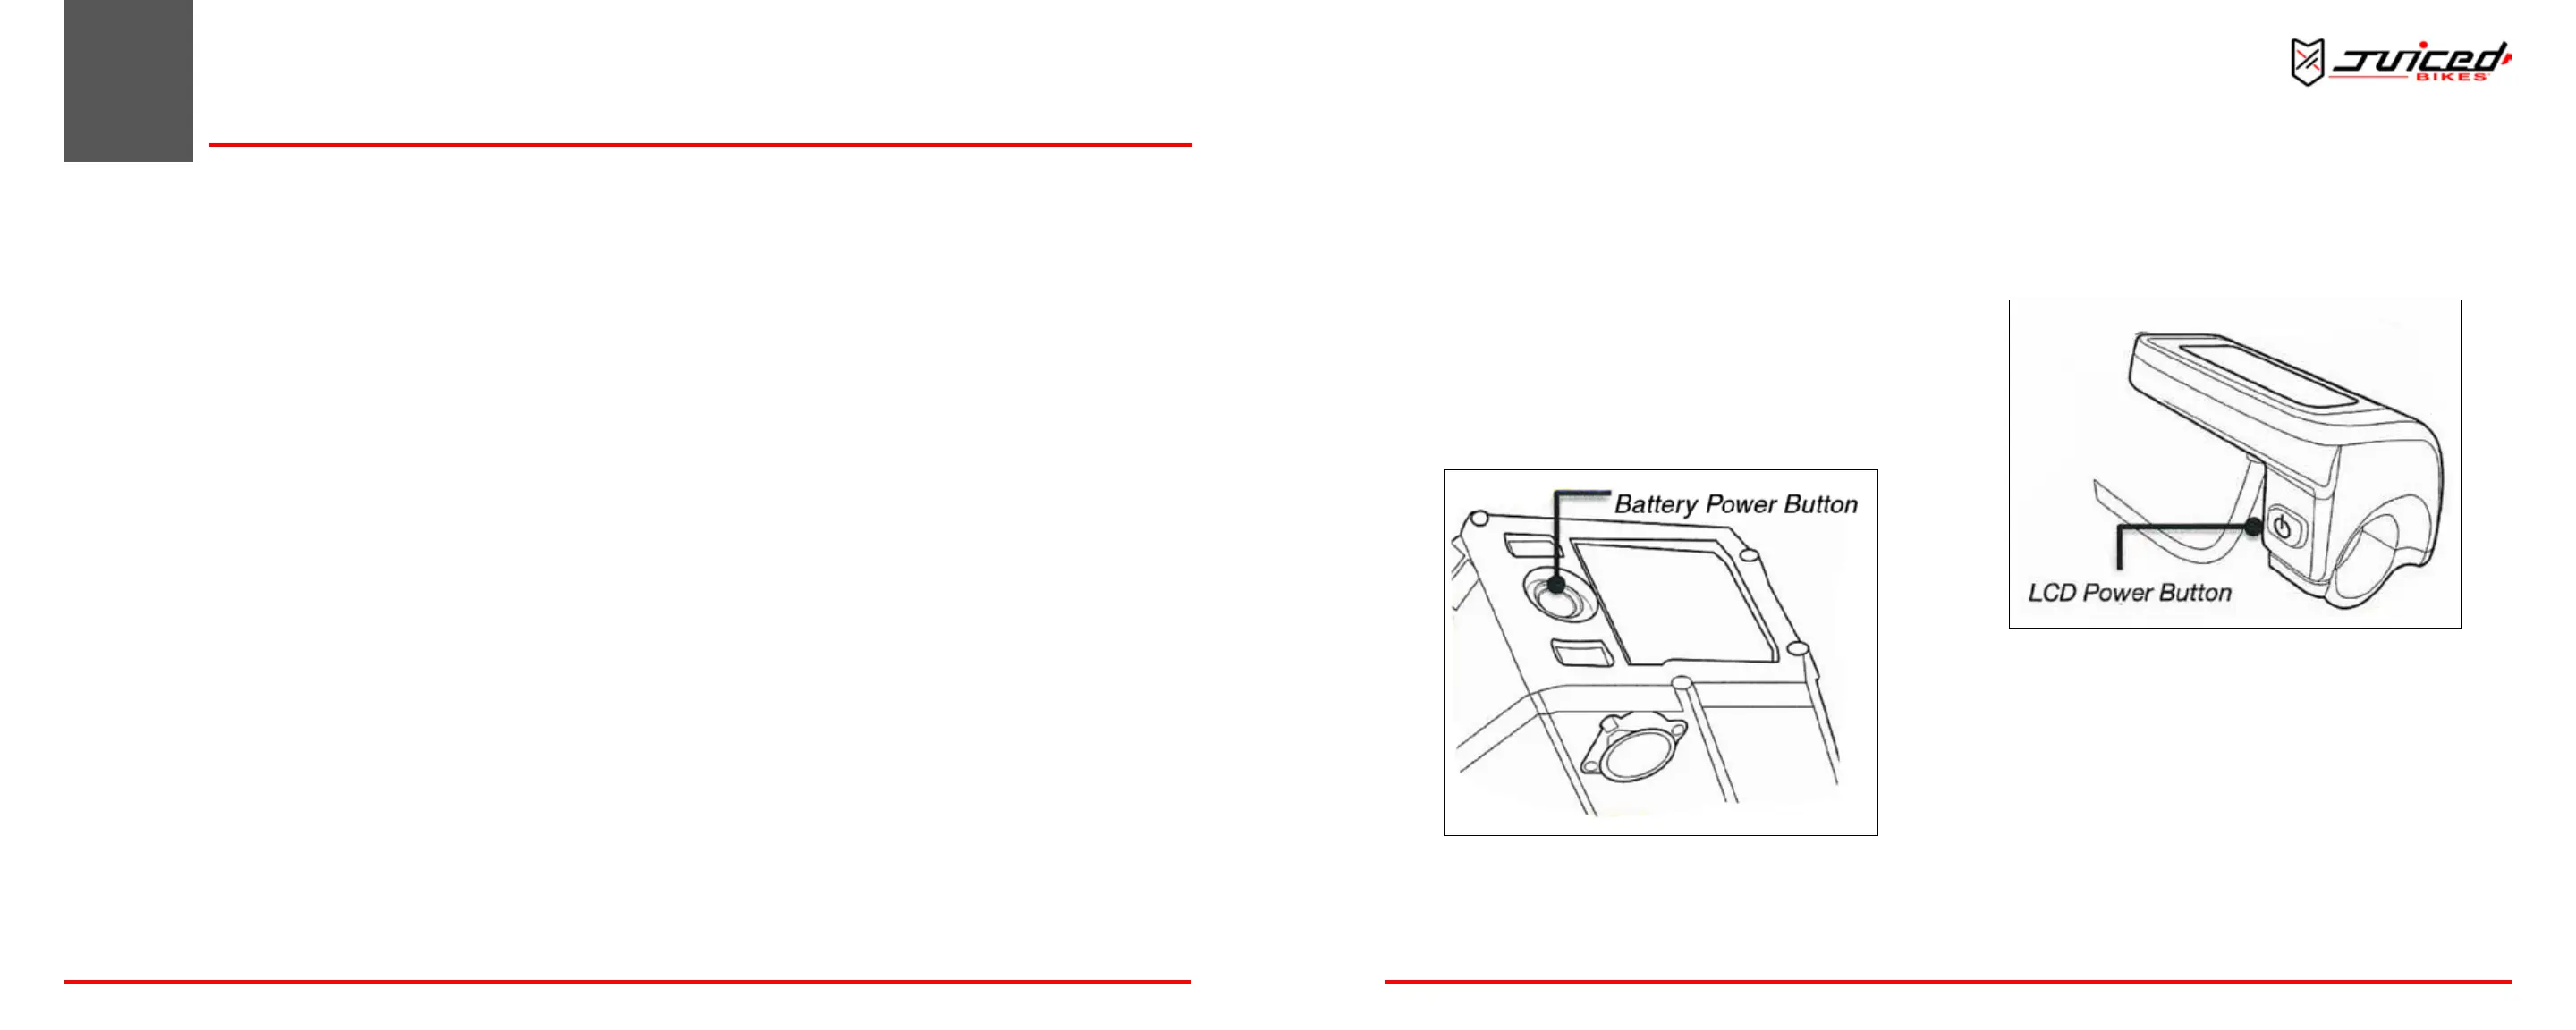
USING THE PEDAL ASSIST CONTROL SYSTEM
1. Press the baery power buon to turn on the baery. The
LED will illuminate in a green color.
Fig. 20 - Baery Power Buon
2. Press and hold the LCD power buon for 3 seconds to turn
on the controller. Be sure to have both feet o the pedals,
as the torque sensor will calibrate when turning on. The
LCD display panel will turn on and indicate the baery’s
charge level and selected pedal assist level.
Fig. 21 - Controller Power Buon
OPERATION