Do you have a question about the JUKI HZL-K65 and is the answer not in the manual?
Critical warnings to reduce the risk of electric shock during operation.
General safety precautions to prevent burns, fire, injury, and ensure proper use.
Important conditions and precautions due to internal electronics and operating environment.
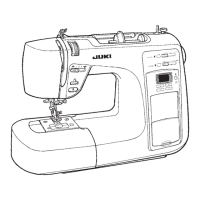
Identifies components related to thread spooling and bobbin winding.
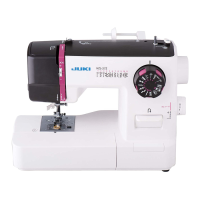
Identifies key controls for operating speed, tension, and machine functions.
Identifies parts related to fabric feeding and needle area.
Details common presser feet and their applications for different stitches.
Lists specialized attachments for quilting, guidance, and invisible zippers.
Includes essential tools and parts for machine setup and maintenance.
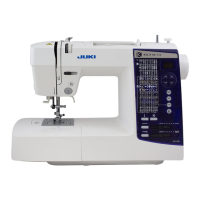
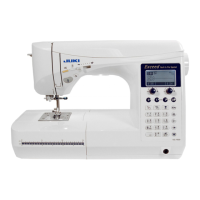
Identifies buttons, displays, and keys on the HZL-K85 control panel.
Explains how to select stitch patterns and use memory functions.
Instructions for using Clear and Shift keys.
How to store patterns and letters into memory.
How to delete stored patterns and letters from memory.
How to switch between upper and lower pattern sets.
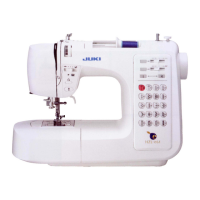
Overview of stitch selection and width/length adjustment on HZL-K65.
Functionality of reinforcement and reverse stitch buttons.
How to adjust stitch length and zigzag width using levers.
How to connect and use the foot controller for speed control.
Proper connection of the power cord and location of the main power switch.
How to start, stop, and secure stitches using buttons.
Operation of the presser foot lever and speed controller.
Adjusting needle thread tension and operating the drop feed dog.
How to extend the sewing machine for free arm sewing.
Steps to open hook cover and prepare for winding.
How to place spool, select cap, and thread bobbin guide.
How to place the bobbin correctly onto the winder.
Procedures for starting winding, stopping, and removing the bobbin.
How to place the bobbin in the case for correct winding direction.
Step-by-step guide to threading the bobbin case.
How to adjust the guide for even bobbin winding.
Initial steps for threading, including raising the foot and passing thread through guides.
How to draw the thread through the machine's groove and pull it upward.
How to thread the take-up lever and hook for automatic threading.
Steps for activating and using the automatic needle threader.
Initial steps to hold needle thread and turn handwheel.
How to draw the bobbin thread up to the fabric surface.
Step-by-step guide for replacing the presser foot.
How to align the pin with the marker line on the needle plate.
Procedures for removing and correctly installing the needle.
Guidance on purchasing and checking the needle for straightness.
Uses for standard and zipper presser feet with various stitches.
Applications for buttonhole, overcasting, blindstitch, and quilting feet.
Verify the correct presser foot is attached for stitch adjustment.
How to select patterns and use adjustment screws for stitch shape.
Description of proper thread tension for balanced seams.
Adjustments for low or high upper thread tension.
Guides for selecting fabric, thread, and needles based on material weight.
Tips on thread matching, needle suitability, and using knit needles.
Explanation of automatic and manual stitch length adjustments.
How to operate the adjustment button and lever.
How the machine automatically determines stitch length.
How to manually adjust stitch length using the lever.
Ensure correct presser foot and select stitch pattern.
Place fabric, lower presser foot, and begin sewing.
How to use lock stitch at the start/end of seams.
Procedures to cancel the automatic lock stitch function.
How to start sewing with automatic lock stitches.
How to use the reverse stitch button to secure seams.
Ensure the correct presser foot is attached for zigzag stitching.
How to select the zigzag stitch and its default width/length.
How to use the manual adjustment button and lever for stitch width.
List of stitch patterns where width can be adjusted.
How to change to the appropriate presser foot for overcasting.
Step-by-step guide to sewing with the overcasting foot.
Attach the correct presser foot for reinforcing stitches.
Choose the appropriate stitch pattern for reinforcement.
How to choose a buttonhole based on fabric and button size.
Lowering the buttonhole foot and placing the button correctly.
How to safely open the sewn buttonhole using a seam ripper.
How to adjust stitch length for different fabric types.
Adjust stitch length and select pattern for bartacking.
Install and use the buttonhole foot for bartacking.
Adjust stitch length and select pattern for darning.
Install and use the buttonhole foot for darning.
Change presser foot and select stitch pattern for quilting.
Lower the presser foot lifting lever and start sewing.
How to join fabric pieces using a runstitch for patchwork.
Ensure correct presser foot and select pattern for patchwork.
Choose the stitch pattern for sewing zippers.
How to use the standard foot for initial zipper basting.
How to attach the zipper foot for sewing.
Step-by-step guide for inserting zippers into side seams.
How to baste the zipper and garment body for centering.
How to sew the zipper on the seam allowance from bottom to top.
Fold and baste fabric edges for blindstitching.
Attach blindstitch foot and select blindhem stitch pattern.
Place the folded edge against the presser foot guide.
How to adjust the guide for correct stitch placement.
Steps to remove the presser foot holder.
Set drop-feed knob and install quilting foot.
Check zipper opening size, install standard foot, and baste zipper.
Prepare fabric and place it for zipper insertion.
Sew the remaining zipper tape on the other side of seam allowance.
Take out the slider and pull it out to appear on the right side.
Mark fabric and lower buttonhole foot.
Steps for sewing buttonholes using the manual foot.
Cut fabric corner and insert into groove for easier work.
Use handwheel to guide fabric into the hemmer foot.
Steps to remove the presser foot holder.
How to attach and secure the even feed foot to the machine.
Description of the smooth surface and fabrics it's suitable for.
Steps for removing needle plate, cleaning feed dog area, and re-installing parts.
Note on applying sewing machine oil on the shuttle race.
Common sewing issues, their causes, and recommended actions.
Details on dimensions, weight, voltage, and power consumption.
| Type | Computerized Sewing Machine |
|---|---|
| Buttonhole Styles | 8 |
| Maximum Stitch Width | 7 mm |
| Maximum Stitch Length | 5 mm |
| LCD Screen | Yes |
| Drop Feed | Yes |
| Weight | 5.6 kg |
| Dimensions | 15.5 x 6.5 x 12 inches |
| Sewing Speed | 750 stitches per minute |
| Needle Threader | Automatic |
| Feed Dog System | 7-Point Feed Dog |
| Stitch Length Adjustment | Yes |
| Stitch Width Adjustment | Yes |
| Reverse Stitch | Yes |
| Free Arm | Yes |
| Lighting | LED |
| Presser Foot | Snap-on |
| Bobbin Type | Drop-in |