Do you have a question about the JUKI LBH-781 and is the answer not in the manual?
Mounting the motor pulley onto the motor shaft and securing it with setscrews.
Mounting V belts, adjusting tension for optimal slack, and aligning them.
Filling the oil reservoir, supplementing oil, and checking oil circulation.
Adjusting oil volume to the sewing hook using oil adjusting screws for fine and rough adjustments.
Applying oil to specific points weekly or bi-weekly, and for new setups or machines out of use.
Slowing down the machine by turning the hand stop crank downwards.
Stopping the machine immediately by turning the hand stop crank downwards and upwards.
Adjusting bobbin thread tension and needle thread tension for proper purl stitches.
Adjusting bobbin thread tension and needle thread tension for proper whip stitches.
Adjusting the stroke and tension of the thread take-up spring for purl stitch.
Information on selecting and using spur gears to control stitch count.
Instructions for securely mounting spur gears onto their respective shafts.
Detailed procedure for setting needle bar height and hook timing using a timing gauge.
Specific steps for adjusting the needle bar height relative to the throat plate.
Steps for setting the hook's timing and clearance with the needle.
Adjusting the belt shifter to align with the correct pulley for low-speed operation.
Adjusting the stopper screw to prevent the belt from coming off the pulley.
Mounting the trimmer and adjusting its height for minimal thread residue.
Adjusting the trimmer's closing timing by moving the driving plate for complete closure.
Adjusting the trimmer's opening timing by moving the driving plate for gradual opening.
Identifies causes like tight tension, hook damage, or incorrect threading and their remedies.
Addresses issues like early trimmer opening, incorrect work clamp check, or wrong threading.
Covers loose tension discs, incorrect take-up spring tension, and high bobbin thread tension.
Points to loose tension discs, high needle thread trimmer, or excessive take-up spring stroke.
Indicates loose tension disc No. 1 or too high bobbin thread tension.
Relates to insufficient bobbin thread tension or improper bobbin case threading.
Covers work clamp check size and material properties affecting stitch skipping.
Addresses clogged needle plate, trimmer, or interference with the work clamp check.
Points to incorrect hand stop crank position or speed transmitter belt shifter.
Relates to low speed cam setting, loose flat belt, or loose low speed V belt.
Points to lubrication needs for the stop-motion lever or speed transmitter belt shifter.
Covers low oil level in the reservoir or lack of oil circulation.
Relates to incorrect knife tripping segment position or low speed cam setting.
Points to incorrect threading or incorrect needle/hook/trimmer positions.
Addresses bent needles, needle-hook touching, or trimmer hitting the needle.
| Brand | JUKI |
|---|---|
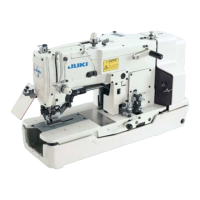
| Model | LBH-781 |
| Category | Sewing Machine |
| Language | English |