−7 −
Adjustment Procedures Results of Improper Adjustment
™ Stitch skiping or thread breakage
will result
™ Needle breakage will result
™ Irregular stitches will result.
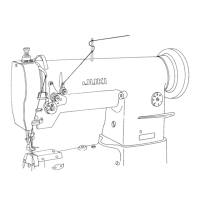
1) Standard of the lowest dead point of the needle bar
1. Set the stitch dial to 0 mm.
2. Turn the handwheel to bring needle bar 7 to the lowest dead
point of its stroke.
3. Remove the face plate, loosen clamping screw 6 in the needle
bar holder, move needle bar 7 up or down and adjust the
distance from the lower end of needle bar frame 8 to the lower
end of the needle bar to dimension B. Then tighten clamping
screw 6 in the needle bar holder.
2) Clearance between the needle and the blade point of the hook
1. Set the stitch dial to 0 mm.
2. Remove the throat plate base cover.
3. Loosen three setscrews 2 in the hook driving shaft bevel gear
and turn the handwheel to raise needle bar 7 by 2.4 mm from
the lowest dead point of the needle bar.
4. Loosen two setscrews 1 in the hook driving shaft saddle, move
the hook driving shaft in the direction of arrow and adjust the
clearance between needle 5 and blade point 3 of the hook to
dimension A.
3) Needle-to-blade point of hook timing
1. Raise needle bar 7 by 2.4 mm from its lowest dead point, turn
the hook so that blade point 3 of the hook is aligned with the
center of neeedle 5, and securely tighten three setscrews 2.
2. At this time, the distance between blade point 3 of the hook
and the top end of the needle eyelet is to be 1.7 mm. If the
distance has not been obtained, loosen setscrew 6 in the
needle bar holder and perform fine adjustment. Then securely
tighten setscrew 6 in the needle bar holder.
4) Adjusting the needle guard of the hook
Bend needle guard 4 and adjust so that the needle guard
comes in contact 0.02 to 0.05 mm with the needle.
(Caution) When the hook shaft saddle is shifted, the backlash
of the bevel gear will change, It is necessary to adjust the
axial direction of the hook driving shaft bevel gear.
(Backlash : 1 degree)
 Loading...