EasyManua.ls Logo

JUKI MEB-3200 User Manual

JUKI MEB-3200
520 pages
To Next Page IconTo Next Page
Page #1 background imageLoading...
Page #1 background image
R
MEB-3200
INSTRUCTION MANUAL BETRIEBSANLEITUNG
MANUEL D’UTILISATION MANUAL DE INSTRUCCIONES
MANUALE D’ISTRUZIONI
ֵ⭞䈪᱄Ҝ
No.13
29343316
NOTE : Congratulations on your purchase of a JUKI sewing machine.
Read safety instructions carefully and understand them before using.
Retain this Instruction Manual for future reference.
HINWEIS : Herzlichen Glückwunsch zu Ihrem Kauf einer JUKI-Nähmaschine.
Lesen Sie die Sicherheitsanweisungen aufmerksam durch, um sich mit ihnen vertraut zu
machen, bevor Sie diese Maschine in Betrieb nehmen.
Bewahren Sie diese Bedienungsanleitung für spätere Bezugnahme auf.
REMARQUE : Félicitations pour votre achat d’une machine à coudre JUKI.
Avant d’utiliser la machine, lire attentivement toutes les consignes de sécurité.
Conserver ce manuel pour pouvior le consulter en cas de besoin.
NOTA : Nuestro agradecimiento y felicitaciones por su compra de esta máquina de coser JUKI.
Antes de comenzar a usar esta máquina lea con detención hasta comprender todas las
instrucciones de sequridad.
Conserve este Manual de instrucciones a mano para futuras consultas.
NOTA : Congratulazioni per l'acquisto di una macchina per cucire JUKI.
Leggere attentamente e compredere tutte le istruzioni per la sicurezza prima di inziare l’ uso
di questa macchina.
Conservare questo Manuale d’Instruzioni per pronto riferimento.
⌞ᝅ φ ᝕䉘ᛞ䍣ҦᵢޢⲺӝ૷Ⱦ
ѰҼᆿޞ൦ֵ⭞θ䈭ᛞ൞ֵ⭞ҁࢃжᇐ䰻䈱ᵢֵ⭞䈪᱄ҜȾ
ཌθ䈭ᛞ⌞ᝅؓ㇗ᵢֵ⭞䈪᱄Ҝθԛ׵䳅ᰬḛ䰻Ⱦ

Table of Contents

Other manuals for JUKI MEB-3200

Question and Answer IconNeed help?

Do you have a question about the JUKI MEB-3200 and is the answer not in the manual?

JUKI MEB-3200 Specifications

General IconGeneral
BrandJUKI
ModelMEB-3200
CategorySewing Machine
LanguageEnglish

Summary

TO ENSURE SAFE USE OF YOUR SEWING MACHINE

(I) Explanation of risk levels

Explains DANGER, WARNING, CAUTION risk categories.

(II) Explanation of pictorial warning indications and warning labels

Details pictorial warnings and specific warning labels used on the machine.

SAFETY PRECAUTIONS

Basic precaution

Essential safety rules to follow before operating the machine.

Safety devices and warning labels

Highlights the importance of safety devices and understanding warning labels.

Items for which the machine has to be turned off

Lists specific operations requiring the machine to be powered off.

PRECAUTIONS TO BE TAKEN IN VARIOUS OPERATION STAGES

Installation

Steps and safety guidelines for installing the machine and its components.

Lubrication

Detailed instructions on lubricating the machine's parts.

Maintenance

Guidelines and precautions for performing maintenance and repairs.

Precautions to be taken so as to use the MEB-3200 more safely

DANGER

Specific high-risk situations and necessary precautions to avoid severe injury or death.

WARNING

Identifies potential hazards that could cause personal injury or damage.

CAUTION

Outlines minor hazards that might lead to personal injury or machine damage.

CAUTIONS IN OPERATION

CAUTION

Specific cautions to be observed during the operation of the sewing machine.

Safety devices and warning labels

Warning label

General warning labels indicating minimum precautions for operation.

Needle bar cover

Protects against contact with the needle bar.

Electrical shock danger label

Warns of electrical shock hazards and precautions.

Hinge stopper

Prevents injury from the machine head dropping.

1. SPECIFICATIONS

2. NAME OF EACH COMPONENT

(1) Names of the sewing machine main unit

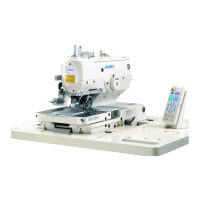
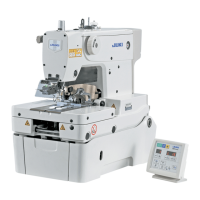
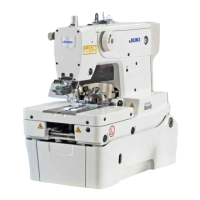
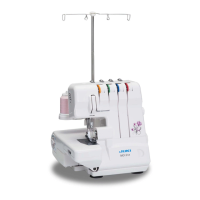
Lists and illustrates the key components of the sewing machine's main unit.

3. INSTALLATION

(1) Installing the air hose

Details the procedure for connecting and adjusting the air hose.

(2) Raising and returning the sewing machine

Step-by-step guide for safely lifting and lowering the sewing machine head.

Installing the thread stand

(4) Installing the operation panel base

Guidance on mounting the operation panel base.

(5) Installing/removing the presser unit

Procedure for installing and removing the presser unit.

4. PREPARATION BEFORE OPERATION

(1) Lubricating the machine and how to lubricate

Detailed instructions on lubricating the arm and bed oil tanks.

Lubricating the looper and spreader components

(2) Attaching the needle

Guide on how to correctly attach the needle.

(3) Threading the machine head

Threading the machine with gimp

Instructions for threading the machine when using gimp.

(4) How to set the cloth

Procedure for placing and adjusting the sewing material under the presser.

5. STRUCTURE OF THE OPERATION SWITCH

(1) Structure of the operation panel

Identifies and explains the function of each key on the operation panel.

Temporary stop switch

(3) Hand switch

Describes the presser and start switches operated by hand.

(4) Foot switch

Details the presser and start switches operated by foot.

6. HOW TO USE THE OPERATION PANEL

(1) Basic operation of the sewing machine

Covers fundamental steps for starting and operating the sewing machine.

(2) Setting the thread tension

Instructions for adjusting needle and looper thread tension.

(3) Temporarily stopping the sewing machine

(4) Performing re-sewing

Procedures for performing re-sewing without opening the cloth.

(5) Performing threading

(6) How to use the counter

Instructions on using the built-in counter for tracking stitches.

(7) When dropping of the knife is temporarily not desired

(8) Changing the operation mode

Explains how to switch between AUTO and MANUAL operation modes.

(9) Changing procedure of the sewing pattern

(10) Confirming the pattern shape

How to preview the shape of a selected sewing pattern.

7. SETTING PROCEDURE OF THE SEWING DATA

(1) Setting the knife No.

How to select the appropriate knife number.

(2) Setting the cut length

Procedure for setting the desired cut length.

(3) Setting the cut-before/cut-after knives

Setting for the cut-before or cut-after knife function.

(4) Setting the number of stitches of the parallel section

(5) Setting the number of stitches of the eyelet

Setting the number of stitches for the eyelet section.

(6) Setting the cut space

Adjusting the clearance for the knife drop in the parallel section.

(7) Setting the eyelet space

Adjusting the clearance for the knife drop in the eyelet section.

(8) Setting the length of taper bar

(9) Setting the number of stitches of taper bar

Setting the number of stitches for the taper bar.

(10) Setting the offset of taper bar

Adjusting the offset amount from the center of the taper bar.

(11) Setting the sewing speed

Adjusting the overall sewing speed of the machine.

(12) Setting the reduction speed of eyelet

(13) Setting the FUNCTION F1

Configuring the FUNCTION F1 key, often for knife position compensation.

(14) Setting the FUNCTION F2

Configuring the FUNCTION F2 key, often for copy destination settings.

10. HOW TO USE THE VARIOUS FUNCTIONS

(1) Performing procedure of the cycle sewing

Detailed steps for performing cycle sewing operations.

(2) Operating procedure of thread tension compensation of each section

(3) Changing the setting position of cloth

(4) Changing over the mode of the start switch

Switching between different start switch modes.

(5) Changing over the presser movement

Changing how the presser returns to its set position.

(6) Changing over the counter (DOWN counting)

Setting up and using the counter for DOWN counting.

(7) Stop before cloth cut mode

Enabling a mode to stop before cloth cutting.

(8) Setting the pattern data of cloth cutting knife pressing amount

11. MAINTENANCE

(1) Height of the needle bar

How to adjust the standard position of the needle bar.

(2) Timing between the needle and the looper

Adjusting the timing between the needle and the looper.

(3) Clearance between the needle and the looper

(4) Adjusting the needle guard

How to adjust the needle guard for proper clearance.

(5) Installation positions of the spreaders and the timing to open/close the spreaders

(6) Position of the presser foot and the needle entry point

(7) Adjusting the knife dropping position

Adjusting the position where the knife drops.

(8) Installing position of the needle thread trimming knife

(9) Adjusting the looper thread trimming

(10) Cleaning

(11) Draining

Procedure for draining oil from the polyethylene oiler.

(12) Checking the fan filter

Guide for checking and cleaning the fan filter.

(13) Replacing the fuse

(14) Standard of replacing time of the gas spring

Guidelines for when to replace the gas spring for safety.

(15) Replacing the gas spring

12. EXCHANGING GAGUE PARTS AND OPTIONAL

(1) Changing the thread trimming method

How to select thread trimming types using DIP switches.

(2) Exchanging gauge parts

Others

Installing the optional foot pedal

Step-by-step guide for installing the optional foot pedal.

13. TROUBLES AND CORRECTIVE MEASURES IN SEWING

14. MEMORY SWITCH

(1) Operating procedure

Steps for accessing and changing memory switch settings.

(2) Memory switch list

A comprehensive list of memory switches, functions, and settings.

15. ERROR LIST

16. STANDARD PATTERN LIST

Related product manuals