10
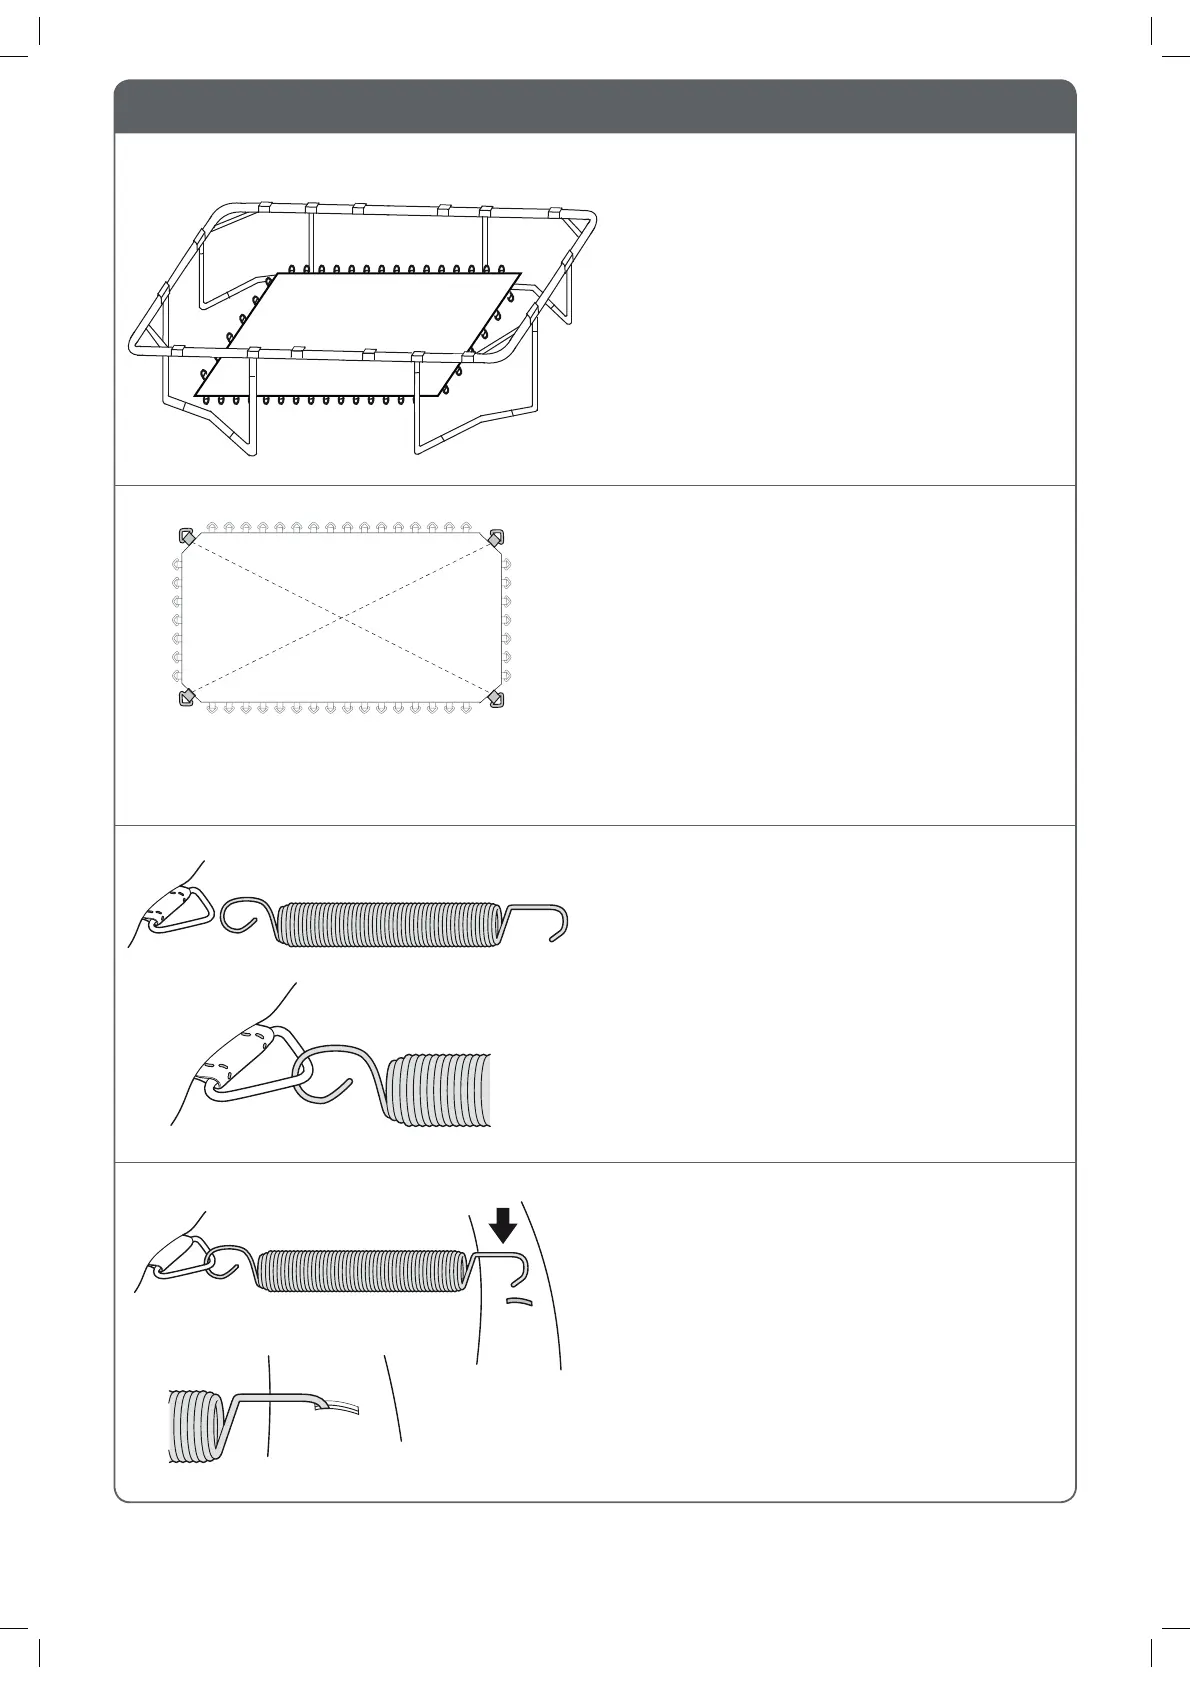
STEP 3 : FITTING THE STITCHED BED
This step will require 2 people who must be
wearing gloves and protective eye wear.
Lay the stitched bed (with the V-Rings) out, inside
the frame of the trampoline with the warning labels
facing upwards.
Please note the bed is 2 foot smaller than the frame.
Locate the 4 corner V-rings.
Slot one of the springs onto one of the V-rings
as shown.
Important: springs must be slotted on the right way
around with the more curled end of the spring
hooked into the V-ring.
Slot the other end of the spring into one of the
spring holes on the top of the frame.
IMPORTANT: Ensure the spring is fully
inserted into the slot on the top of the frame.
Part 10
Part 9
Please see page 11 for detailed spring attachment