8
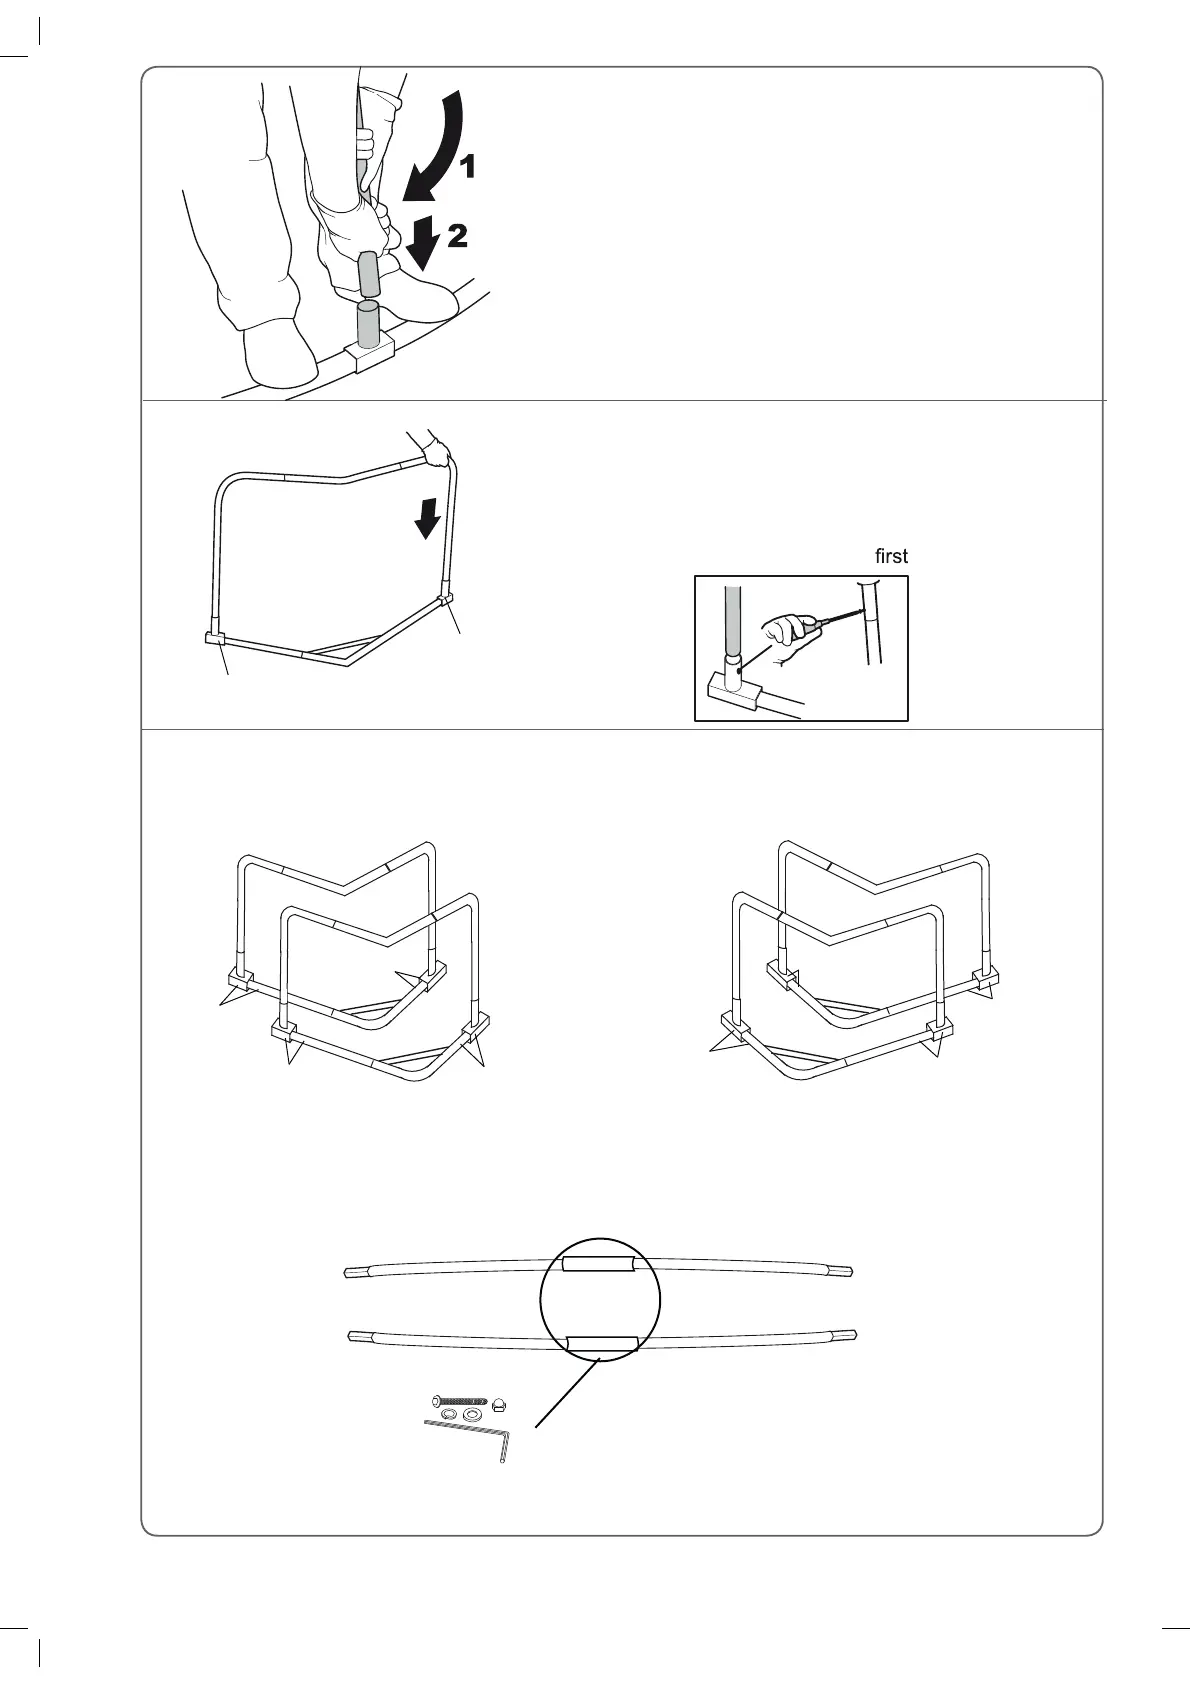
Push down on the end of the centre leg to fully
rt the L Leg into the T-Connector.esni
You have now completed the
frame section.
Repeat the last two steps until you have assembled the remaining sections of the trampoline
frame.
You have now completed step 1.
Screw one of the self tapping screws through the
hole in the T-Connector and into the hole in
the leg extension using the cross-head screwdriver.
With D marking
With C ma
A marking
A marking
B marking
B marking
rking
D marking
D marking
C marking
C marking
Top tube D marking
9 spring holes
Top tube C marking
9 spring holes
Top tube C marking
9 spring holes
Top tube D marking
9 spring holes
Tighten with 10mm screws
Note: You may need to tap the L Leg in using a rubber mallet
or by placing a piece of wood over the top of the tube. Do not
use a metal hammer on the metal tube as this may distort
the end of the tube.
Using Part 20 tighten the 10mm screws to secure the two top rails together - Part 4 and 5.
Important: The frame is held together under tension, so
you may need to use some force to insert certain parts.
Place your feet on the top tubes and grip the L Leg with
both hands.
Pull the L Leg unil it can be slotted into the T-Connector.
Slot the end of the L Leg into the T-Connector.