17
4
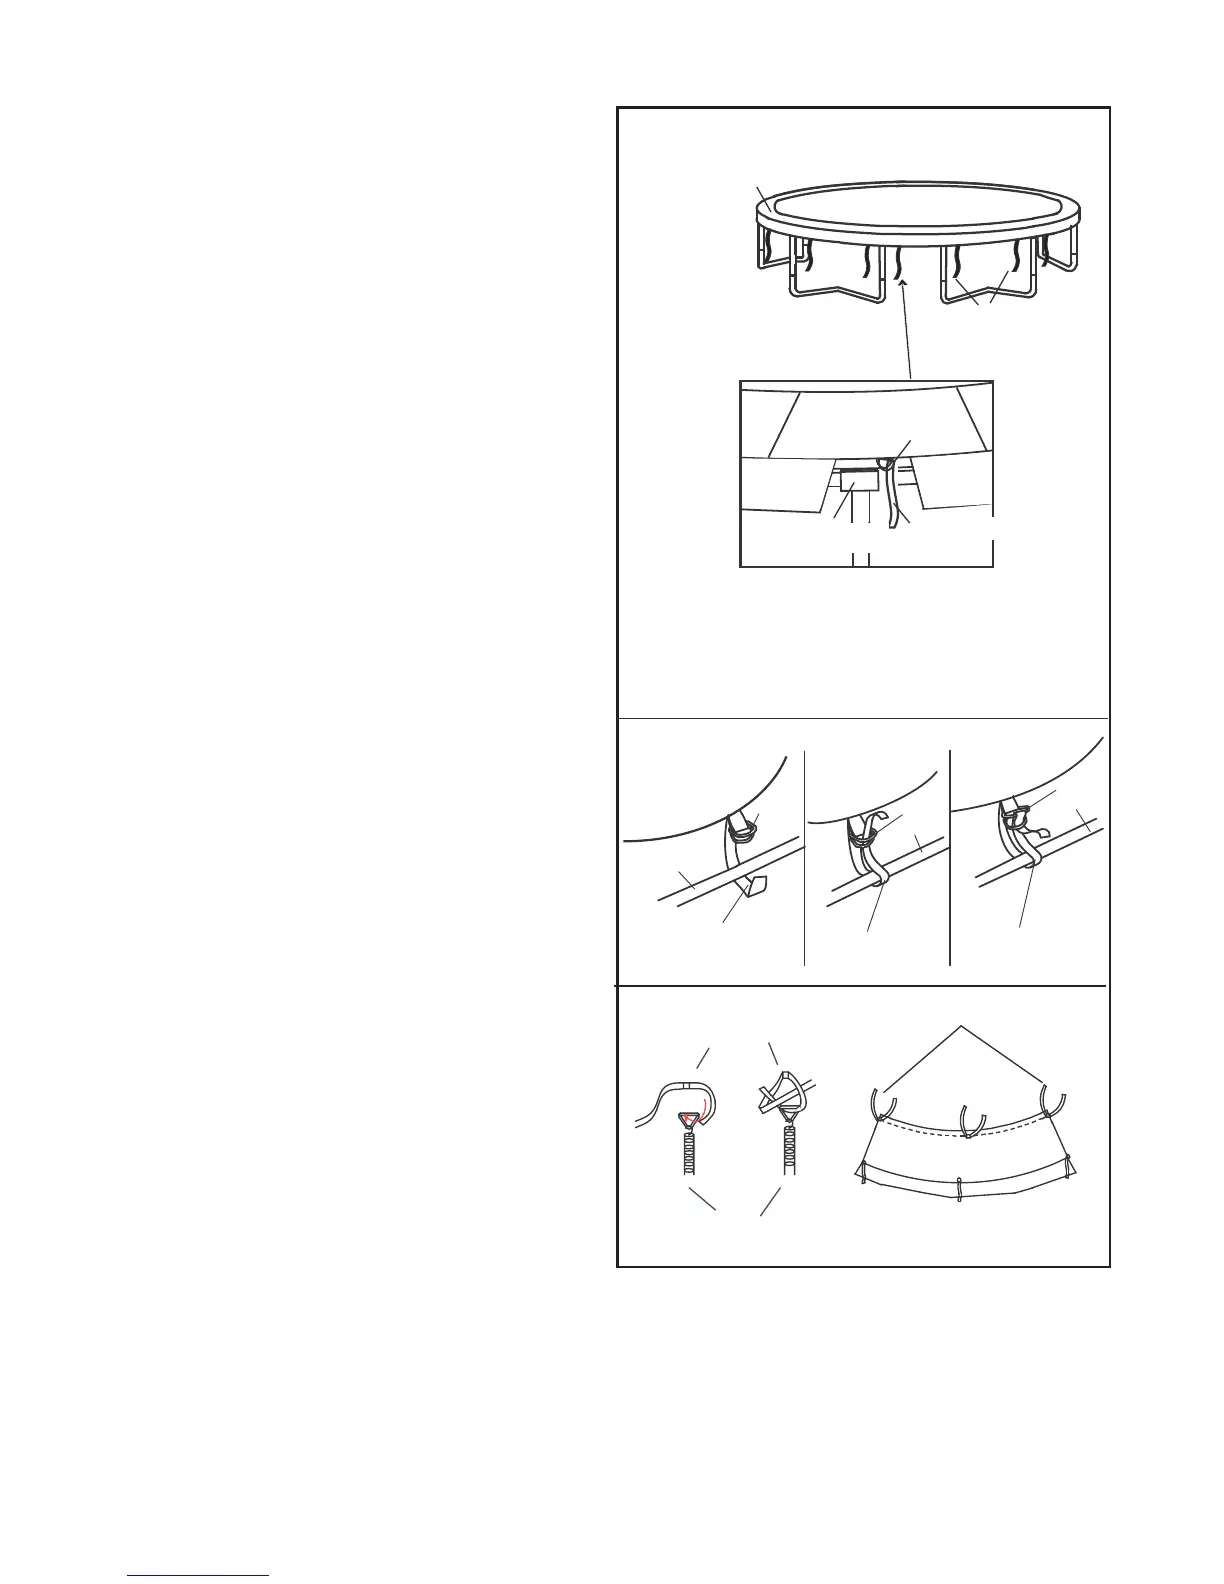
4. Lay the Frame Pad (8) on the frame.
Do not use the trampoline without the
Frame Pad (8), which is designed to reduce the
likelihood of injury to the user from coming in con-
tact with the trampoline frame. If you do not
have a Frame Pad, call our Customer Hot Line
toll-free at 1-877-927-8777, Monday-Friday,8 a.m.
-5 p.m. Central Time.(Excluding Holidays)
Properly install the Frame Pad before using the
trampoline.
Thread one end of Elastic Tie-Down, then tie a knot
on V-Ring.
Repeat this step with the remaining straps which at
middle position of each pad section (not shown).
Elastic Tie-Down
Spring
V-Ring
V-Ring
5
A
B
C
Frame Pad
Frame Pad
Frame Pad
Top tube
Top tube
Top tube
Webbing
Webbing
Webbing
D-ring
D-ring
D-ring
Look under the trampoline and locate the pairs
of straps near the edge of bed(7) and Double
D-ring and webbing near the frame.
See the inset drawing. A, B and C. Repeat this
step with the remaining straps (not shown).
5.
Elastic Tie-Down
Strap with Double D-ring on the pad edge
Safety pad(8)
D-ring
T-connector
Webbing
Webbing
Double D-ring in the middle of pad should be
fixed exactly close to the right of T connector
on the top rail.
Double D-rings on the middle of pad should be fixed
exactly on the right of each T-connector of frame.
8
 Loading...