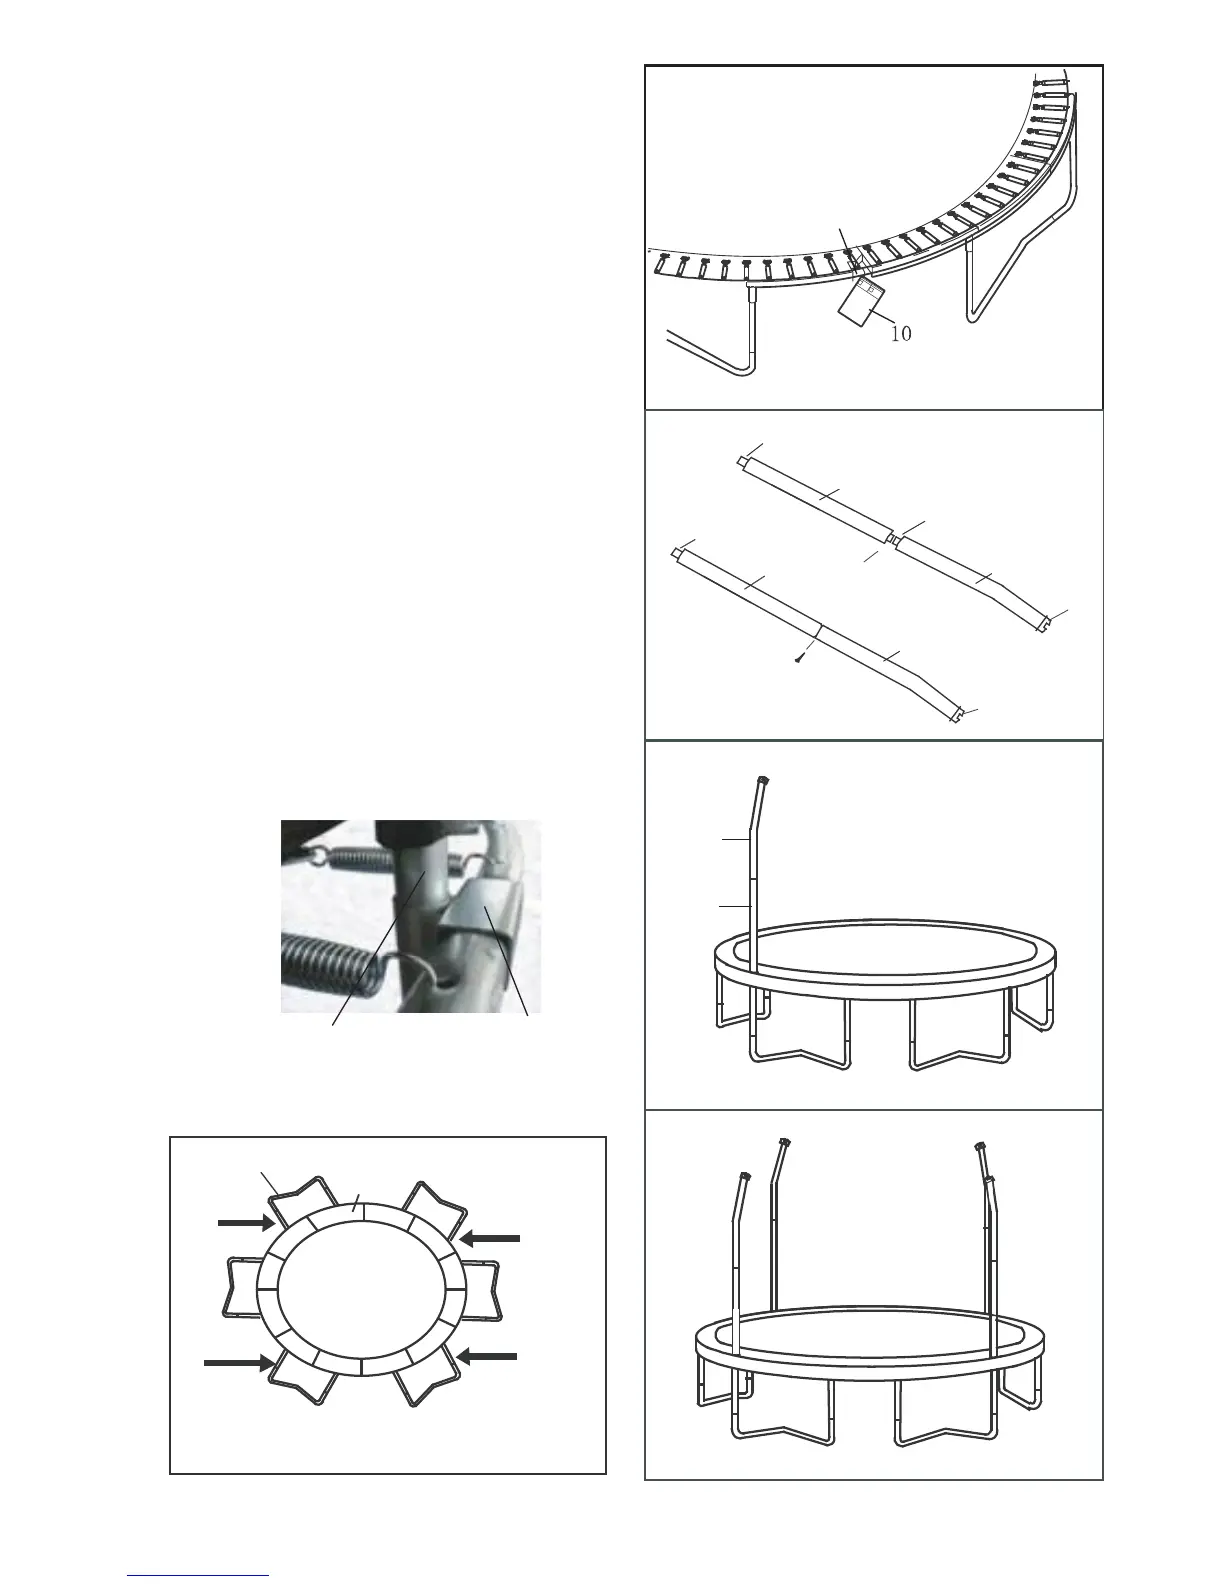
6. Using the included plastic tie, attach the Safety
Placard (10) to the frame near the point where
jumpers will climb onto and off the trampoline.
The trampoline is now fully assembled. Make
sure that all parts are securely attached.
Familiarize yourself and all users of the tram-
poline with the safety precautions, use and
instructional materials, and care and mainte-
nance instructions in this manual before using
the trampoline.
6
Frame
7. Lay a Straight Tube(11) and a Top Tube (12)
with Plastic Cap on the ground.
Make sure that the Straight Tube (11) is oriented
so the small holes are in the position shown.
Slide a Foam Sleeve (17) onto each of the tubes;
note that the ends of the Straight Tube (11) should
not be covered.
Insert the Straight Tube (11) into the Top tube(12).
Tighten a Self-tapping Screw (13) into the small hole
in the Tube (11,12).
Assemble the remaining Straight Tubes (11), Top
Tubes (12), and Foam Sleeves (17) in the same
way.
7
8
Tighten Self-tapping Screw
Into Small Hole
Small Hole
Plastic Cap
(15)
11
12
13
11
18
17
17
17
17
Plastic Cap
(15)
T-connector(4)
Straight tube (11)
8. Insert the end of Straight Pole (11,12) into the hole
of T-connector+Welded tube (4).
Attach the other three Straight Pole (11,12) in the
same way. See inset drawing.
Attach the Poles(11,12) as above arrow drawing
shown.
Leg
7
8
11
12
 Loading...