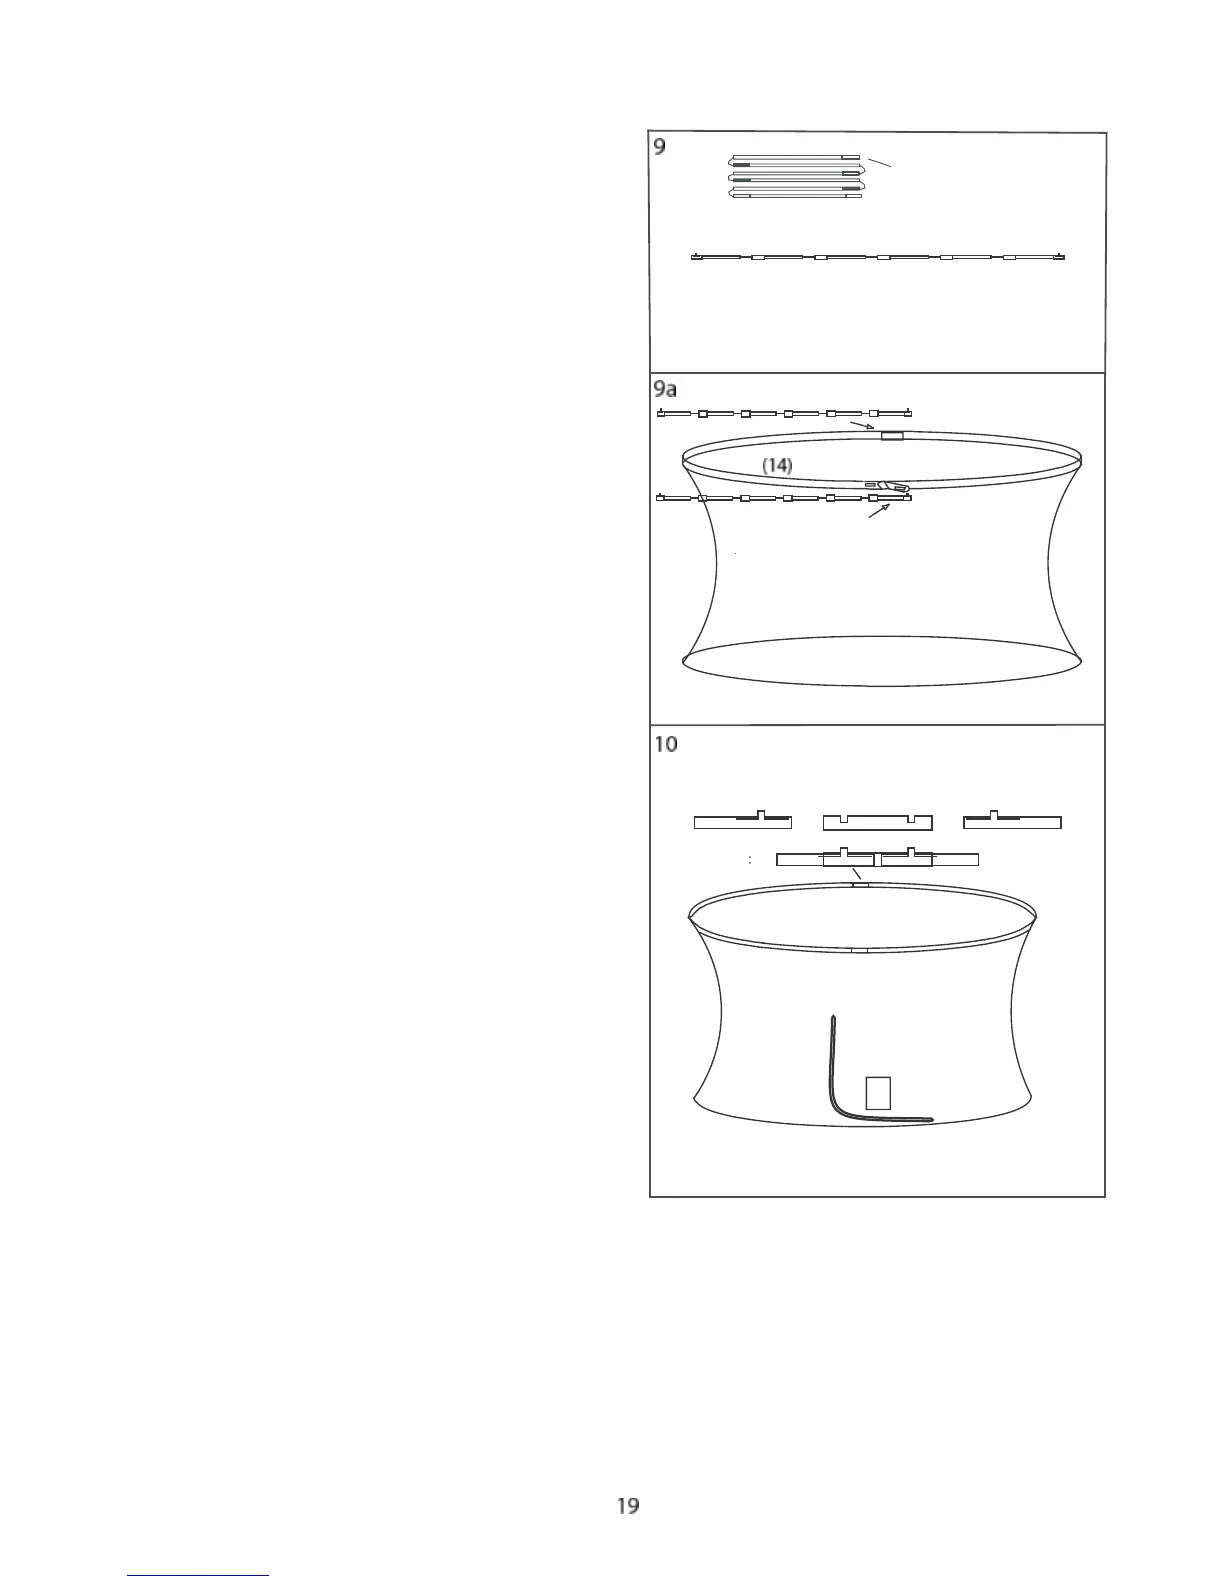
9. Lay out Top G3 Pole (14), joint each section
Connector to a straight line as shown.
Assemble the remaining Top G3 Pole (14) in the
same way.
Spread the Netting (16) on the trampoline bed,
insert a Top G3 Pole (14) into the opening of
Top Sleeve on the Netting (16). Insert the
other Top G3 Pole (14) into the opposite
opening of Top Sleeve on the Netting (16).
Insert the pole into sleeve of the Netting(16)
Netting(16)
Opening
Joint the end of each pole by Clip of Connector
Start:
Finish
Door of Netting
Top Sleeve
10. Joint each end of Top G3 Pole (14) by the clip of
connector at each opening. The Top Sleeve of the
Netting (16) become a round shape.
6 Sections Per Line
Top G3 Pole (14)
Spread out G3 Pole and Joint each section
to one straight line.
 Loading...