2 HYGHSPIN, release 01.2015
Undo clamping nuts (item 18) by turning counter-clockwise
Remove bottom stud bolts (item 9)
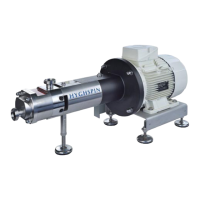
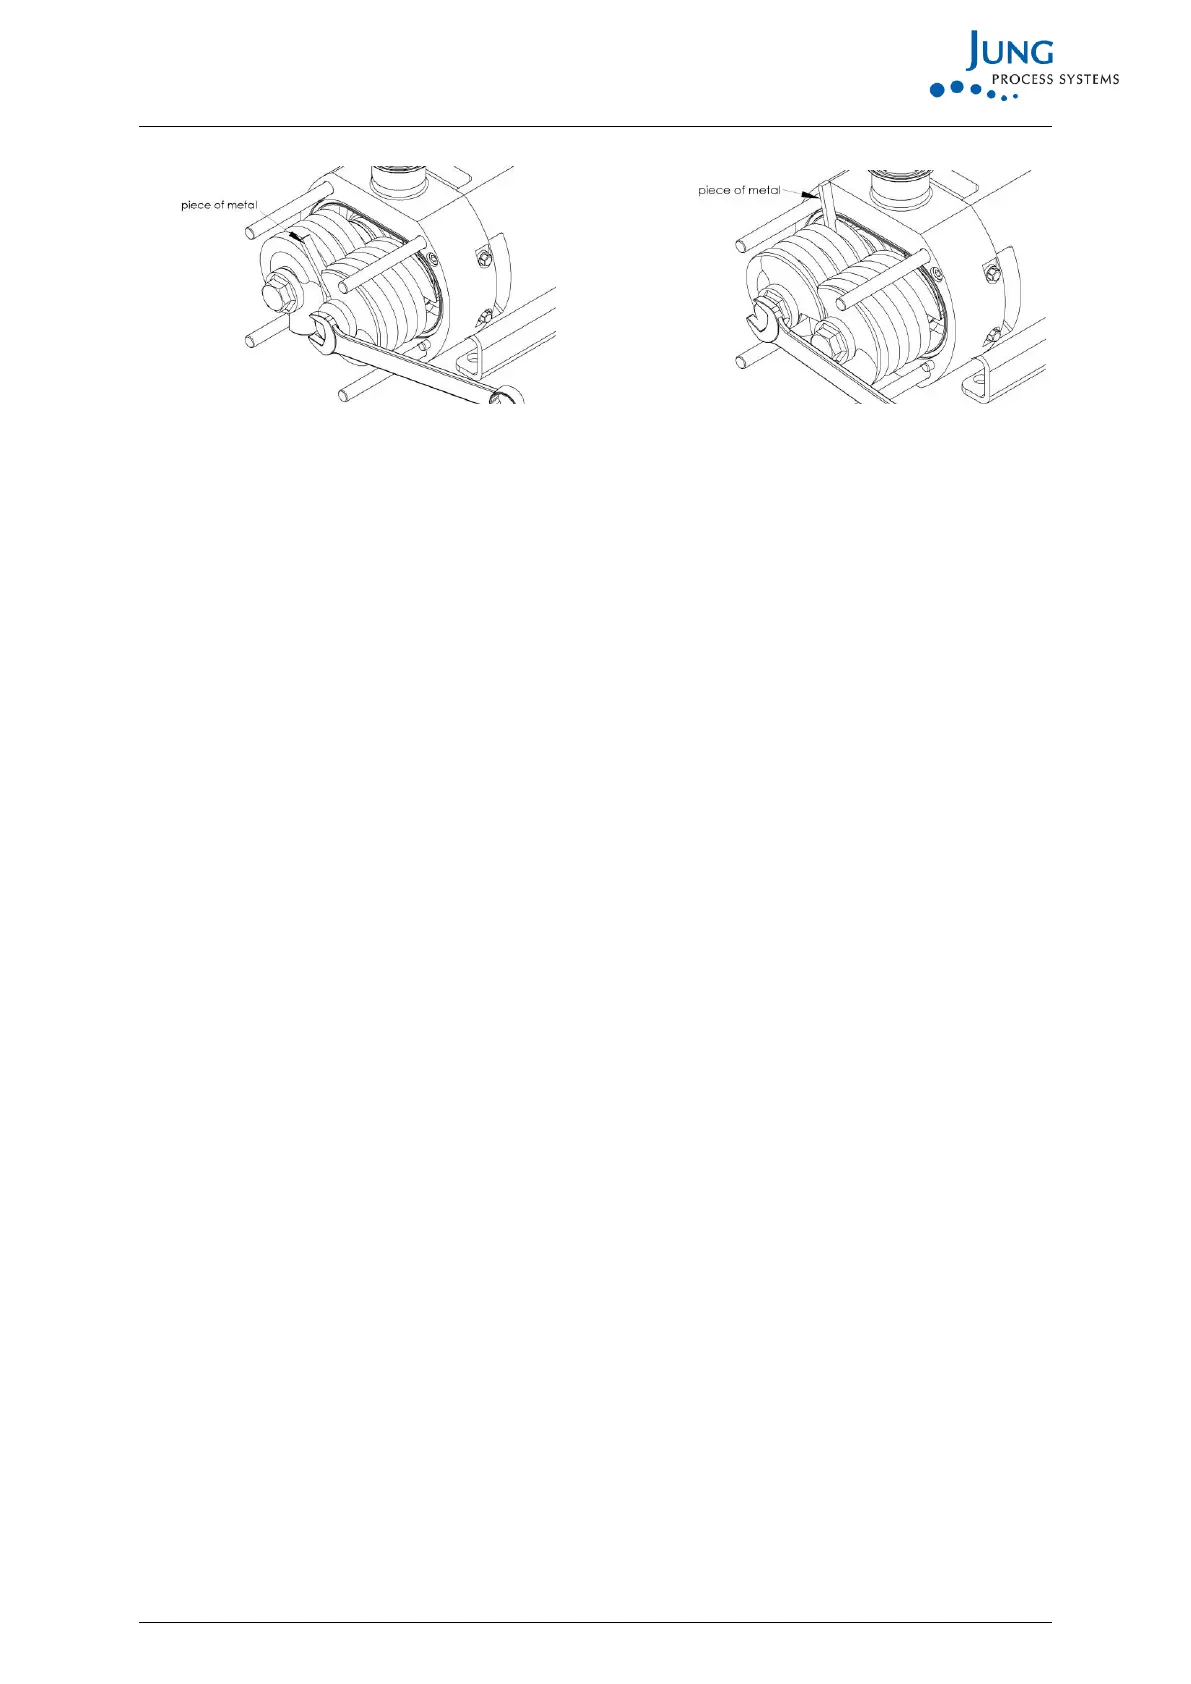
Mark teeth position of feed screw towards shaft
Remove pair of feed screws (item 6)
Remove rotating units of the mechanical seals
Remove cylindrical screws(item 102)
Remove intermediate flange (item 3)
Remove top stud bolts (item 9)
In the case of double-acting mechanical seals (item 104), remove rotating seal rings from the shafts
Remove cylindrical screws for mechanical seals at the intermediate flange (item 3)
Remove mechanical seals (item 104) from the intermediate flange (item 3). If necessary, use
set/jacking screws
4 Assembling the feed screws and mechanical seals
For tightening torques, see table.
Check sliding surfaces of the mechanical seals for score marks and cracks
Insert mechanical seals (item 104) in the intermediate flange (item 3)
Screw mechanical seals to intermediate flange (item 3) with cylindrical screws
In the case of double-acting mechanical seals (item 104), mount rotating seal rings on the shafts
Screw in 2 stud bolts (item 9) for guidance of the intermediate flange (do not insert completely)
Fit casing form ring (item 103)
Mount intermediate flange (item 3)