Table 1: Equipment Required for Services Router Installation
Management AccessAll Other ModelsJ2300 Model OnlyAll Models
For CLI access:
■
Management device,
such as a PC or laptop,
with a serial port (not
provided)
■
RJ-45 console (Ethernet
“rollover”) cable, with
an RJ-45-to-DB-9
adapter (both provided)
For J-Web access:
■
Management device,
such as a PC or laptop,
with an Ethernet port
(not provided)
■
Ethernet cable (not
provided)
■
For rack installation,
mounting screws
appropriate for your rack
(not provided).
■
Routers with redundant
power supplies require
an AC power cord
(provided) or DC power
cables (not provided) for
each power supply.
■
Mounting brackets are
preinstalled on J2320
and J2350 models, and
must be installed on
J4350 and J6350 models.
■
For desk installation,
four rubber feet
(provided)
■
For rack installation,
four mounting
screws appropriate
for your rack (not
provided)
■
For wall installation,
four wall screws or
anchors capable of
supporting the full
weight of the chassis,
up to 12 lb (5.4 kg)
■
Electrostatic discharge (ESD)
grounding strap (not
provided)
■
For rack or wall installation,
a screwdriver appropriate
for the screws or anchors
(not provided)
■
For AC power, an AC power
cord with a plug appropriate
for your geographical
location (provided)
■
For DC power, 14 AWG DC
power cables with
appropriate lugs (not
provided)
■
For grounding, 14 AWG
grounding cable and lug for
the router (not provided)
CAUTION: A licensed electrician must attach a cable lug to the grounding and power
cables that you supply. A cable with an incorrectly attached lug can damage the
router.
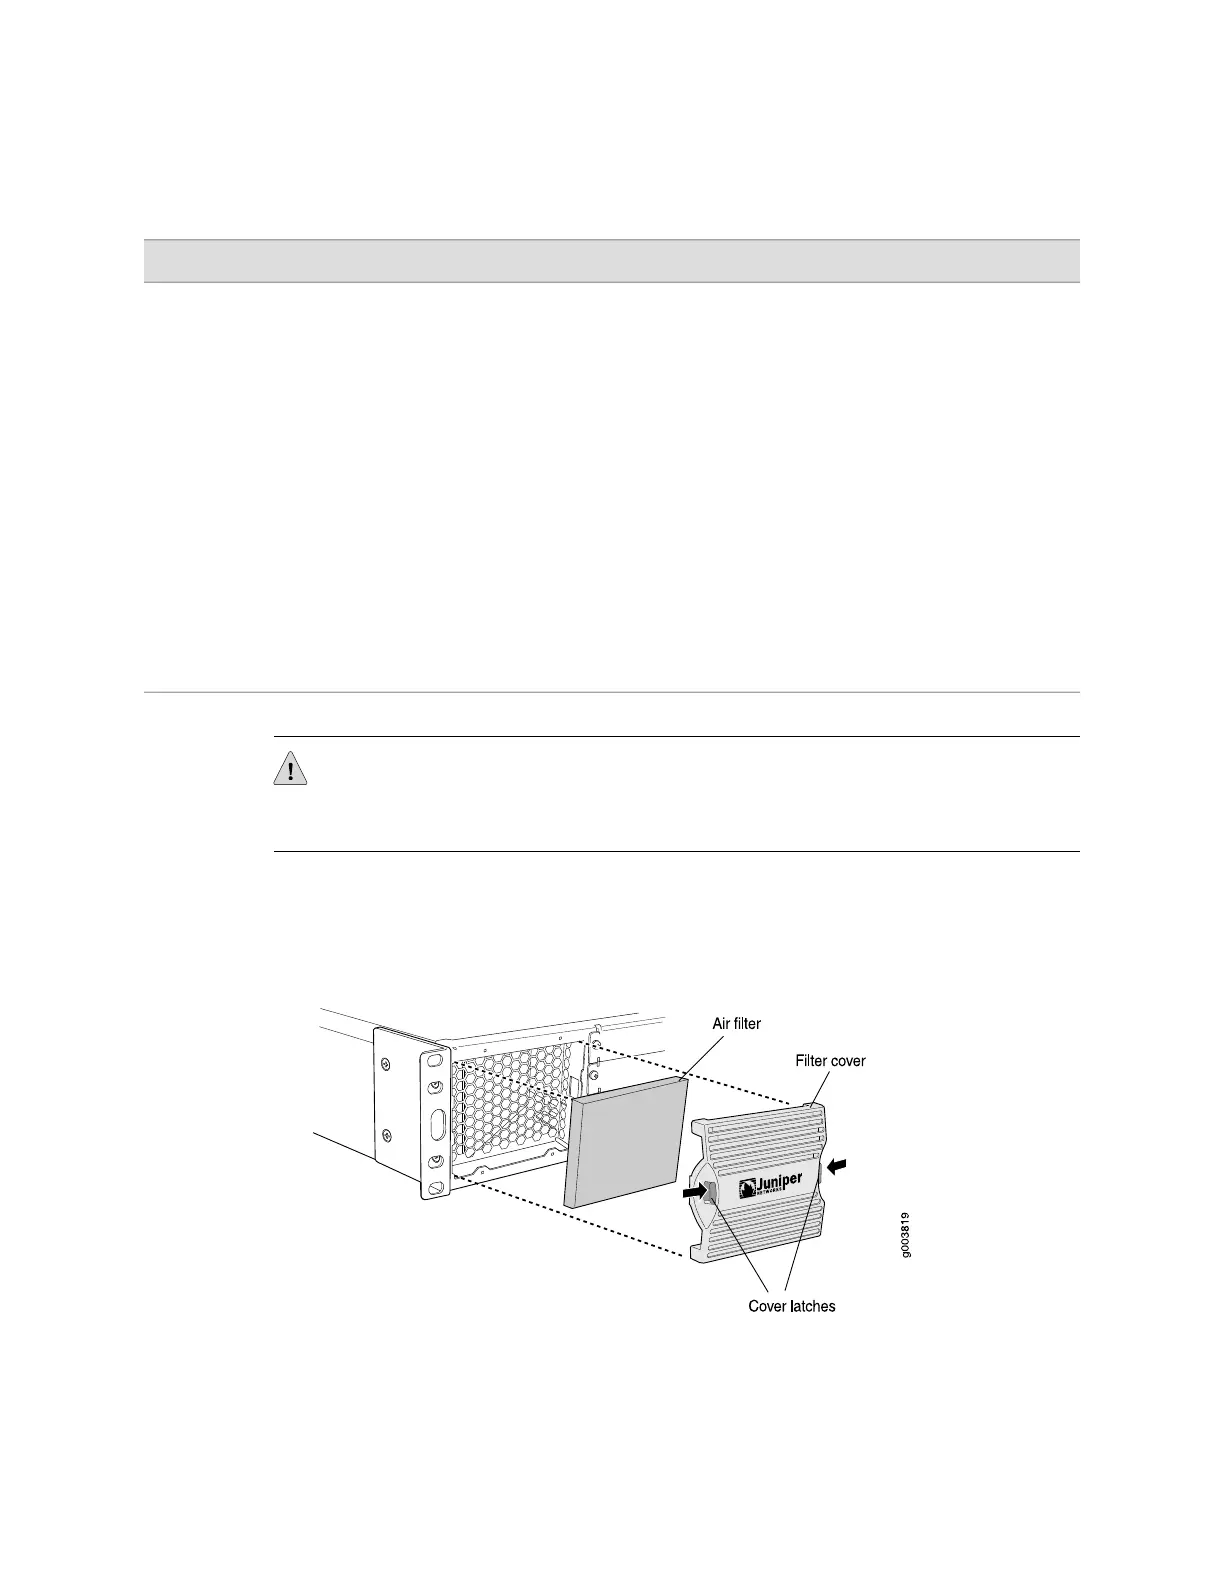
If you are installing a J4350 or J6350 Services Router, take the following steps:
1. Attach the air filter and filter cover, as shown in Figure 1 on page 5.
Figure 1: Attaching Air Filter and Filter Cover
2. Attach the mounting brackets to either the center or front of the chassis, as
shown in Figure 2 on page 6.
Before You Begin ■ 5
Before You Begin

 Loading...