JUTASolarChargeController Model:CM5024Z
- - - - - - - - - - - - - - - - - - - - - - - - - - - - - - - - - - - - - - - - - - - - - - - - - - - - - - - - - - - - - - - - - - - - - - - - - - - - - - - - - - - - - - - - - - - - - - - - - - - - - - - - - - - - - - - - - - - - - - - - - - - - - - - - - - - - - - - - - - - -
- - - - - - - - - - - - - - - - - - - - - - - - - - - - - - - - - - - - - - - - - - - - - - - - - - - - - - - - - - - - - - - - - - - - - - - - - - - - - - - - - - - - - - - - - - - - - - - - - - - - - - - - - - - - - - - - - - - - - - - - - - - - - - - - - - - - - - - - - - - - - - - - - - - - - - - - - - - - - - - - - - - - - - - - - - - - - - - - - - - - - - - - - - - - - - - - - - - - - -
2、Install the controller into a fixed vertical plane. See section 5 of the pore size
and pore spacing. In order to ensure a good thermal control conditions, please
set aside each 10cm below the controller space.
3、Put into the external temperature sensor on the left of the controller (probe
port). The temperature sensor should be similar space with battery. (Otherwise,
the controller will control the parameters of all wrong temperature
compensation.)
4、If you have remote monitoring and control function, please insert one end of
the included communication wire on the right of the controller (communication
port), the other end to connect to The host computer.
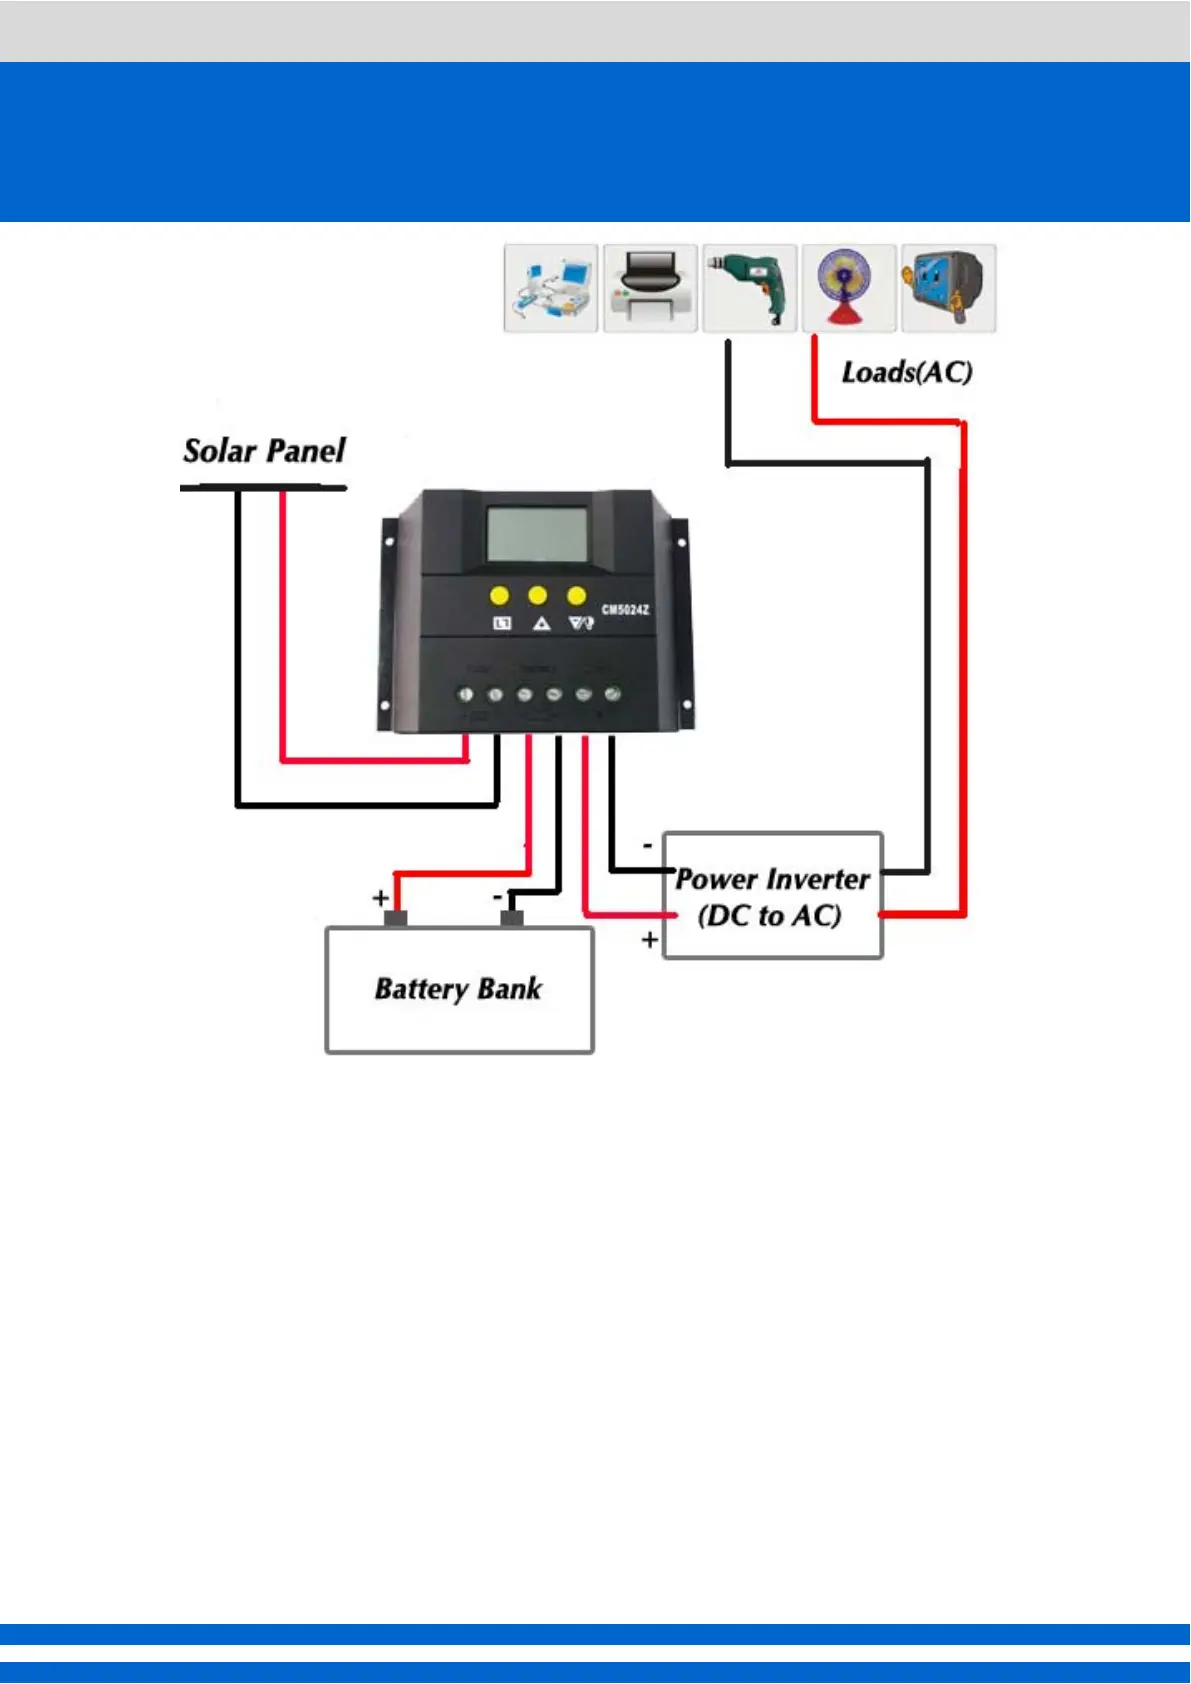
Demolition:To prevent accidents, please order the demolition of solar panels,
battery and load disconnect with controller.
 Loading...